Even with our best efforts, photographs of paintings and other 2D artwork don’t always come out looking like the real thing. Luckily, using GIMP, we can salvage these less than perfect images by adjusting color, angles, and more.
NOTE: If you haven’t yet installed GIMP (a free photo imaging software) you should probably do so now. Learn how to download GIMP for a Mac or for a PC.
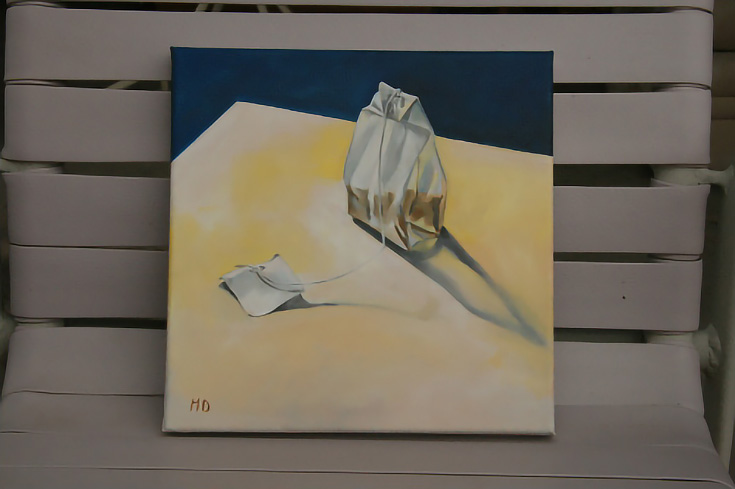
For this tutorial I will be fixing a photo of a painting I put on eBay. As you can see, the original photo is rather gray, there’s an unwanted background behind the painting, and the artwork doesn’t appear to be perfectly square.
I always recommend using the “Save As” command before starting to adjust an image in order to preserve the original. The keyboard shortcut for “Save As” is Ctrl+Shift+S (and remember, even Mac users will use Ctrl instead of Apple’s Command key).
The first thing you’ll want to do when color correcting your art is to eliminate all unwanted background elements. (In this case, it’s a lawn chair.)
After all, there’s really no reason to correct the color on anything other than the artwork itself.
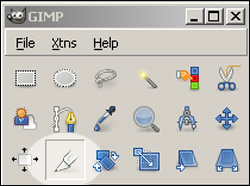
Choose the crop tool from the tool box and let’s get to work. . .
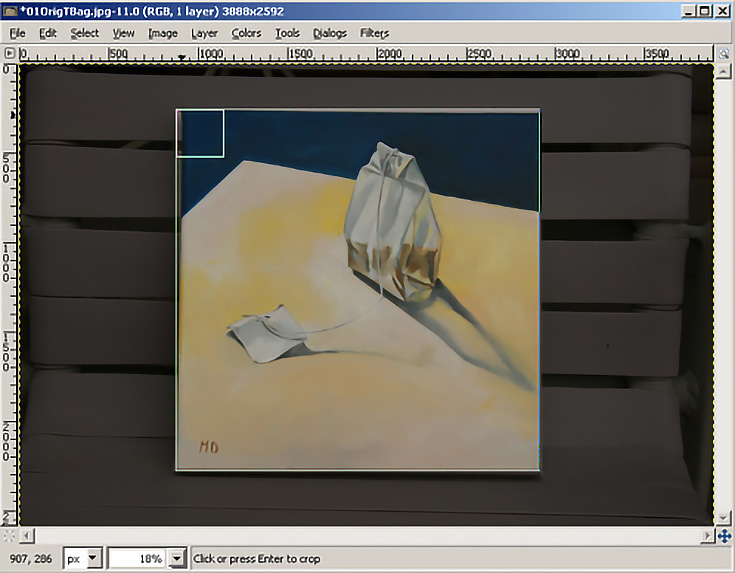
Hover your mouse over your image, then click, hold, and drag out a box around the area you’d like to keep. After releasing your mouse button, feel free to adjust the boundary lines using the box’s corner squares.
When you’re satisfied, hit Enter (or Return) to apply the crop you’ve chosen. If you’re not happy, you can always undo your last action by pressing Ctrl+Z and trying again.
I could have cropped closer in and removed part of the painting to make the image a perfect square, but instead I chose to be as accurate as possible and UN-skew the image using the perspective tool.
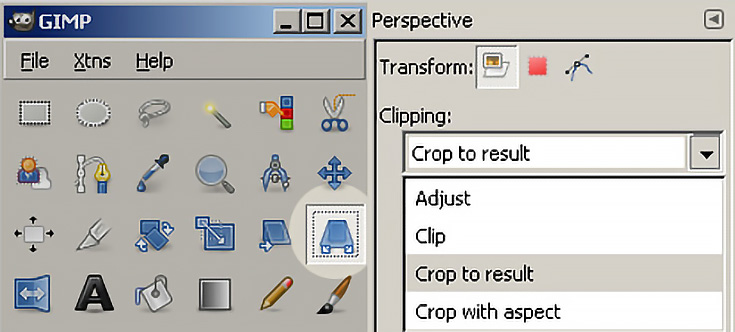
To unskew your own painting, select the perspective tool and make sure to highlight “Crop to Result” in the options window below the toolbox.
Then simply grab the corners of your image, line up the edges of your artwork with the dashed lines, and click the “Transform” button to apply.
In the picture below, I’d want to bring in that top-left corner before hitting “Transform.”
Finally, my photo is ready to be “de-grayed” (AKA, color-corrected). Click on “Color” in the Menu bar of your image and then choose “Levels.”
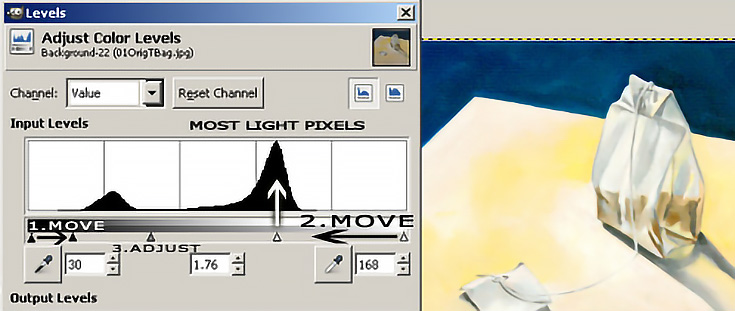
The graph below displays the number of pixels in your with dark to light values. Ideally, this graph would show a fairly even amount of dark pixels and light pixels—or at least have no extra whitespace on the left and right.
To change the darkness or lightness of your image, move the little black triangle to the edge of the closest “hill,” then move the little white triangle to the the edge of its closest hill. Finish off by adjusting the little gray triangle in the middle.
You will have to experiment and use your artistic judgment to determine when the image on your computer is most similar to the artwork in real life. (Having the painting handy to compare will help.)
Hit the OK button when you are satisfied with the image.
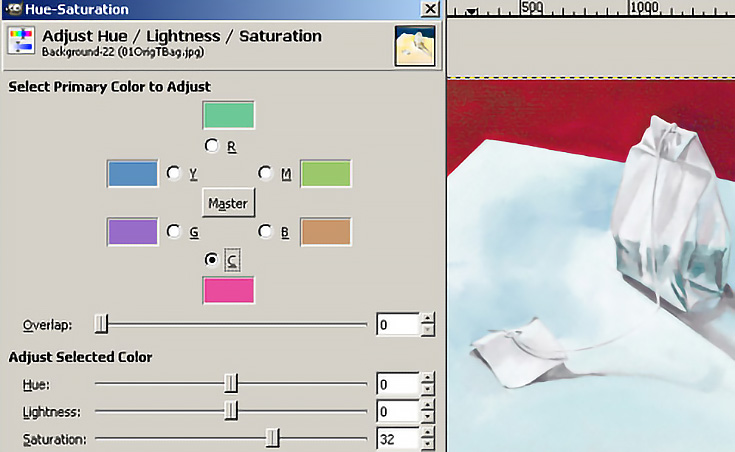
If you need to adjust the color saturation or brightness of your image, or simply want to see what it would look like in a different color, click on “Color” in the menu bar and then choose “Hue-Saturation.”
This tool is pretty easy to use—just adjust the sliders and watch the results.
To change just ONE primary color, select its button and play with the sliders for just that color. As you can see from my image, I went to the extremes. . . but when used subtly, this is a great tool for fine-tuning your images.
Have fun color-correcting, and come back next week for another GIMP tutorial!
This post may contain affiliate links.
