The artistic process can be a delicate one, and your surroundings play a vital role.
Although everybody approaches their work differently, there are a few key elements every home art studio should have to encourage productivity and help keep your creativity flowing.
The ultimate home art studio should combine inspiration, organization, and functionality. Depending on your artistic medium (and how much room you have to spare!) this may pose a challenge.
However, with a little ingenuity, time, and out-of-the-box thinking, you can have your very own space to create.
Here are 4 tips for creating a great studio space at home:
1. Work with the space you have
Whether you have an extra bedroom or decide to simply repurpose a corner of your one-room apartment, the first step is to designate a spot for your studio. Everyone’s workspace will look a little different, and where you decide to work will largely depend on where you live. As you consider how much room you can spare, these craft room ideas may help get you started:
Transform unused rooms
If you have the space, a spare bedroom is a great option for your home art studio. If the room still needs to double as a guest room, you may want to install some craft storage cabinets. These will help keep your supplies as tidy as possible when you have overnight visitors. A seldom used dining room will also convert into a cozy art room with ease.
Repurpose outbuildings
Maybe you don’t have room in the house, but you have a shed or workshop in the backyard. These can serve as wonderful workspaces since they offer privacy and the freedom to get a little messy.
However, if the building is empty or used for storage, you may have to do a fair bit of cleaning. Plus, you’ll need to consider heating and cooling for less temperate climates.
Take over the basement
Though easily overlooked, the cellar can be the ideal spot to set up shop. Cement floors, proper drainage, and an open floor plan offer plenty of potential. If you choose this option, you’ll need to consider lighting. Standard fluorescent lights won’t be adequate, so you’ll need to install proper fixtures for your workspace.
Create a craft nook
When you have very little space to spare, it’s time to get creative. Add a small desk and shelves to your extra closet for a mini-studio that conveniently closes up between uses. Alternatively, claim a corner of the living room or your bedroom as a dedicated work area. Even if supplies or works in progress are out in the open, they can double as fun, artsy decor.
Take the show outside
As an alternative to a fixed studio, you may want to explore the world of plein air painting. Developing a mobile art kit that you can take anywhere may be the ideal option for those who don’t have the space or the inclination to work in one place. In fact, a study by Washington State University professor Janetta Mitchell McCoy, Ph.D., showed that spending time in nature boosts creativity.
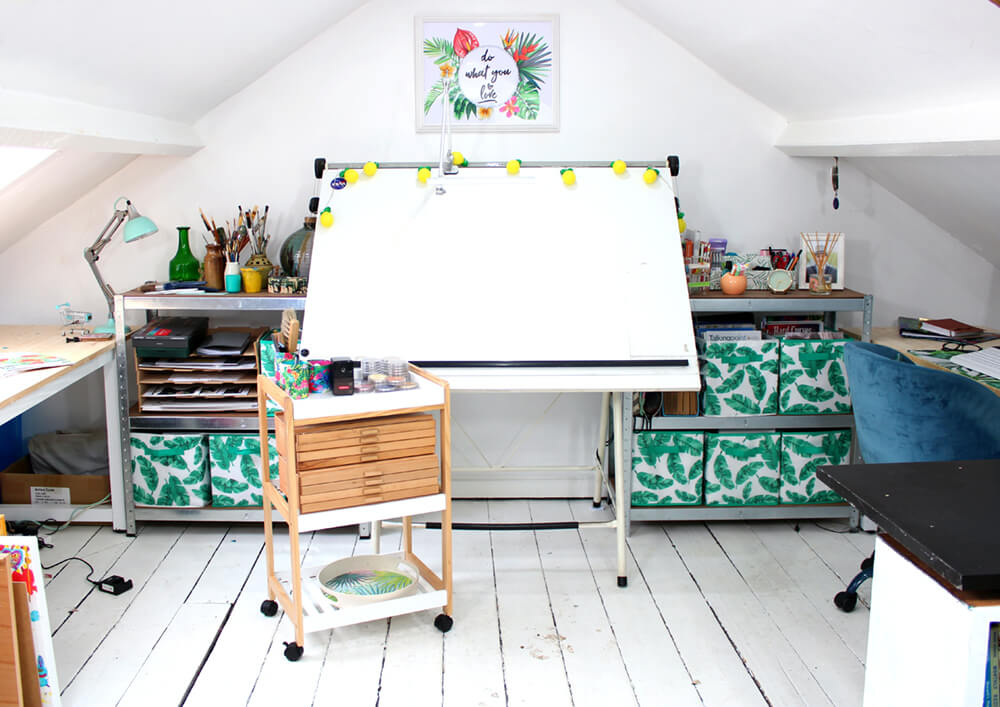
2. Organization will set you free
While clutter and messiness are common side effects of creating art, staying organized is still important. When you don’t have much room to work with, vertical space is your friend. A DIY storage wall allows you to keep all of your tools accessible and easy to see. Wall-mounted shelves, hanging baskets, and pegboards also make versatile storage options.
Craft storage cabinets offer another simple option. With plenty of drawers and shelves, you can stow your paints, canvases, brushes, and other tools neatly and avoid wasting time digging in search of specific supplies. Rolling carts with deep bins are an ideal choice if you tend to move around a lot while working.
Be sure to have a spot to keep works in progress and completed projects. Sling bookcases work well for 2D pieces, while open cubbies are a better option for 3D artwork, such as pottery and sculpture.
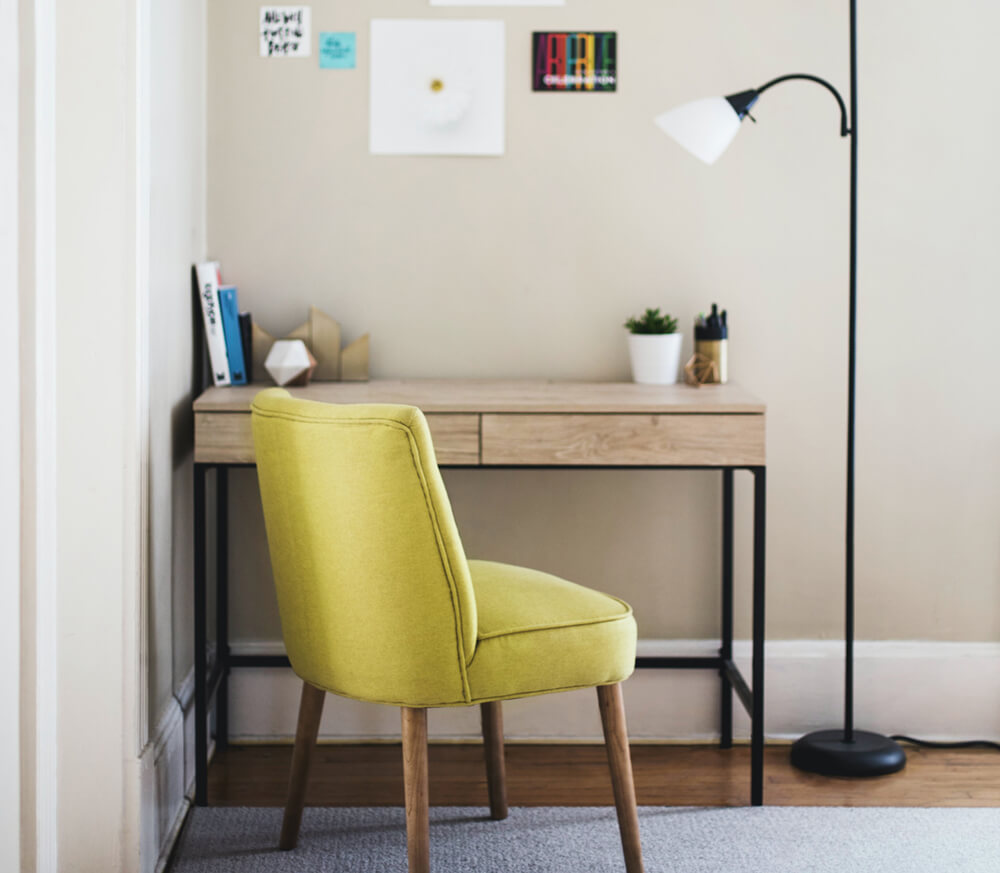
3. Form and function
Once you have a location and plan for organizing, it’s time to start choosing furniture. Think about which media you use and how you need the space to function. Here are some examples of benefits certain pieces can have in your layout:
- Spacious craft desks and drafting tables allow you to spread out while working.
- A supportive chair will make it much easier to work for hours when you’re on a roll.
- If your art studio is also your business space, consider some comfy and practical home office furniture.
- If an easel is essential, choose a model that can hold your largest projects (or is adjustable)
- If you prefer to sit back and reflect before diving in, a cozy armchair may be a wise addition.
And whatever furniture you choose, make sure to pick pieces that you don’t mind getting messy!
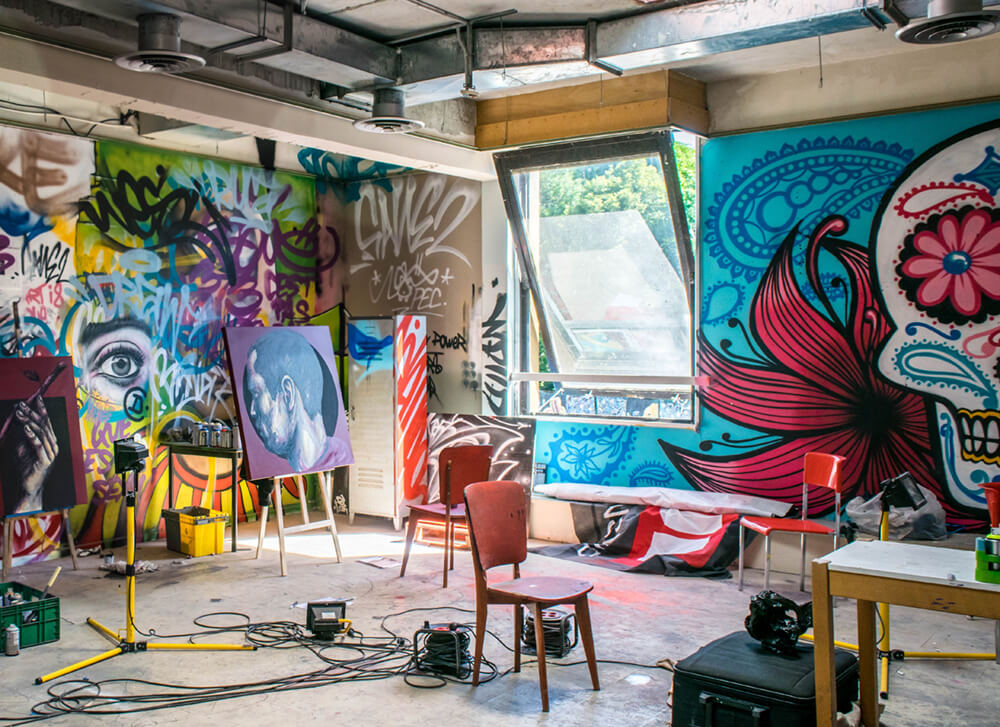
4. Surround yourself with inspiration
The core purpose of any home art studio is to have a workspace where you feel inspired. Once all the essentials are in place, take a few moments to enjoy personalizing your space. Hang finished projects as a reminder of what you are capable of, or put up works from artists who you admire.
Change encourages creativity, whether the differences are big or small. Refresh your environment and perspective periodically by rearranging furniture, swapping out decor, or switching up the wall color. If you have the flexibility, create a few small home art studios, and rotate between them whenever you need a new setting.
Creativity is everywhere
Everybody has their own preferences on how they want their workspace to be. The beauty of designing a home studio is that you can make it uniquely yours. Once you have key components like space, storage, and furniture, the room (or shed, or attic, or closet) is another blank canvas just waiting for you to put your signature on it.
Special thanks to Hazel Bennett for sharing this post! To read more from Hazel, follow her @hazelblogger.
This post may contain affiliate links.