When I bought my Wacom Graphire a few months ago it came with Corel Painter Essentials. Since I had Photoshop already, I didn’t even bother installing Painter at first—I figured that anything Corel Painter could offer me I could already do in Photoshop.
Well, this week I actually took a look at Corel Painter to see if I was right. I’m not going to extensively compare and contrast Painter with Photoshop in this article, but I WILL point out some of what you’ll get with Painter if you’re a traditional artist interested in going digital.
Keep in mind throughout that this is only Corel Painter Essentials, and it came free with my Wacom drawing tablet. There are better versions available that are just called Corel Painter—but since this version was free, I’m definitely not complaining.
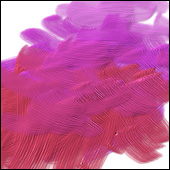 The first thing I noticed after briefly “painting” some color onto a new “canvas” was that the paint actually looked a little three-dimensional. There are several options of different brush types, and since I started off using the thick acrylic flat brush, the paint did actually pile up a little bit over time.
You can turn that off with a click, though, if you don’t like it.
But I didn’t mind. It was kind of cool. What did bother me was the inability to rotate the brush. Some of the brushes were permanently angled or flat and there was no way to change that. The only option available is to rotate the entire canvas.
It was sort of weird, but after I found the shortcut for that—alt and space at the same time—it got a little bit easier to rotate the canvas without pausing much between strokes. I still didn’t end up liking that feature, but I tolerated it.
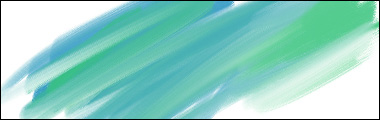
What I did like was the amount of blending you could do with a lot of the brushes. Specifically, when using the smeary round or smeary flat oil brush any color you used would pick up some of the color where you started your stroke.
The harder I pressed on my Wacom tablet, the less of the other color it picked up, which allowed me to control the blending.
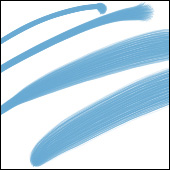 There were also opaque flat and opaque round oil brushes for when I didn’t want to blend, and a fine camel brush which allowed the pressure sensitivity of my Wacom Pen to control the diameter of the stroke I made. All that is just oil and acrylic brushes so far.
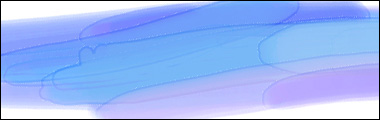
So you know, I’m not a watercolor painter, but with Corel Painter I’m pretty sure I could become a digital watercolorist.
I liked both the broad water brush (seen below) and the flat water blender. To my (non-watercolor trained) eye at least, Corel’s watercolor strokes were pretty convincing.
There’s also a salt brush which wasn’t really a brush at all of course, but which sprinkled “salt” on top of the color and made a nice traditional textural effect.
I’m won’t cover all the brushes in this article; the ones I mentioned just stood out to me as the most realistic or useful. However, there were also airbrush tools, chalk, palette knives, pastels, pencils and a few others which I’ll have to test out later.
Overall, I’m more impressed than I thought I would be. I can definitely see myself making a sketch in Photoshop with my Graphire Tablet, and then bringing the drawing into Corel Painter and doing a watercolor wash underneath or developing a digital oil painting over the top.
If you’re considering buying a Wacom Tablet I don’t think you’ll be disappointed with what you can do just using Corel Painter Essentials. Check out the tablets at Amazon![]() for pricing—my Wacom was under $100 and it’s been a blast from day one.
for pricing—my Wacom was under $100 and it’s been a blast from day one.
This post may contain affiliate links.