In my last GIMP tutorial I showed you how to make a sepia-tone photo from a color photo. Today we’re going to do something similar—follow along to learn how to digitally color a black and white photo in GIMP.
Step 1. Find a black and white (or grayscale) image
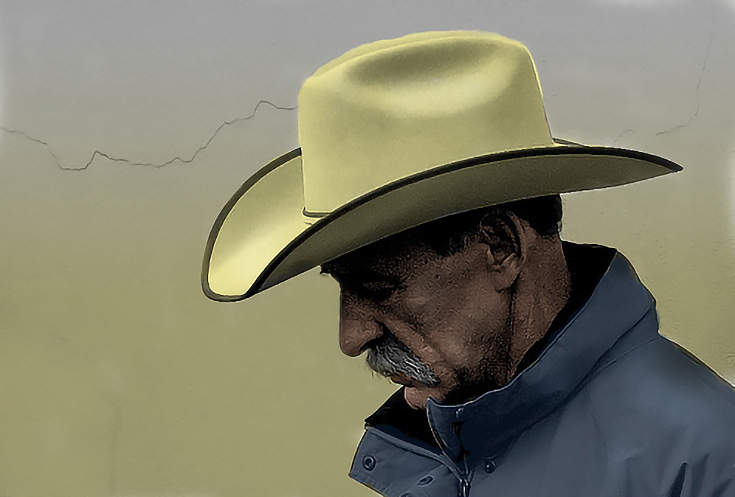
The image I found from the Internet is not copyrighted and is perfect for colorizing since it has large, distinct areas to color. Small sections of an image can be hand-tinted too, it just takes more time and care.
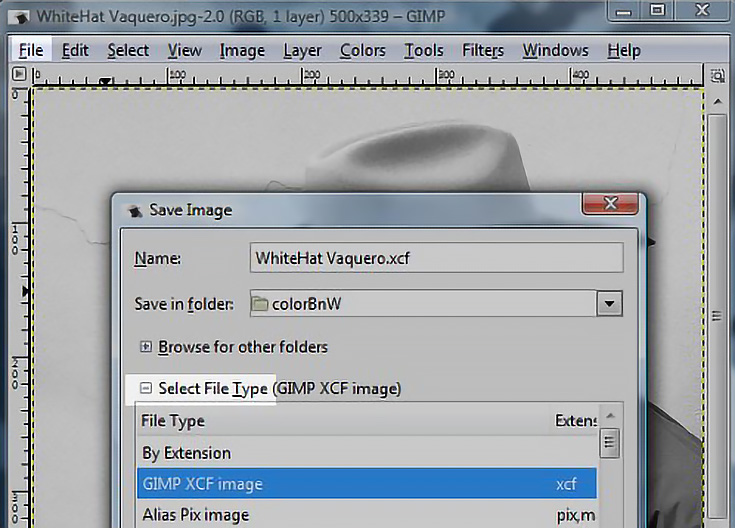
As soon as you open your image in GIMP, save it as a new file (Shift+Ctrl+S) using the .xcf format. This will save the original image in case you need to start over.
If a photo has too much contrast, it may not be suitable for colorizing. Try to find an image with a full range of grays.
Step 2. Create new layers of color for every section
The photo I’m using has 5 distinct areas that I’ll be coloring: the background, the face, the hair, the hat and the jacket. I will need a separate layer for each.
Count up the sections of your own photo that you’d like to color, and create new layers for each one. It’s a good idea to choose the colors you’ll be using for each section of your photo as you create your layers.
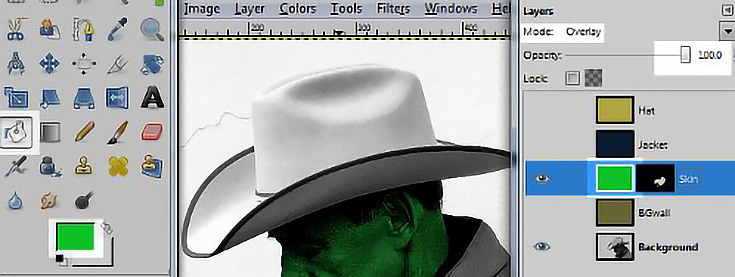
I chose yellow for the cowboy hat, blue for the jacket, and tan for the skin. I also named my layers “Hat,” “Jacket,” and “Skin” to keep things organized.
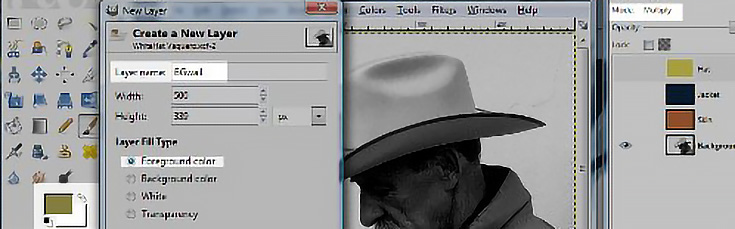
Once you’ve made all the new layers your image requires, change each layer mode to “Multiply.” Pick the layer you’d like to start with and make the rest invisible by clicking on the eyeball next to each layer.
Because your layer mode is set to “Multiply” the photo below should show through.
Step 3. Create layer masks to avoid over-coloring
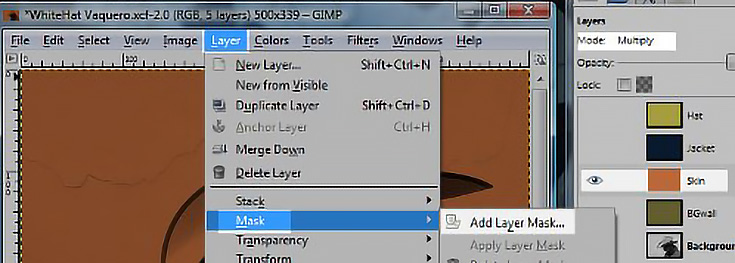
As you can see, the entire photo is colorized at this point—so you’ll need to make this layer affect only the section that you want. To do that, go to “Layer” in your menu bar, click on “Mask,” then choose “Add Layer Mask.”
Layer masks aren’t real layers. Instead, they appear next to an existing layer in the layers palette and tell GIMP which areas of that layer to show.
The colors white and black have special meaning to layer masks. If you fill a layer mask with the color white, the entire layer it’s linked to will be visible. If a layer mask is filled with black, NONE of the layer will be visible.
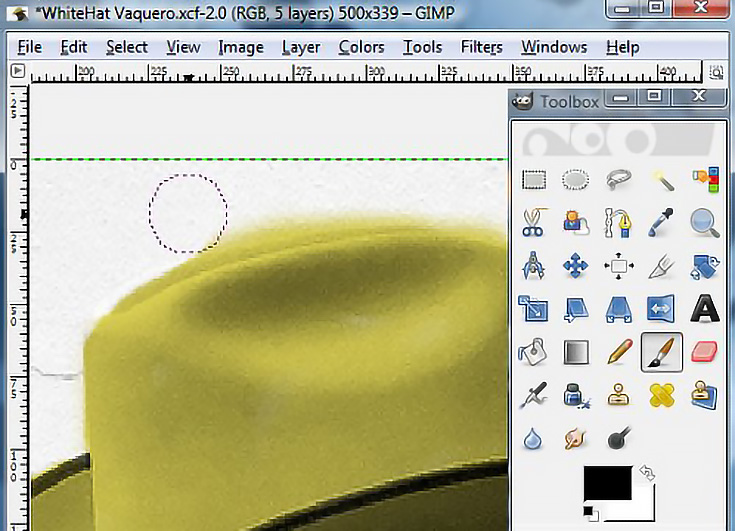
Since I’m starting off with fairly small section in my photo (the face) I filled my entire layer mask with black, then began to paint over the face with white, which slowly revealed the skin color.

If your layer mask isn’t selected, you’ll actually paint the color white on your photo – and you don’t want that! Right click on the layer mask and choose “Edit layer mask” to be sure it’s selected. (See the image above.)
If you paint outside the lines, switch to black and paint the negative space. (Black acts like an erasor in layer masks.)
If you find that the color you’ve chosen is too dark or light, you change the mode to “Screen” or “Overlay” (rather than multiply) or lower the opacity of that layer.
You can also try different colors. To change a layer’s color, make sure you have the layer itself selected (not its layer mask) and use the Paint Bucket to fill in a new color.
If you make a mistake, you can always undo your recent actions by pressing Ctrl+Z.
You can also fine tune the darkness or lightness of a layer by dodging the highlights and burning the shadows. Select the Dodge/Burn tool by pressing Shift+D.
Step 4. Repeat this process for each object in the photo
At this point, you know everything you need to know to colorize an entire photo. Once you finish your first section, create a layer mask for the next layer and repeat step 3.
As you’ll notice, by using a separate layer for each color you have the utmost control over your image. One color may need to be more transparent than the others, or more opaque. Layers let you make that decision.
You can also erase color from one layer without worrying about messing anything else up at the same time.
And as always, don’t forget to experiment!
For example, try coloring just one section of a black and white photo, instead of the whole thing—it’s a great way to come up with a striking image.
NOTE: If you’d rather pay a professional to color your photos (or you’re not interested in learning GIMP) that’s OK too! Head over to ColorAPhoto.com to learn more.
This post may contain affiliate links.