One of the first things that artists might want to do in GIMP is to format images of their artwork for the internet—perhaps for an art blog or an online gallery.
In this tutorial I’ll be showing you how to crop and resize an image in GIMP using a fairly high resolution image from NASA. If you haven’t yet installed GIMP (a free alternative to Photoshop for editing images) you should probably do that first. Click here to learn how to install GIMP on a PC, or here for a Mac.
OK then, let’s get started!
1. Fire up GIMP and open the image you would like to edit. Whether you’re using a Mac or a PC, use the keyboard shortcut “Ctrl-O” to open an image.
2. Since the golden rule of image editing is to maintain the original image (in case you mess up later) the first thing I will do is Save As. This is located in the picture menu bar, not above the toolbox where you might expect it.
Save it as something unique so you can differentiate between this edited image and the original, untouched image.
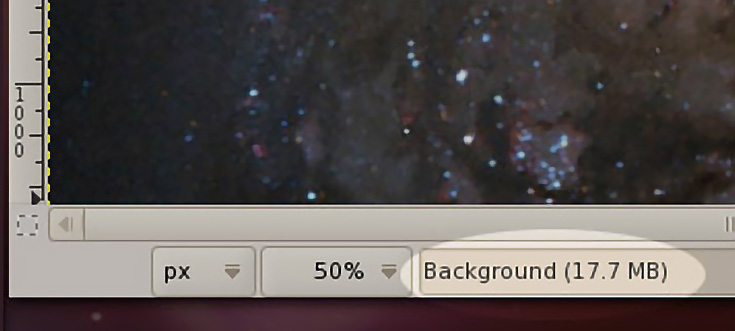
3. Check to see what size your artwork or photograph is to begin with. This information is located at the bottom of your image.
Make sure your cursor is off the image so you can see the size. You can also check how many pixels there are, or adjust your zoom.
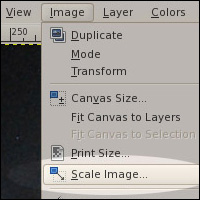
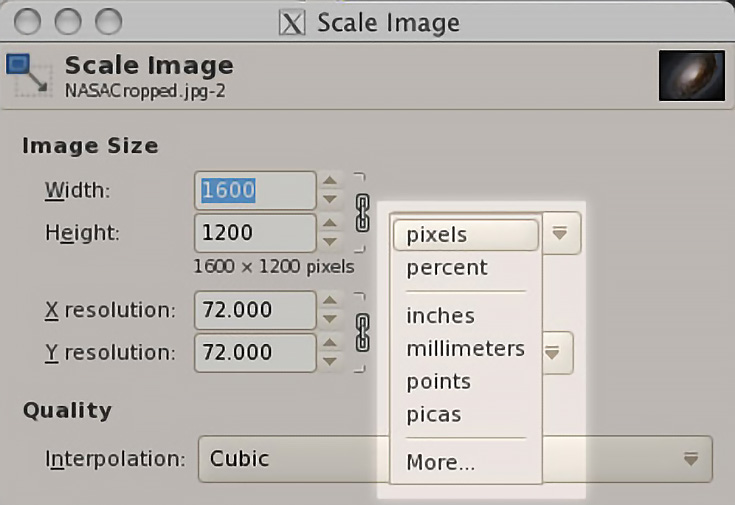
4. A dialog box will open, giving you choices on how to measure the image. If you were editing this image to put in a picture frame, you’d pick inches. For use on the internet, pixels is a much better choice.
Your online gallery may tell you a certain width that they’d like your images to be. Highlight the current pixel width and type in whatever their specifications are.
Be sure to hit Enter (or Return) on your keyboard so that the image’s height value changes as well—the values are linked together automatically.
Then click the scale button at bottom right. If you make a mistake and your image is still too large (or too small) just undo your most recent action by pressing Ctrl-Z on your keyboard.
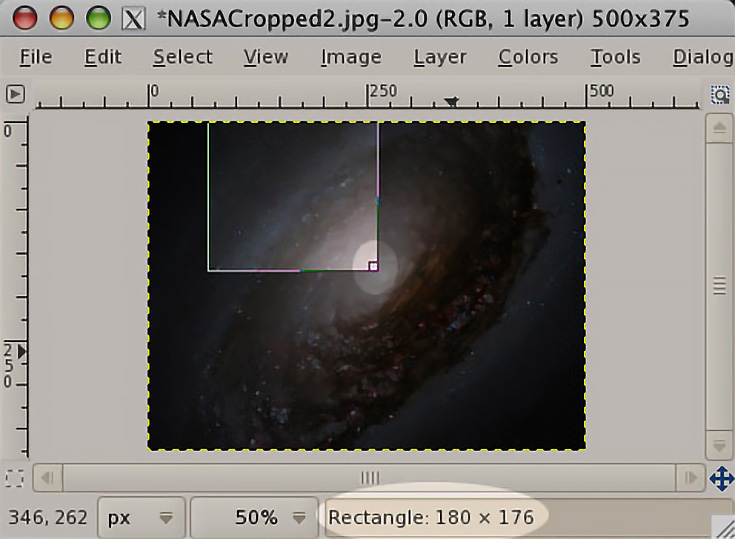
5. You might also need a thumbnail image for a your website—if so, hold down Shift-C or choose the crop tool from the tool box.
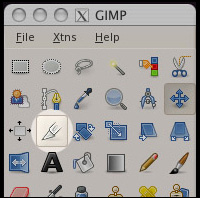
If that one is close, but not perfect, you can grab the edges or corners with your cursor and then click and drag to re-adjust the box.
Watch the information area at the base of the picture as you drag out your crop box.
When you see the dimensions you want, stop dragging and press Enter or Return to make that cropped area permanent.
6. Color and file type are also important considerations when saving for the web.
The web requires that color be defined in RGB (Red Green Blue) while printers prefer CMYK (Cyan Magenta Yellow blacK). Printers often use JPEGs, a file format made for photographers, but we can use JPEGs for the web too.
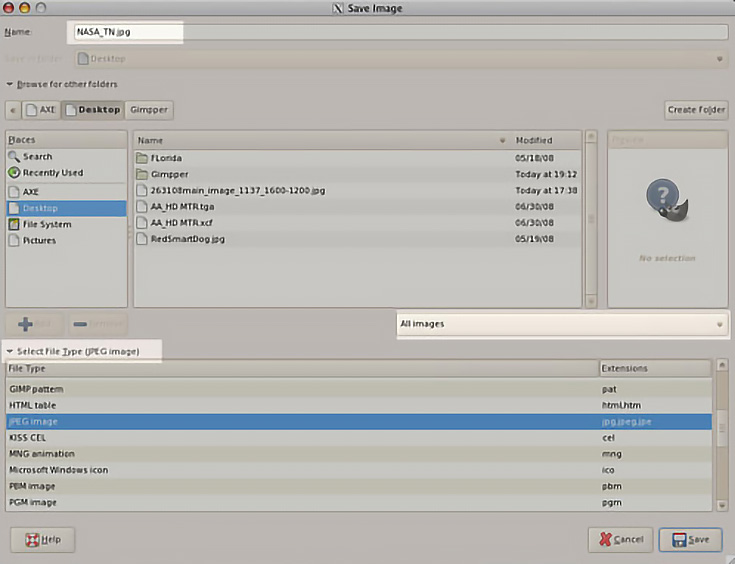
Lets “Save As” again, this time using the keyboard shortcut Shift-Ctrl-S.
Name the file in the top area and then decide on a file format. There are two areas to choose file formats: the one on the left shows the extension (.jpg .gif .tif) while the other, “All Images,” lists the file names.
Hit the “save” button.
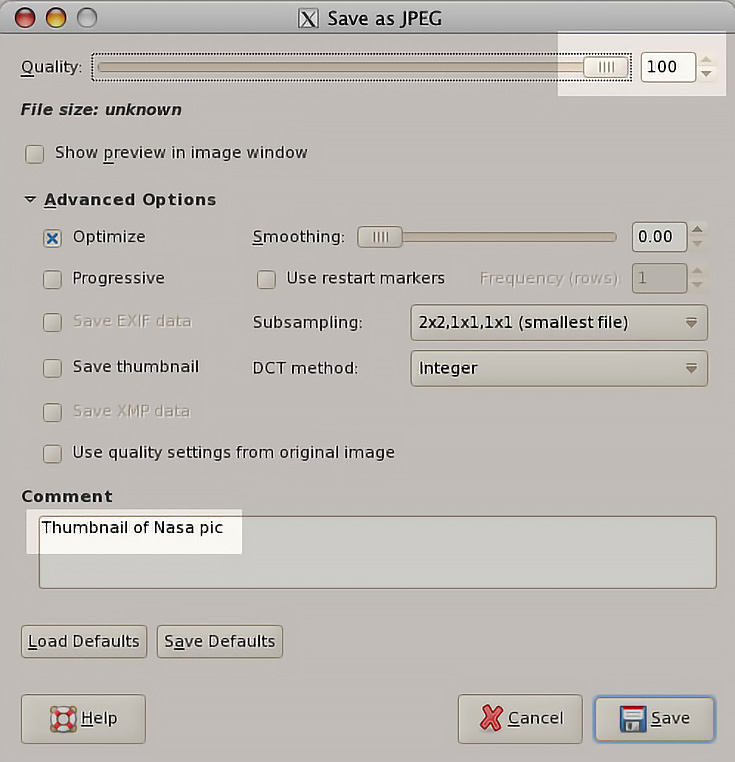
7. If you picked JPEG, a dialog box will appear when you click the “save” button.
I chose to save at a high quality, made a comment, then hit save. Now it’s ready to upload to the web!
And there you have it—the basics for preparing your images for use on the internet. You now know how to use GIMP to save your original image, resize your image, and make a thumbnail image with the crop tool.
Stayed tuned for next week’s tutorial on using GIMP to color correct your artwork!
This post may contain affiliate links.

