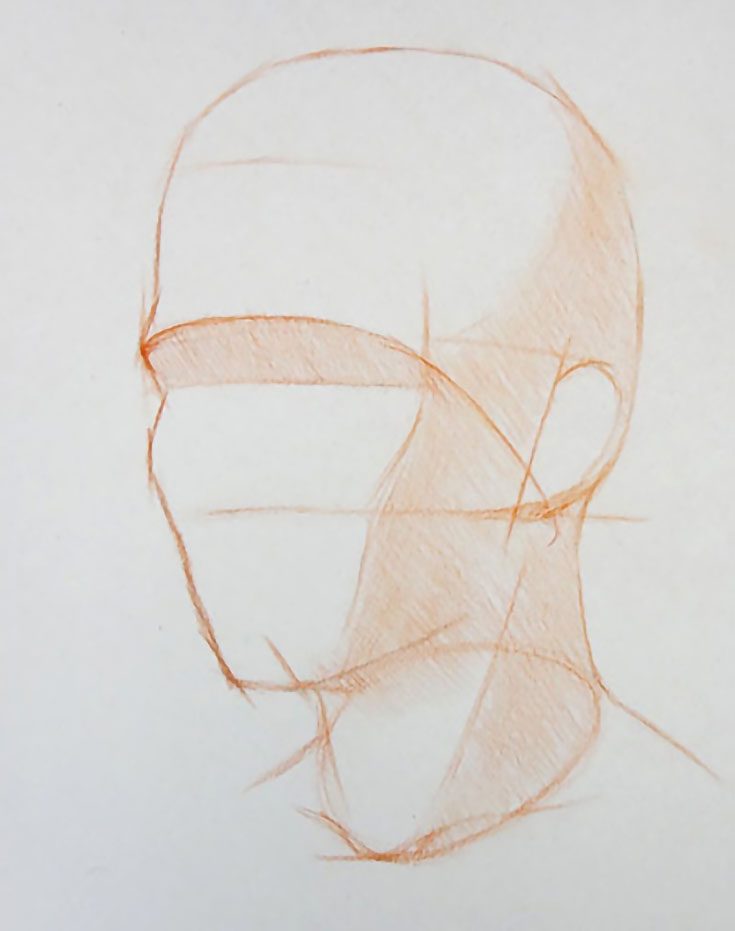
Welcome to part 4 of my ongoing series on drawing a portrait in three quarter view. If you’re just now joining us, I suggest reading part 1, part 2, and part 3 where we discussed how to build a general wire-frame of the head, and ended with some simple shading in the last lesson.
Now let’s pick up right where we left off:
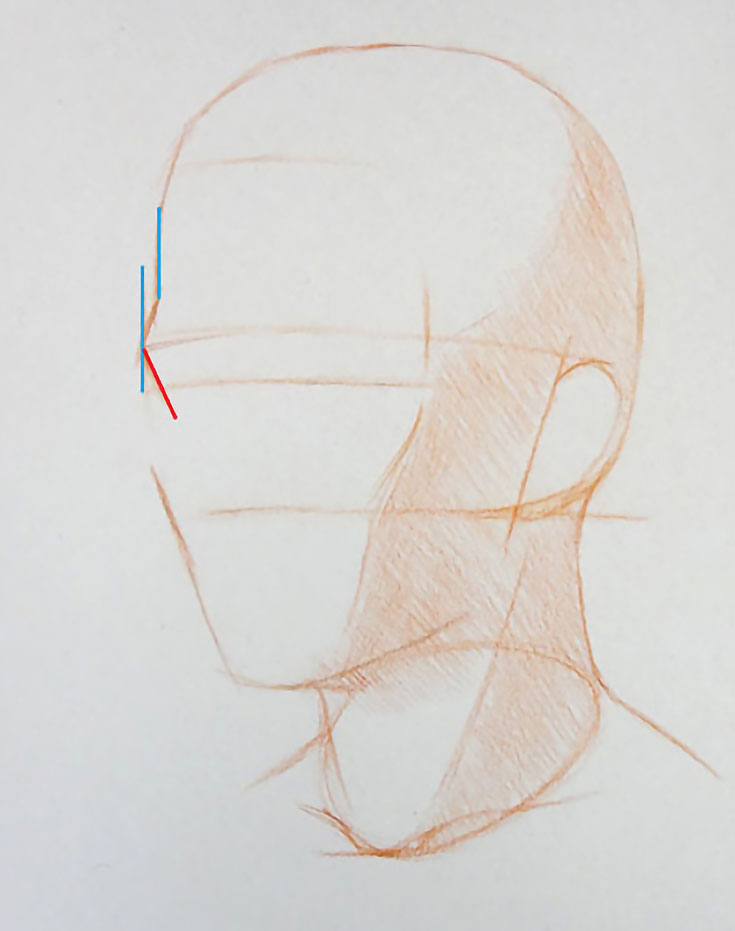
16. Drawing outlines of the eyebrow
The shape of your model’s forehead and eyebrows will be unique to them, so check it carefully. You’ll note that in three quarter view the eyebrow outline protudes slightly in front of the forehead—this distance is indicated in blue lines on the drawing below.
Measure the distance and angle, and then draw the eyebrow outline based on your model’s characteristics (marked in red above).
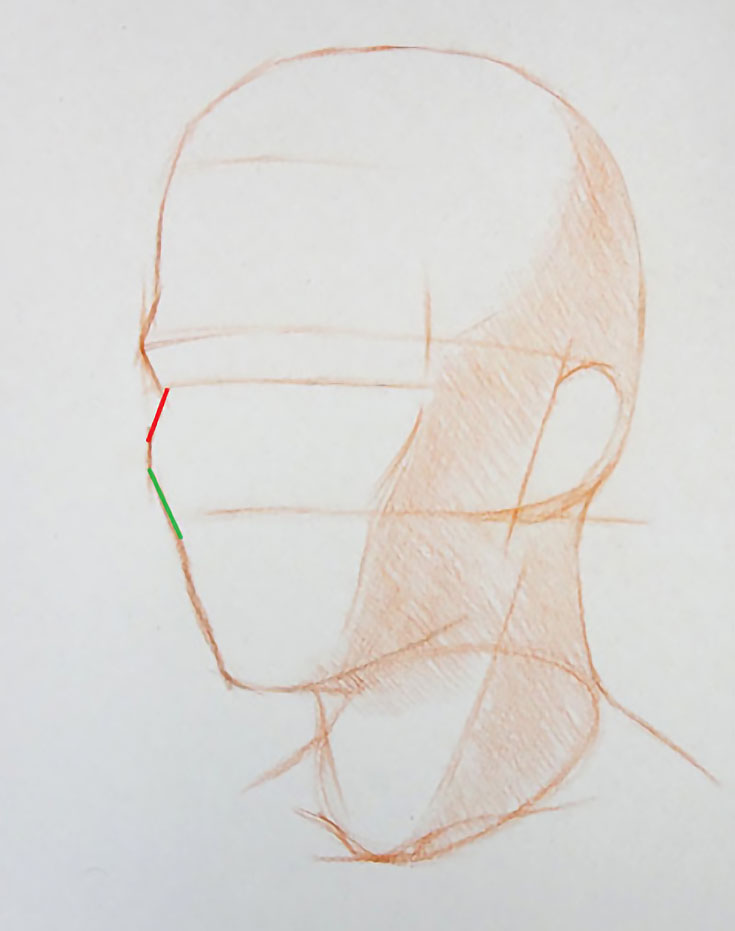
17. Adding the outer cheekbone
Moving down the contour of the face, study the outline of your model’s cheekbone. Pay attention how far it extends outward compared to the eyebrow, and use your pencil to check for its correct angle.
Usually you’ll find that the eyebrow is extended forward a bit more than the cheekbone, as in our example below where the cheekbone is shown in red.
Next, note the direction of the line moving from the cheekbone down to the jawbone on your model (in green, above). Again, this will differ for every model, so measure with your pencil and add it to your drawing.
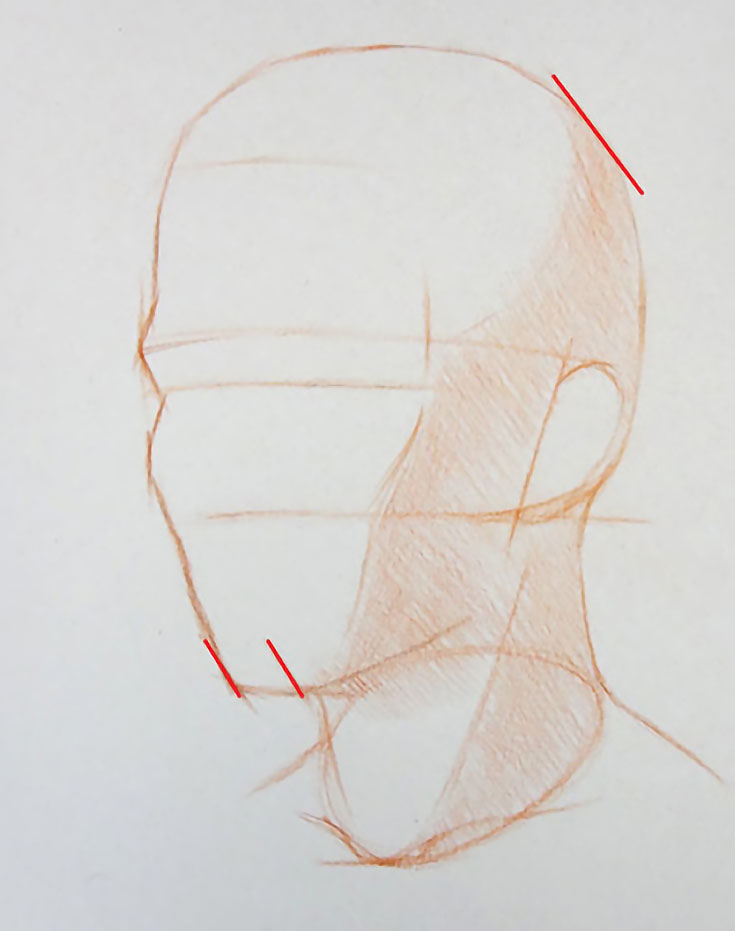
18. Drawing parallel contours of the chin
Usually the female chin is less pronounced than a male one; nevertheless, both male and female jaws have outlines that can be marked in two parallel lines:
Interestingly, these lines are closely parallel to the line at at the back, top of the head. For now, we simply place them in the drawing. We’ll use them more later.
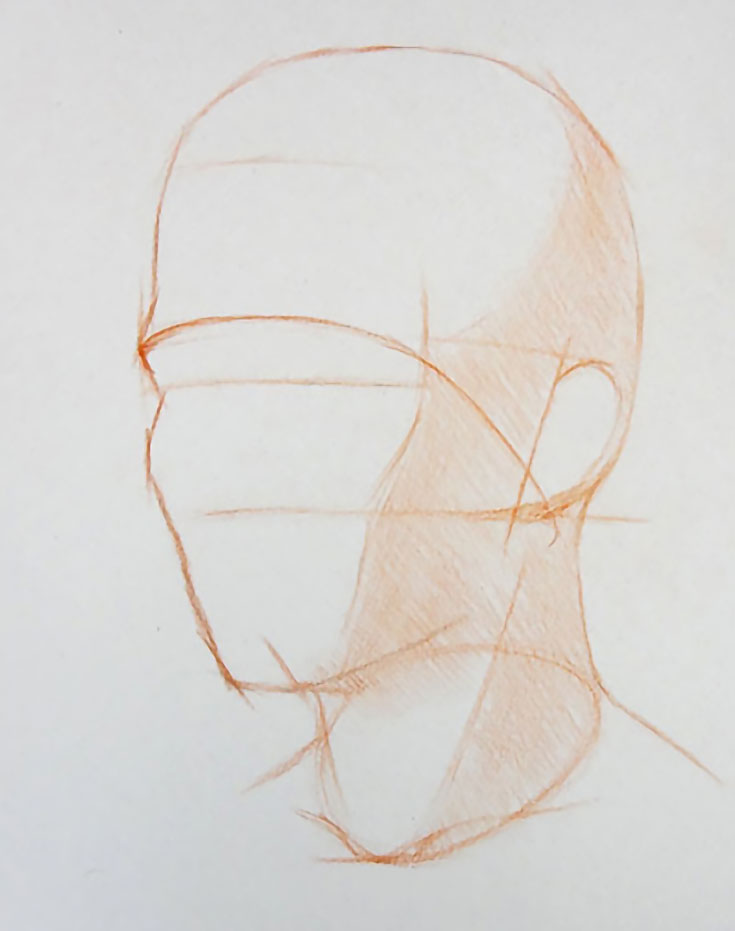
19. Adding the eyebrow curve
In a human head, the border between the cranial part of the skull, which protects the brain, and the facial part of the skull can be indicated by a curved line that goes through the eyebrows and then sloped towards the ear channel.
This virtual guideline helps us to properly build the bridge of eyebrows, which is not straight, but bent downward. We add it here to act as a guide for the next step:
20. Shade the plane under the eyebrow
With the curved line of eyebrows defined, we can now shade in the area below it.
In most cases, the source of light is above a model’s head, and we can easily mark this shaded area by applying very light pencil pressure across the entire area.
As you can see, we’re still defining big masses of the head, and so far, haven’t paid any attention to detailed facial features like the eyes, nose and mouth. But don’t be discouraged—we’ll get there!
Drawing facial features before constructing the main shape of the head is like decorating the walls of a house that yet to be constructed. Following each step of this process will help ensure the correct proportions in your portrait, and will result in greater likeness once we reach those final lessons.
Keep practicing, and make sure to also read Part 5 of this series, now available EmptyEasel.com.
Portrait drawing expert Vladimir London is a published author and founder of the Drawing Academy, an online class for learning traditional drawing techniques from home—make sure to click through for full tutorials, drawing tips, and more!
This post may contain affiliate links.
