If you’re a traditional artist, transferring your skills to a digital format can be both frustrating and rewarding. Luckily, with a Wacom pen and tablet things get a bit easier.
In the following paragraphs I’ll be going through the process I use to create a digital painting in GIMP with my Wacom tablet.
If you’re new to digital painting, make sure to check out last week’s tutorial on getting started with a Wacom in GIMP before reading any further.
Choose a subject and set up your document
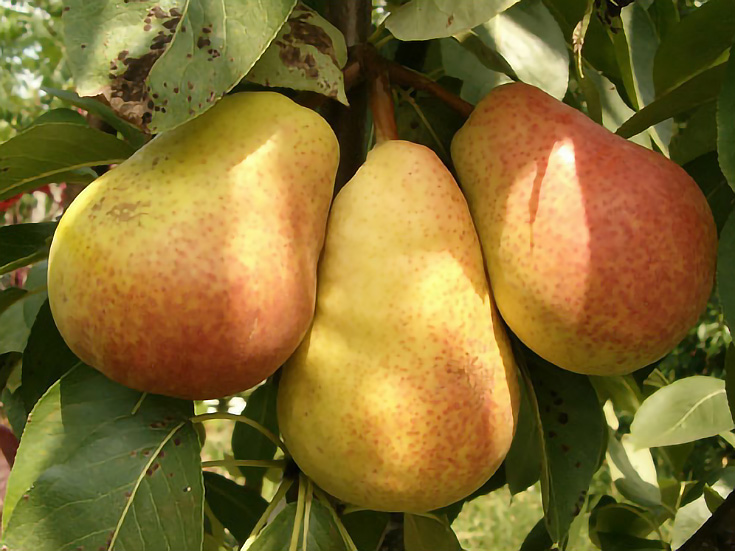
First you will need to choose a subject. I am usually a proponent of painting from life, but if you prefer your imagination or photographs, that will work too.
Here is the copyright free image I will be using as a reference.
Open up GIMP and create a new document with proportions that match your reference material. Make it 300 dpi if you think you’ll be printing it out later on.
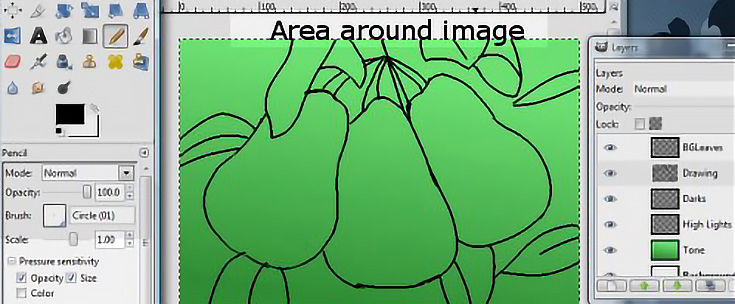
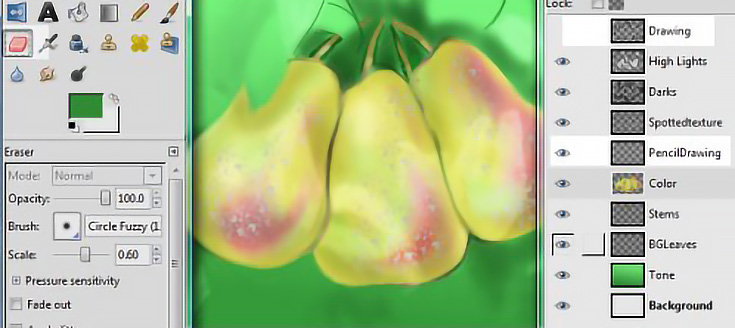
I’d also suggest starting off with several layers right from the beginning, since this will help you keep your painting organized.
I like to have one layer for my background, another for a line drawing, and a third for my colors. I also make three separate layers for my highlights, mid-tones, and darks.
And just like in traditional painting, you’ll probably want to start off by painting a medium wash over your “canvas.” In this case the leafy background I’m working from demands a green, so I filled in my background layer with that color.
Create your initial sketch
Now that your layers are all set up, start off by drawing a simple line sketch on your drawing layer. I chose a small brush that gets lighter and smaller with more pressure.
Once you have a drawing to guide you, it’s time to add some 3-dimensionality.
Add layers of highlight and shadow
Using a light color, add some highlights to your highlights layer.
I started out with the airbrush tool and changed the size of my brush as I worked to suit the marks I wanted to make. I also didn’t worry about overspray since I can always clean things up with the eraser later on. (That’s one of the benefits to using several layers—you only erase from one layer at a time.)
Add in some darks for shadow areas, too. If your darks or lights are too strong, you can always lower that layer’s opacity or change the blending mode for a softer effect.

Now that you’ve got your highlights and shadows in place, it’s time to add some color to your painting. (You still have that colors layer, right?)
Paint in your colors, then blend with the smudge tool
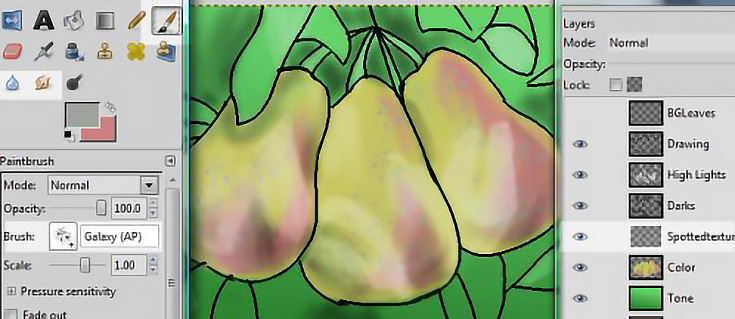
For this painting I kept my palette limited and switched between a yellow and rose color on a single layer. You can add more layers for additional colors if you’d like, or just keep all your colors on a single layer.
To make your colors look more like oil paints, use the smudge tool and start smearing your colors back and forth.
For detail work, choose a smaller brush or find one with texture that fits your subject. In my painting, I chose a texture brush to help replicate the spots on these pears.
To keep those spots separate from my other colors, however, I decided to put them on a new layer above my main colors layer.
And whenever you add texture, try different blending modes to see what looks best.
More digital painting tips
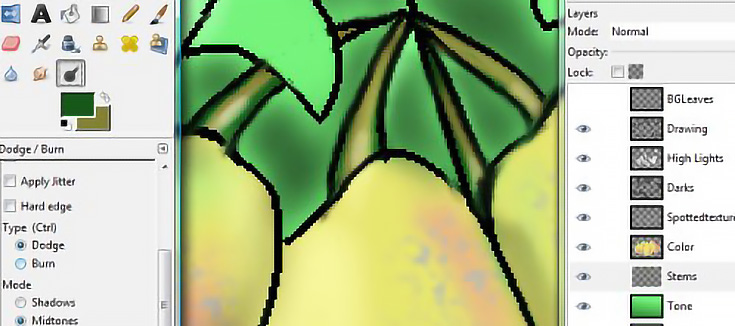
It’s often helpful to see the layer you are working on without the layers above it. You can turn the visibility of layers on or off by clicking on the eyeball symbol next to each layer name in the layers dialog box.
You can also rearrange your layers—I always put my highlights above my darks layer.
Another great think about digital painting is that you can zoom in on an area and really see what you are doing. If you want to move to a new area while zoomed in, just hold down the space bar and drag the screen.
I should note that working for a long time while staying zoomed in isn’t always a good idea—be sure to zoom back out and see how the entire image looks from time to time.
Just like an oil painting, keep adjusting your colors until your happy. Unlike an oil painting, remember that layers are free so use as many of them as you need.
When you get to the point that your line drawing is unnecessary, turn off that layer and continue painting without it.
Unfortunately I have no advice to give on knowing when your painting is finished. I guess some things are exactly the same whether you’re painting digitally or not. : )
When you’re ready to print. . .
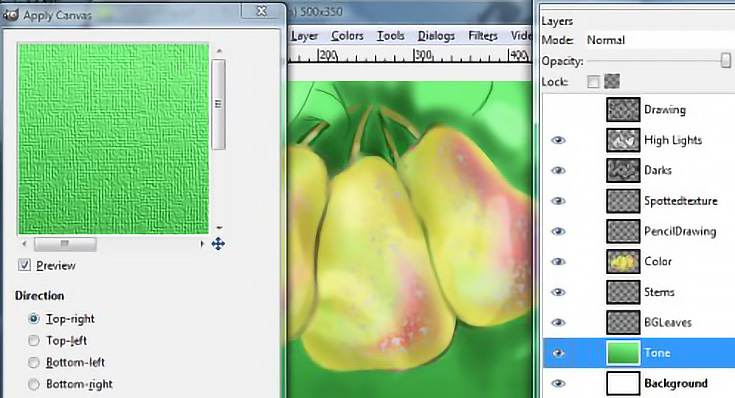
Nowadays it’s very easy to print directly to canvas—if you want to get an idea of what that would look like, merge all your visible layers (after saving of course!) and go to “Filters,” then “Artistic,” then click on “Apply Canvas.”
Good luck, and happy painting!
This post may contain affiliate links.