Many artists use GIMP just to create digital paintings or edit photos, but it also has some great built-in features for making eye-catching text.
If you’re designing a web banner, a brochure title, or a logo, the following tutorial will show you some quick and easy ways to create amazing text effects in GIMP.
Step 1. Open up a new document in GIMP
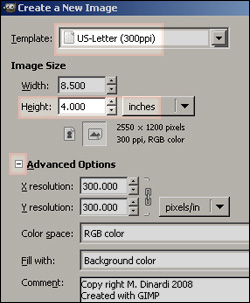 The first thing you’ll need to do is open GIMP and start a new document (the shortcut for that is Ctrl+N).
Since you might want to print this logo, make sure you set your resolution at 300 DPI—you can always reduce your resolution for the web later on.
I started with the default US Letter template, changed the height to 4 inches, then under advanced options I typed in my copyright information.
As you’ll see in a moment, this tutorial is based around a logo for MEGA 106.3, a local radio station that plays oldies.
Step 2. Place your basic text in the document
Once your document is open, select the Text tool (it’s marked with a big “A” in your toolbox) and pick a font from your computer.
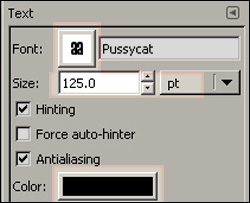 For my logo, I chose Pussycat, a free font I downloaded from creamundo. (Warning: you can spend hours browsing and collecting fonts!)
Click once in the center of your document and type the words or letters of your choice. In the options area of the toolbox there are several type tools settings. You’ll at least want to change the color of your text.
I re-sized my text fill the entire document, with just a bit of white space around it, too.
Step 3. Add filters and adjust layers
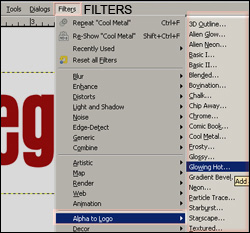 In your menu bar, click on Filters, then in the dropdown box choose “Alpha to Logo.” There you’ll see several pre-designed treatments for your text.
Many of these filters have different gradients or other options to play with. Go ahead and try out as many as you’d like—if you’re not happy with the result, just undo your last action with Ctrl+Z.
I liked the Cool Metal filter, but tried a few more and settled on a Glossy filter.
When creating intricate text effects, you’ll definitely want to be using your layers palette—if it’s not up on the screen right now, press Ctrl+L to make it appear. Now take a look at your layers. Do you see how you have different layers for some of the effects? With GIMP, you can alter each layer separately to fine-tune your text effect.
 Click on the eyeball icon next to any layer to make it invisible. Click again to toggle visibility back on.
You can change the order of your layers by clicking and dragging the name of the layer up or down.
You can change the blending modes of each layer as well, just to see how that will affect the look of your logo. Multiply, Screen and Overlay are the most commonly used blending modes, but they all have their uses.
If you want to change your logo just a little, try adjusting the opacity of different layers up or down.
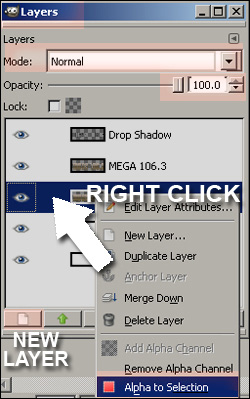
You can also select and modify different layers by right-clicking on that layer and choosing “Alpha to Selection.”
For example, if you’d like to apply a gradient or add a new texture, choose “Alpha to Selection” then click on the new layer button (as shown in the image above).
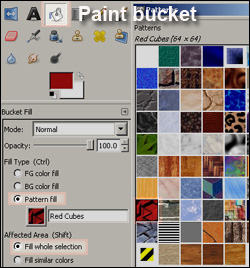 To apply a texture, choose the Paint Bucket tool from your toolbox and check Pattern Fill in the extra options.
As you can see, there are a lot of patterns—I chose the one with red cubes, but pick whichever one fits your logo idea the best.
Once you’ve picked a pattern, click on your image and the pattern will fill the selected areas.
Keep playing until you find something you like. . . it’s the best way to learn!
Step 4. Merge all layers into one
When you’re finished adjusting your layers, you’ll need to merge them all into one image. Go to the base of your layers palette and select the next to the last one.
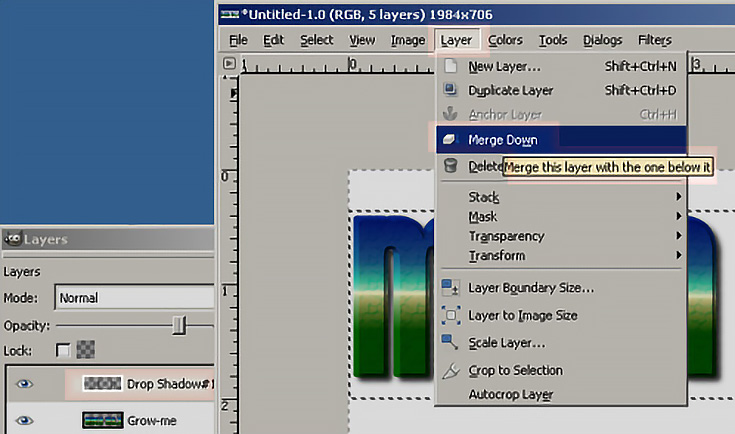
The Merge function merges the selected layer with the one below it. Start at the second-to-last layer and move up, merging one layer at a time. Oddly enough, if you start at the top and merge down, the image will end up looking slightly different.
Step 5. Final touches (optional)
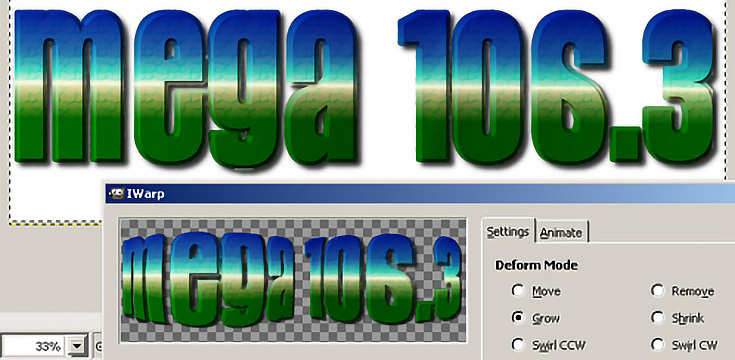
After merging, my logo was still a little plain for my taste, so I decided to add some extra oomph with a distortion. Go to Filters in your menu bar and click on Distort.
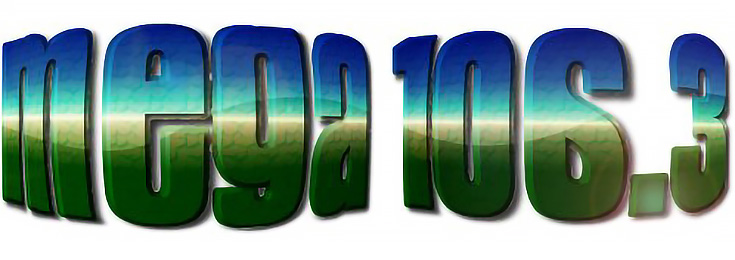
I finally settled on the IWarp distortion, which gave my text a truly “mega” effect.
I also added a little pizazz by using the Pen tool (see the pen tool tutorial) and a Mask (see the photomontage tutorial) to create a light wave across the entire logo.
Obviously GIMP can be a lot of fun to play with, even if you’re just spicing up text. Between GIMP’s built-in “Alpha to Logo” filters and the skills you’ve learned in past tutorials, the possibilities are almost endless.
Thanks for reading, and stay tuned for more articles on GIMP in the coming weeks!
This post may contain affiliate links.