Digital drawing tablets are sophisticated computer drawing aids (comprised of a “pen” and tablet) that many digital artists wouldn’t be able to live without—myself included!
At this time, the leading brand in the digital drawing tablet market is Wacom. What’s amazing about Wacom tablets is that they accurately capture pressure sensitivity as well as direction, so when you press down harder on your tablet you’ll get different results (such as a thicker line) on-screen.
If you don’t already have a tablet and pen, I would highly recommend running out and buying one—they make digital painting and drawing a LOT easier.
Any size Wacom will work. The first Wacom that I purchased (in 1990)was only 4 x 6 inches, while my current Wacom tablet is a bit larger at 6 x 8 inches. Larger tablets simply allow for more arm/shoulder movement while drawing.
Setting up your Wacom drawing tablet
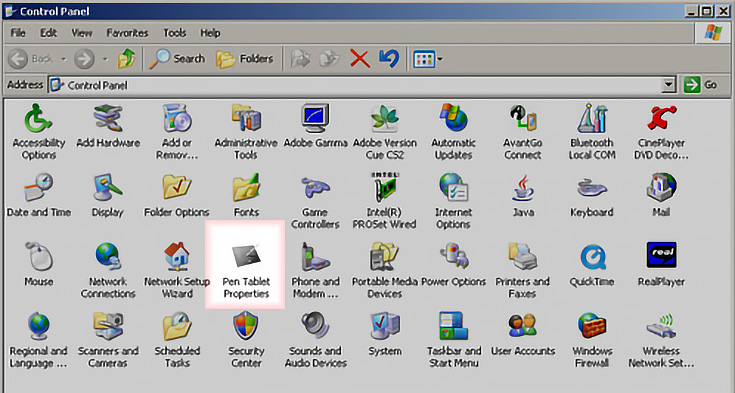
Once your Wacom tablet is installed on your computer, there are some settings you’ll need to customize before you can use it in GIMP. If you own a PC, go to your start button, open up control panel and click on the Pen Tablet icon.
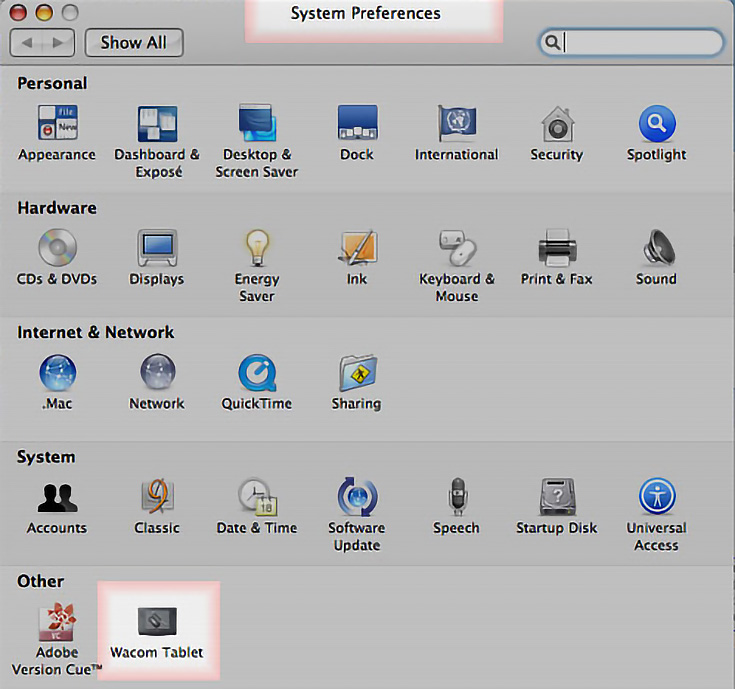
For Mac users, go to the apple symbol in the upper left of your screen and choose System preferences, then click on the Wacom tablet icon.
NOTE: The following settings are my own preferences, so feel free to experiment on your own and find what you like the best.
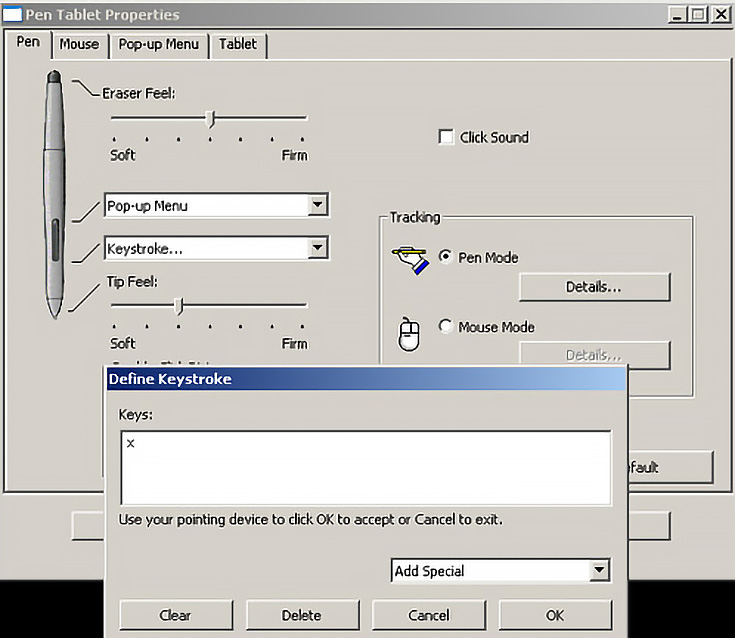
There are two buttons near the drawing point of your Wacom—I like to have the top one open up a Pop-up menu (like the right-click of a mouse) while the bottom one switches between my foreground and background colors.
Adjust the pressure sliders to get a softer or firmer response to the amount of pressure you put on the pen (whatever feels right to you).
When you’ve finished setting the sensitivity of your pen, make sure that “Pen Mode” is selected instead of “Mouse Mode” and click on the “details” button. You’ll want the entire computer screen (or all screens) selected, along with a full tablet area.
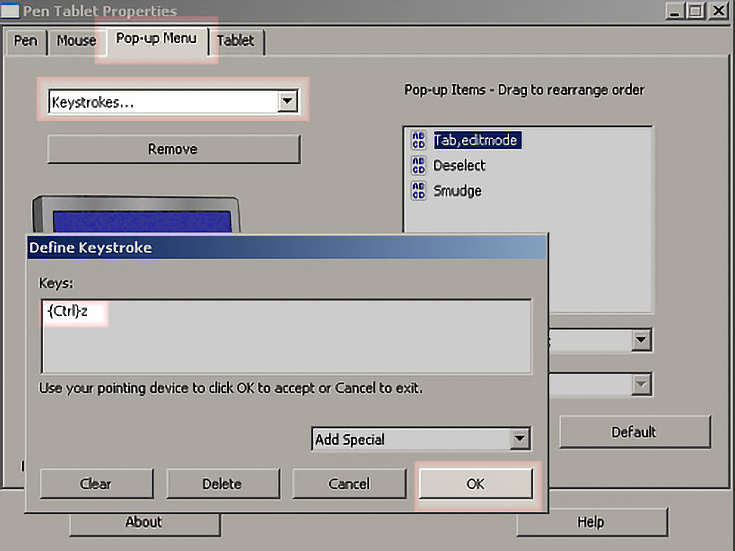
Now there’s just one more thing to do before you can get to drawing in GIMP—click on the Pop-up Menu Tab to choose what shortcuts should appear when you press the top button on your pen.
Use the drop-down menu to add additional shortcuts to your list. You can see that I’ve just added the “undo” command (Ctrl+Z) above.
Introducting GIMP to your drawing tablet
Make sure your tablet is plugged in and turned on before opening GIMP. If you don’t do it in that order, GIMP won’t know it’s there.
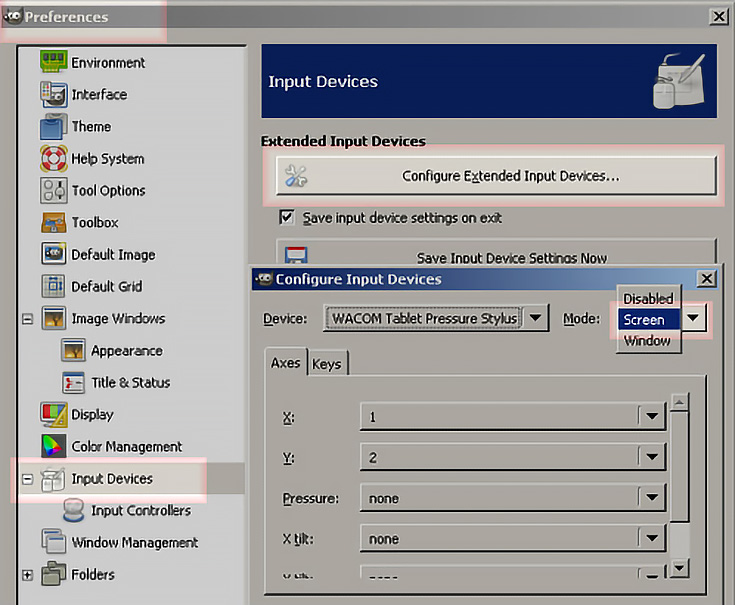
Even so, your pen and tablet will not work with GIMP immediately—first you’ll have to introduce them. To do that, go to File in the menu bar and click on “Preferences.”
Once inside the Preferences dialog box, select “Input Devices” in the left column and then click the “Configure Extended Input Devices” button.
Change the “Mode” to Screen and test your pen’s directional movements—if it’s acting opposite what it should, switch the X to 2 and the Y to 1 (or vice-versa).
Leave the rest of the options alone and save your settings. You should now have pressure sensitivity in GIMP.
Wacom drawing basics
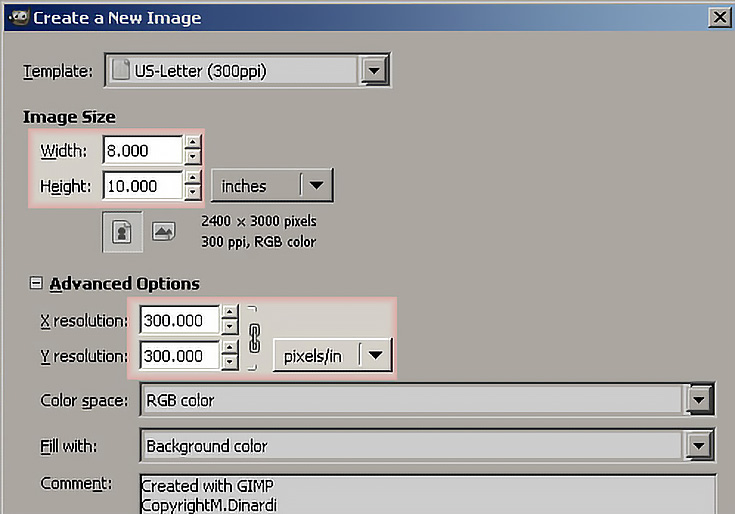
It’s time to make a sketch! Open a new document (Ctrl+N).
If you’ve read through any of my previous tutorials you know that an image you plan on printing should be at least 300 dpi while a web or TV image should only be 72 dpi.
Choose whatever size you’d like. I picked 8 x 10 inches to fit a standard frame size.
One of the best things about painting digitally is the safety net it provides. If at any time you mess up, the “undo function” will take you back to previous steps (Ctrl+Z).
Another great thing about digital painting is using Layers. Layers are free, so use lots of them, make duplicate layers, change their blending modes, and try out whatever comes to mind. You can always delete a layer if you don’t like it.
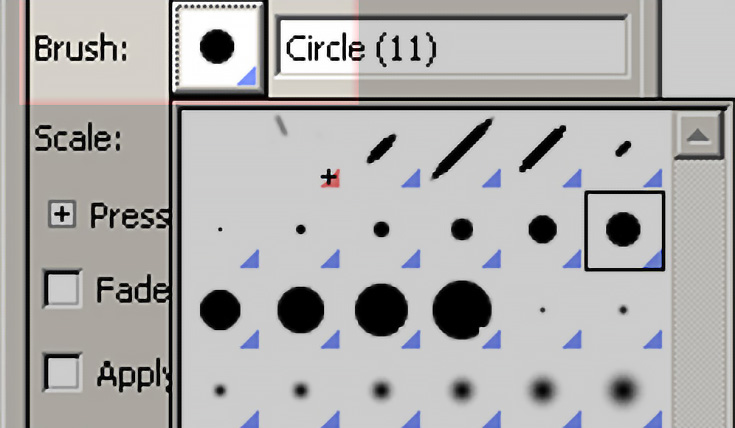
The most common tools you will use when drawing with your Wacom pen and tablet are the Brush, Air Brush, Pencil, and Ink. You can pick whichever one you like (and some even let you add texture).
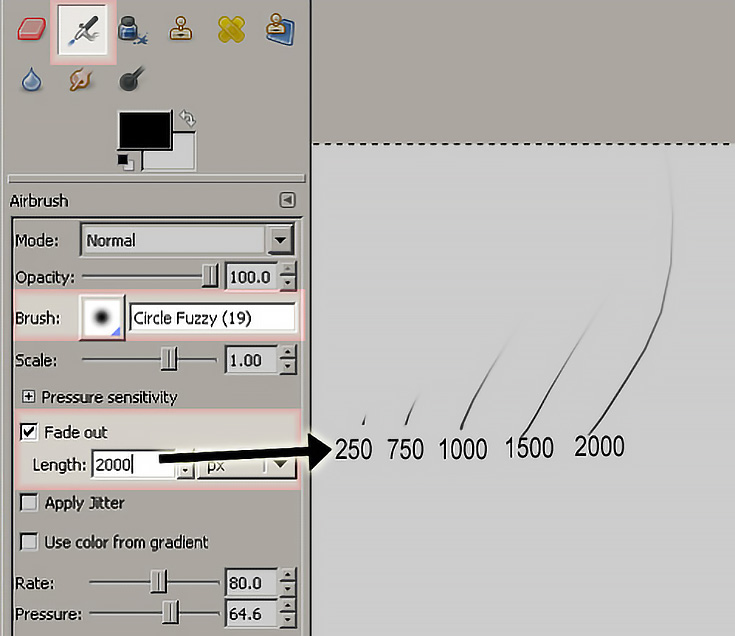
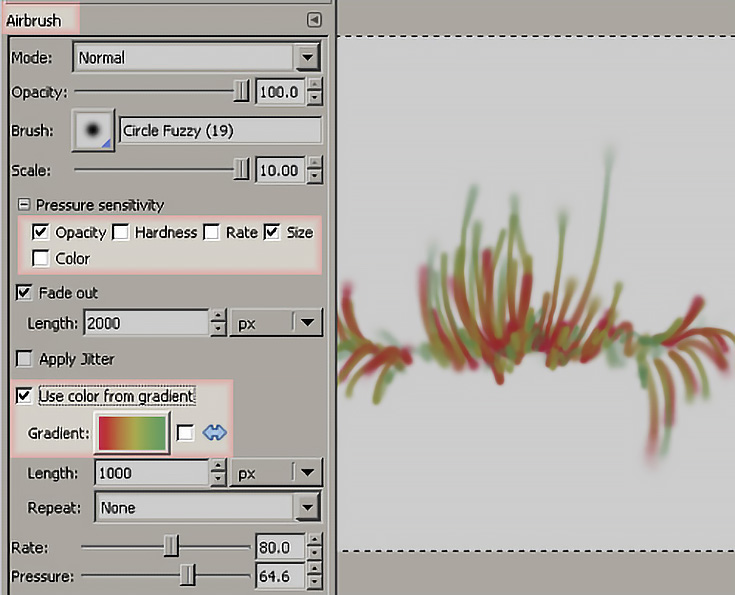
I also like to set my pen to “Fade out” so that it looks more natural.
I created an image that was 300 dpi, so to get a long, fading line I needed a 2000 pixel length for the fade amount. Feel free to experiment and see what works for you.
Another option is to add a gradient—choose different foreground and background colors and your brush will transition between them mid-stroke.
You can get interesting results from highly contrasting colors and subtle results from two colors with a similar tonal value.
Set the pressure to affect several things at once and see what happens. Try drawing your first sketch with the tablet—it may be harder than you think!
Some artists find it disconcerting to look UP at a monitor while drawing on a tablet. The good news is that after a few hours of practice, that disorientation will go away.
There’s a lot you can do with a drawing tablet in GIMP—come back next week for some specific ways to mimic traditional artistic mediums on-screen!
This post may contain affiliate links.
