Photomontage is an art form where multiple photos are combined to create one image, similar to collage. In today’s tutorial I’ll be showing you several techniques for creating a digital photomontage using GIMP.
Before we get to that, however, the first thing you’ll need is a bunch of images on a subject that interests you.
NOTE: I’m going to skip the whole copyright discussion for now and just suggest that you use your own photos—at least if you ever plan to display or sell prints of your photomontage at a later date.
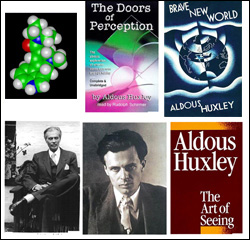 For this tutorial I picked out several images relating to Aldous Huxley.
Huxley was the author of Brave New World and Art of Seeing (just to name a few of his books) as well as an early experimenter in LSD long before it was illegal—which is why I grabbed an image of a molecule.
When you pick your own images, whatever the subject, here are some things you might want to look for:
1. Fairly large images. You can always make an image smaller, but it’s tough to go the other way. With photomontage especially, you’re dependent upon the size of the images you use for the size of your final piece.
2. Pictures with solid backgrounds. If you only want part of an image, a solid background makes it easier to select and delete the areas you’re not interested in
3. High-contrast photos. When blending and layering images, it’s easy to lose contrast. Starting out with high contrast pictures is always a good idea.
4. Images with black or white elements. Black and white images can be colored very easily, while colored images take more effort to change.
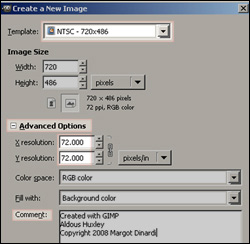
See what you can come up with using those guidelines. Once you’ve got your photos ready, create a new document in GIMP (Ctrl+N) and let’s get started!
 Throughout this tutorial I’ll be referring to this new document as my “foundation” image, simply because I’ll be adding all my other images to it.
Since the photos I’m using were taken off Google Images, I’m going to create a document that has a fairly low resolution to match theirs.
Depending on your images, you may need a larger starting document. (While you’re there, it’s a good time to add your copyright info as well.)
When your new document is created, open all of the images you collected on your topic and choose one to use as a background. I chose an old map of England, since Huxley was born in England near London.
You’ll want to copy the entire image and paste it onto your foundation document, which means you’ll need to start out by selecting it. To “Select All” press Ctrl+A.
The shortcuts for copy and paste are exactly the same as any word document program or Photoshop, so once that background image is selected, press Ctrl+C (to copy the image) and then click on your foundation image and press Ctrl+V (to paste).
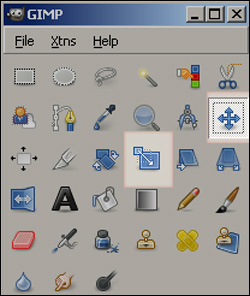 Using the Move Tool (which looks like crossed arrows in your GIMP toolbox) you can move the image to the position you want.
If the background image is too large or too small, you’ll want to select the Scale Tool (Shift+T) then press, hold and drag anywhere inside the image. If you’d like to keep the width/height ratio the same, hold down Ctrl as you are dragging.
When you’re happy with the new dimensions click the “Scale” button found in the dialog box which appeared just as you started to re-size the image.
Once your background is set, it’s probably a good time to save. Press Ctrl+S.
 To start building up your photomontage, choose an image with lots of contrast (preferably in black and white) to put on top of your background.
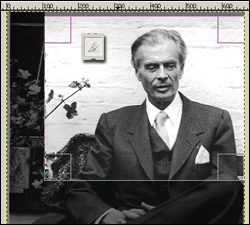
I chose to use a black and white image of an older Aldous Huxley sitting against a white brick wall, but I didn’t want the whole picture, so I just used part of it. If you want to grab a section of your photo like I did, use the Crop Tool (Shift+C) on the area you want.
After cropping, you can copy (Ctrl+C) and paste (Ctrl+V) onto your foundation image.
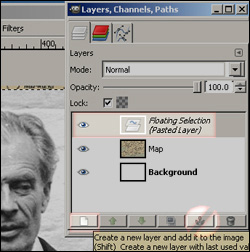
Notice that when you paste something onto the foundation image, you’ll see the words “Floating Selection (pasted layer)” appear in your Layers dialog box.
If you click on the “New Layer” button at the base of the layers panel, that new “Floating Selection” will turn in to a regular layer of its own.
If you hit the “Anchor” button, it will become part of the layer below it and you won’t have the ability to edit that image independently anymore.
Additionally, if you double-click on the name of any layer you can rename it by typing in a new name, then pressing Enter (or Return).
Keeping well-organized layers is an important part making a successful GIMP photomontage. Name them, duplicate them if necessary, and always keep track of which layer you’re currently working on.
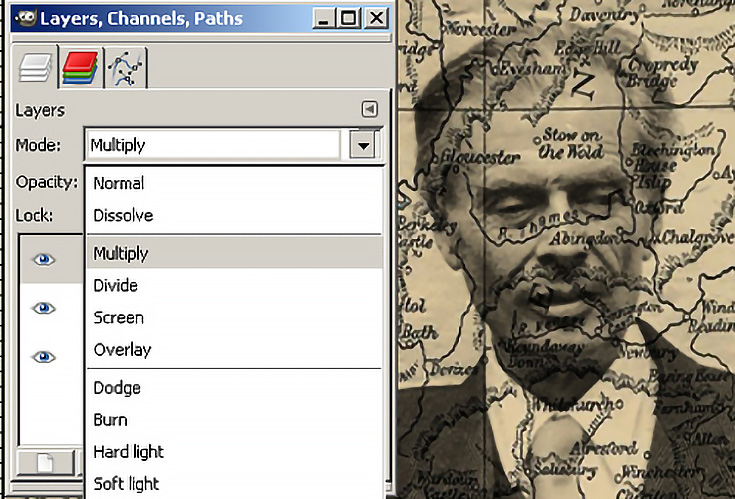
Now we can play with the different blending modes found in your Layers panel.
Some of the most useful blending modes are “Multiply” which makes white pixels disappear, “Screen” which makes black pixels disappear and “Overlay”—but try all of them; they all have a specific purpose!
If you’d like to add another image, but want to have it fade into your photomontage instead of using a blending layer, here’s how you’d do it:
Open another picture (I’m using a photo of a younger Huxley) and just as you’ve done with the previous images, copy and paste the new image onto the foundation image. Convert that new-pasted layer into a regular layer and rename it.
Now for the fade—you’ll start by applying a layer mask. Make sure your new layer is selected, go to “Layer” in the menu bar and click on “Mask” then “Add Layer Mask.”
You will have some options presented to you. The default is “White (full opacity).”
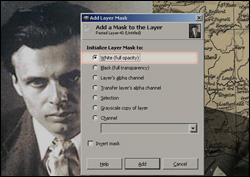
Choose that one for now, although we’ll be adding a gradient in just a moment.
The gradient won’t actually appear in your photomontage, by the way, it just modifies the layer mask—because wherever a layer mask is black, its layer is invisible; wherever the mask is white, its layer is visible. This will give us that fade effect we’re looking for.
Do you see in the layers panel a second thumbnail beside the name of the layer? That thumbnail represents the mask.
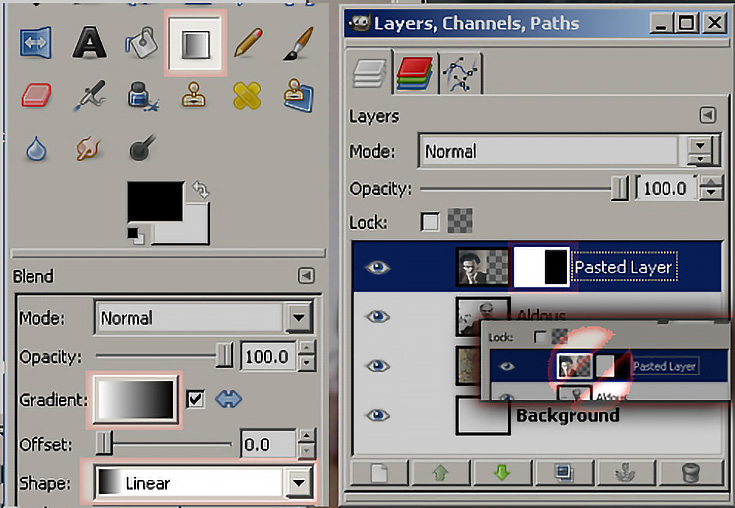
If you don’t want to edit the mask, then click on the other image thumbnail. For now, however, make sure the mask thumbnail is selected and pick the Gradient Tool from your toolbox (or just press L).
In the extra options area under the toolbox you can choose to make the gradient linear or radial. I chose linear.
You can also pick colors for your gradient, but in this case, you need to make sure the gradient is black and white. Click on the box beside the word “Gradient” to change it.
Now, in your foundation document, with the Gradient Tool still selected, click and drag from left to right (or any direction) to apply the gradient. Your top image should now fade out, like this one.
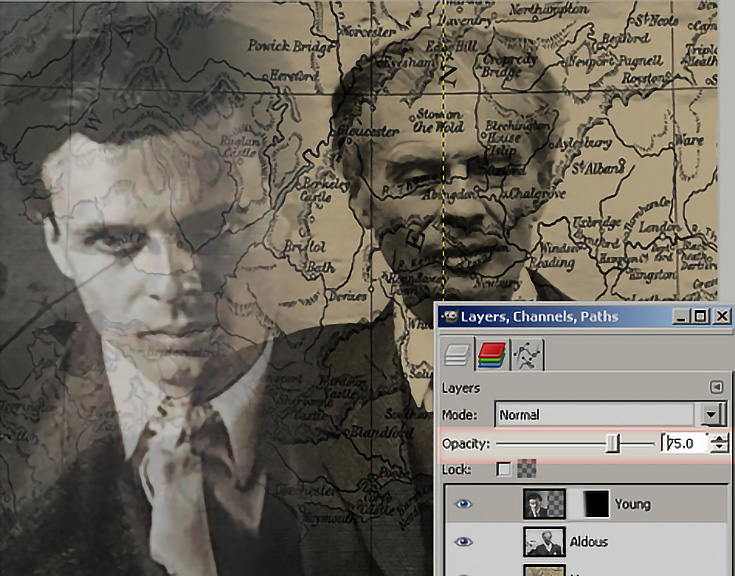
You’ll notice that I wanted a little bit of the map showing through everywhere, so in the Layers dialog box I lowered the Opacity of my image to 75%.
Feel free to try different gradients or apply different blending modes to the image. What’s neat about GIMP is that you can change these things at any time because they’re on different layers.
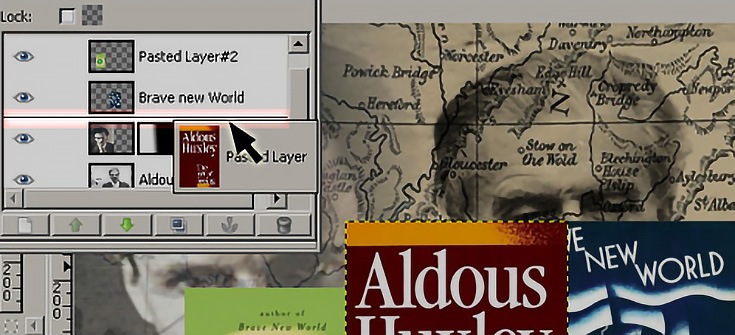
For example, when I put Huxley’s books into this photomontage I decided to put each one on a separate layer.
This let me decide which book should be “on top” and which ones should be underneath—I simply dragged the layers to reorder them.
Try reorganizing a few of your layers. Just click on one, hold, and drag up or down. A horizontal line will appear, showing you where you can place the layer. When it’s where you want it, release your mouse button.
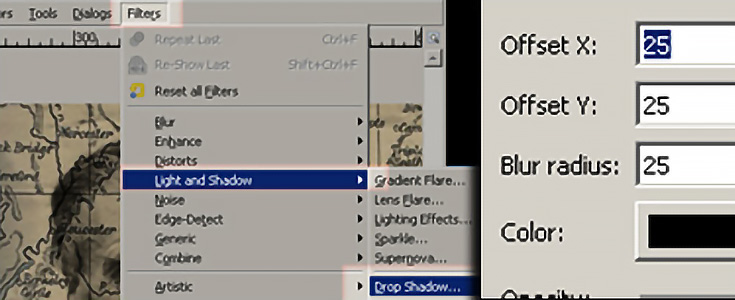
After re-arranging those layers I decided to fan out Huxley’s books with the Rotate Tool (Shift+R) and apply a drop shadow to make them stand out.
To make a drop shadow, select a layer and go to “Filters” in the menu bar, click on “Light and Shadow” then “Drop Shadow.” Shift your shadow whichever way you prefer: “Offset X” moves the shadow horizontally, while “Offset Y” moves it vertically. (Use negative numbers to move the opposite direction.)
There are many other filters which are fun to try out too. Don’t be afraid to play around—as you can see, I applied the “Sparkle” filter to my blue book layer, and a “Curve Bend” filter to another book layer.
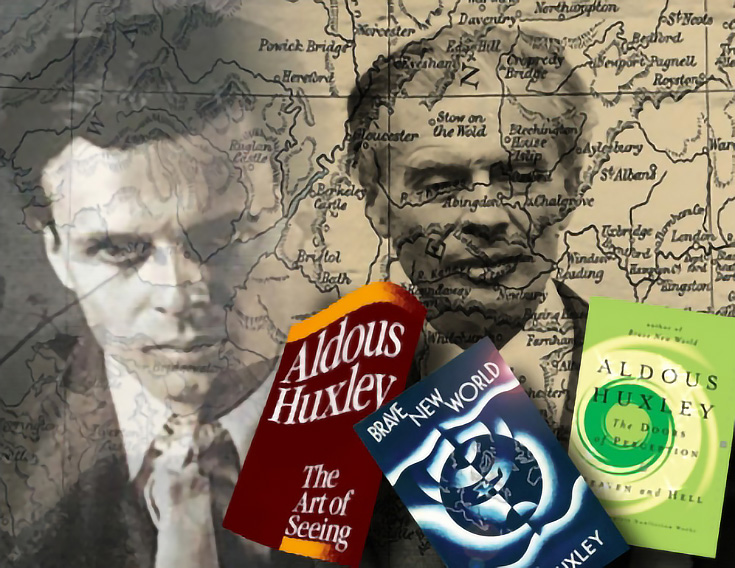
If you followed every step of this tutorial then you now know how to copy and paste, scale and rotate images, apply layer masks, and use blending modes and effects.
Keep working on your photomontage—add images, experiment with multiple blending modes, and see what you come up with. There’s no limit to what you can create!
This post may contain affiliate links.