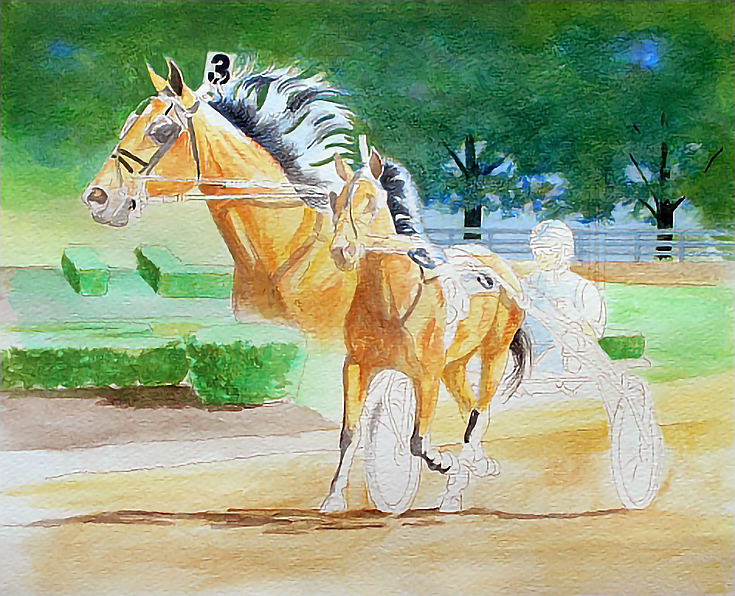
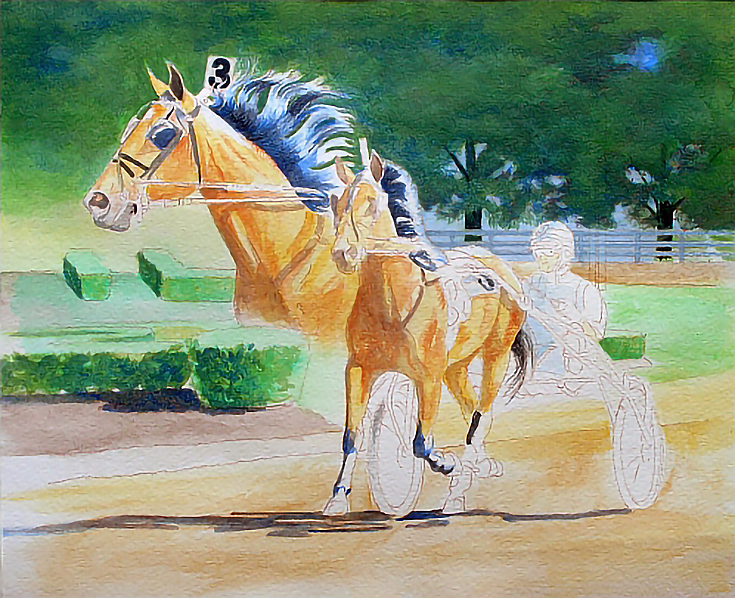
Today, I’ll show you how to start a colored pencil drawing with water soluble colored pencils. I’ll be using Strathmore 300 lb. watercolor paper and Faber-Castell Art Grip Aquarelle pencils.
If you’re following along, you’ll also need a few other supplies, including gummed craft paper tape, a smooth, clean board slightly larger than your paper, a 3/4th-inch sable flat brush, and a #3 sable round brush.
Before you start, you’ll want to mount your paper to the board by wetting the paper thoroughly and evenly and laying it on the board. Blot it so it’s not dripping wet, then tape it to the board with gummed craft paper tape. The tape is water activated, so dampen it first, then place it so it overlaps the paper about a quarter inch. Smooth it down with a sponge then let the paper dry.
Make a usable palette by applying each of the colors you’ll be painting with to a scrap piece of watercolor paper. Use heavy pressure in several layers to make large patches of each color. You’re essentially creating a watercolor palette WITH your water-soluble colored pencils.
For my palette, I used a template to make 2-inch circles and I labeled each color with a dry colored pencil or permanent pen, as shown in the sample below.
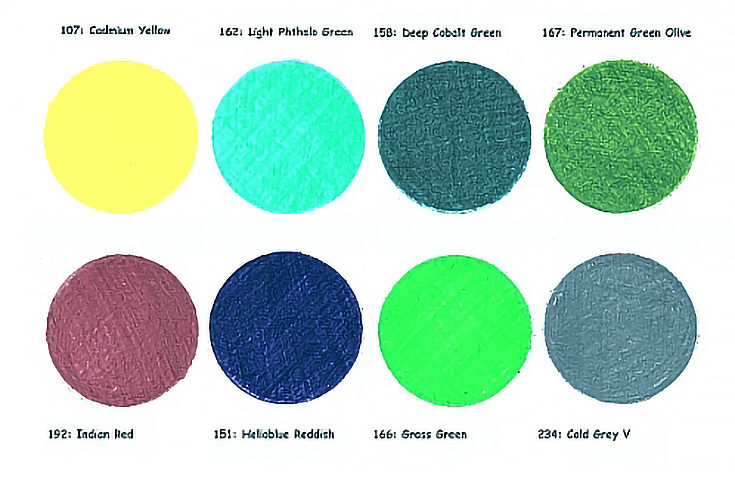
OK, now you’re ready to start!
Step 1: Laying in the initial washes
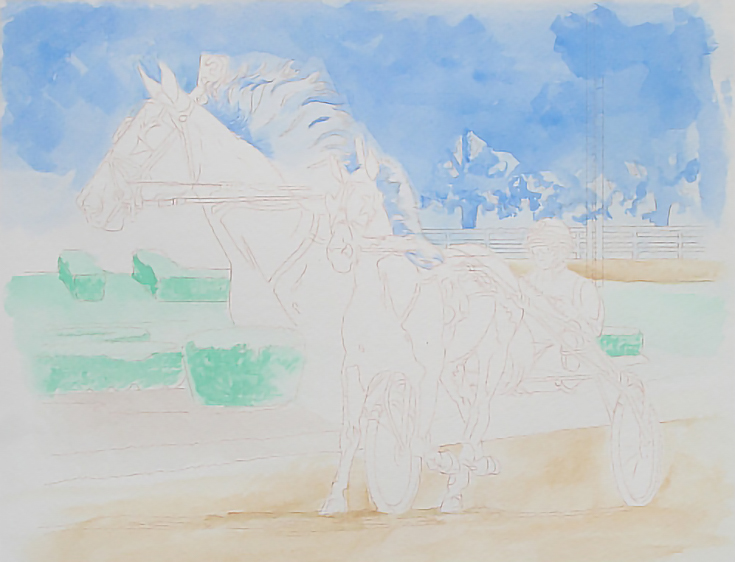
I dampened the upper portion of my paper, including both horses’ manes. I then used a wet 3/4th-inch brush to pick up color from my palette, and lay in a wash of Light Phthalo Blue (162). I kept dipping the same brush into water and picked up more color off the palette to put a wash of Grass Green (166) into the grass and bushes, and Van Dyke Brown (176) and Burnt Ochre (187) into the dirt.
Shadows were created with multiple washes as the paper dried. I also used a small, round sable to add mottling in the bushes and create texture on the track.
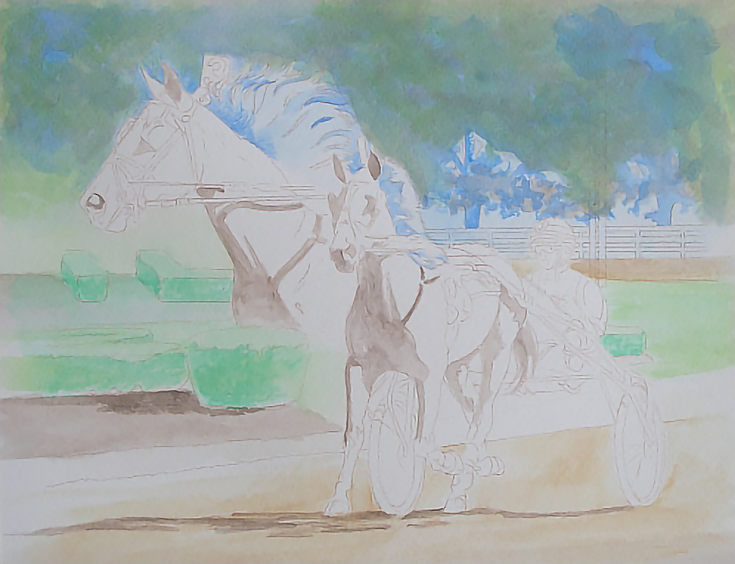
I washed Middle Phthalo Blue (152) over the trees, beginning with the small round to outline the areas I wanted to work around, then the 3/4th-inch flat to tap in texture in the larger areas.
Using the 3/4-inch flat, I washed Van Dyke Brown over the background trees in a mottled pattern and darkened the infield dirt. I then switched to the round brush and washed the same color into the shadows on both horses and the ground. After that dried, I used the large flat with lots of water and tinted the foreground with Van Dyke Brown.
After the painting dried, I used the 3/4th-inch flat to mottle Grass Green into the trees, shrubs, and infield grass. I used color with a lot of water to tint the area under the head study so it wasn’t so stark white.
Step 2: Building color saturation
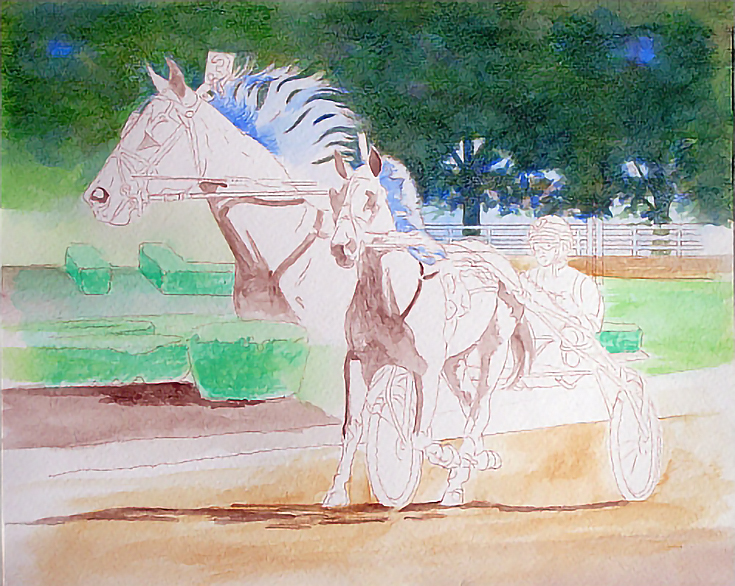
I picked up my Olive Green (167), Helioblue-Reddish (151), and Grass Green water soluble pencils, and used them like traditional pencils to give my trees a darker, more saturated color. I used parallel strokes in different directions applied with medium pressure in a random pattern to create a variety of shades and value.
I then wetted my brush again, and tapped it onto the colors I had just laid down to dampen and blend them, creating much more intense color.
I next used a very wet round brush to wash color over the horses using Phthalo Blue (144) in the reflected light areas and Sanguine (188) in the rest of the body. I just barely touched to the color on the palette. In the body, I added a less watered down layer of color in the middle tone areas to begin establishing values.
Phthalo Blue was washed over the backstretch to tone it down and Sanguine was washed over the front stretch and parts of the shrubs to add more depth of color in the track and to warm up the infield shrubs.
I also did a little more work on the infield shrubs and background trees with Olive Green. I used a variety of strokes, and found that the most productive method was dipping the pencil in water, then brushing it directly with the small round, and painting with that on the paper. This resulted in almost complete coverage of color on the paper.
Step 3: Creating water-resistant details
Next, I switched to Prismacolor pencils to create some fine details that I wanted to preserve in the drawing. The wax base in the pencil has a nice benefit of preventing any fluid color from soaking into the paper. The water-based color can be removed later with an eraser, and the Prismacolor details will remain.
I used Sky Blue Light burnished it with white in the sky and Slate Gray burnished with Sky Blue Light on the fence. I also burnished the markings on the faces of the horses with White and blocked in the numbers with Black burnished with white.
On the trotting horse, I applied White with a blunt pencil and heavy pressure to the saddlecloth, then burnished it with Sky Blue Light in the shadows. The number was colored with Black in the shadows and Slate Gray in the lighted areas, using heavy pressure.
Lastly, I added Black to the manes and tail with a sharp pencil and directional strokes.
Step 4: Finishing the wet phase
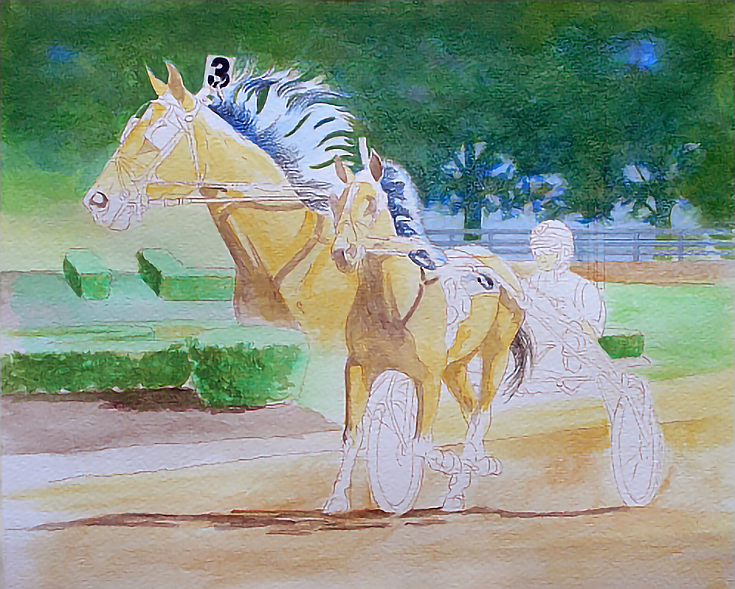
I switched back to water soluble pencils and washed Black (199) over the shadows in the manes, tail, and legs of the horses and the trunks and branches of the trees. I washed Middle Phthalo Blue in very thin washes over the mane of the head study and over the shadows on the driver’s helmet, jersey, and pants, then washed Burnt Ochre in various values over the middle tones of both horses.
For each of these areas, I dipped the sable round into clean water and touched it to the palette, blotting the brush on paper towel if necessary.
To finish this stage, I darkened the trees by dipping the Sanguine pencil into water and stroking it with the small round to pick up color, which I then applied in the shadow areas. I followed that with an application of Helioblue-Reddish using the same technique.
The final details were finished with Helioblue-Reddish in the cast shadows, as well as the shadow sides of the shrubs, and the shadows in the black parts of the horses using the small round brush. I also used Olive Green over all of the trees. I allowed the paper to dry completely between each layer.
If I were doing a complete drawing with water-soluble colored pencils, I’d continue to push value and color ranges and build detail. Since I’m finishing with dry colored pencil, however, this is as far as the water soluble phase needs to go.
Next time, I’ll show how I finished this painting using traditional colored pencils.
Stay tuned!
This post may contain affiliate links.
