Today I am happy to share with you my process of making portraits using colored ballpoint pens on paper.
For a drawing like this, I start by choosing a suitable photo of the person for a portrait in terms of lighting and expression. Then I study the face to get acquainted with the features. I imagine how I can show the personality of the person in the best possible way. I also ponder upon any special features that need to be focused upon like wrinkles, color of the eyes or hair, etc.
I then crop/compose the face using a PC and get it printed on an A4 size sheet. On this print, I draw a grid of thin lines, 22 vertical and 30 horizontal lines. This is my reference.
For the drawing, I use a 22×30 inch 300 gsm handmade paper. at this size the face becomes a little larger than life size, making it easy for me to draw all the details.
I draw a proper grid of pencil lines on my paper at 1 inch distance between each line, so that I get 22×30 lines. This allows me to accurately draw the proportions of the face by comparing my drawing to the reference photo grid. Then I use the same HB pencil to draw only the important outlines. I avoid drawing more pencil lines as they are difficult to erase later once the ballpoint pen lines overlap on them.
This particular face portrait is of a famous harmonium player from the previous generation in India who played Hindustani classical music and accompanied almost all the master vocalists in his generation throughout India. I did this portrait for his birth centenary celebrations.

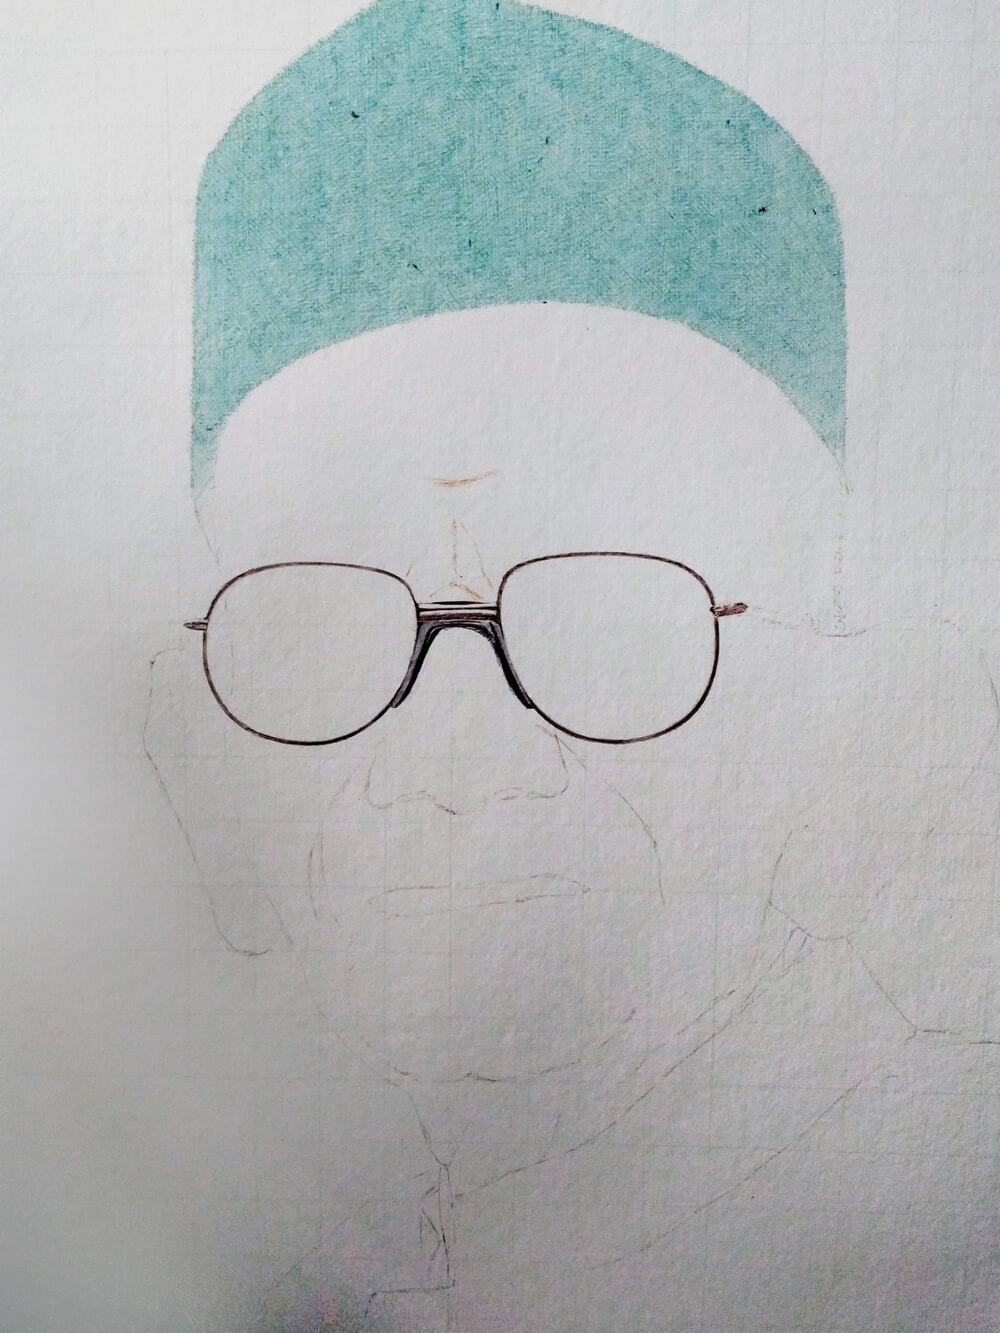
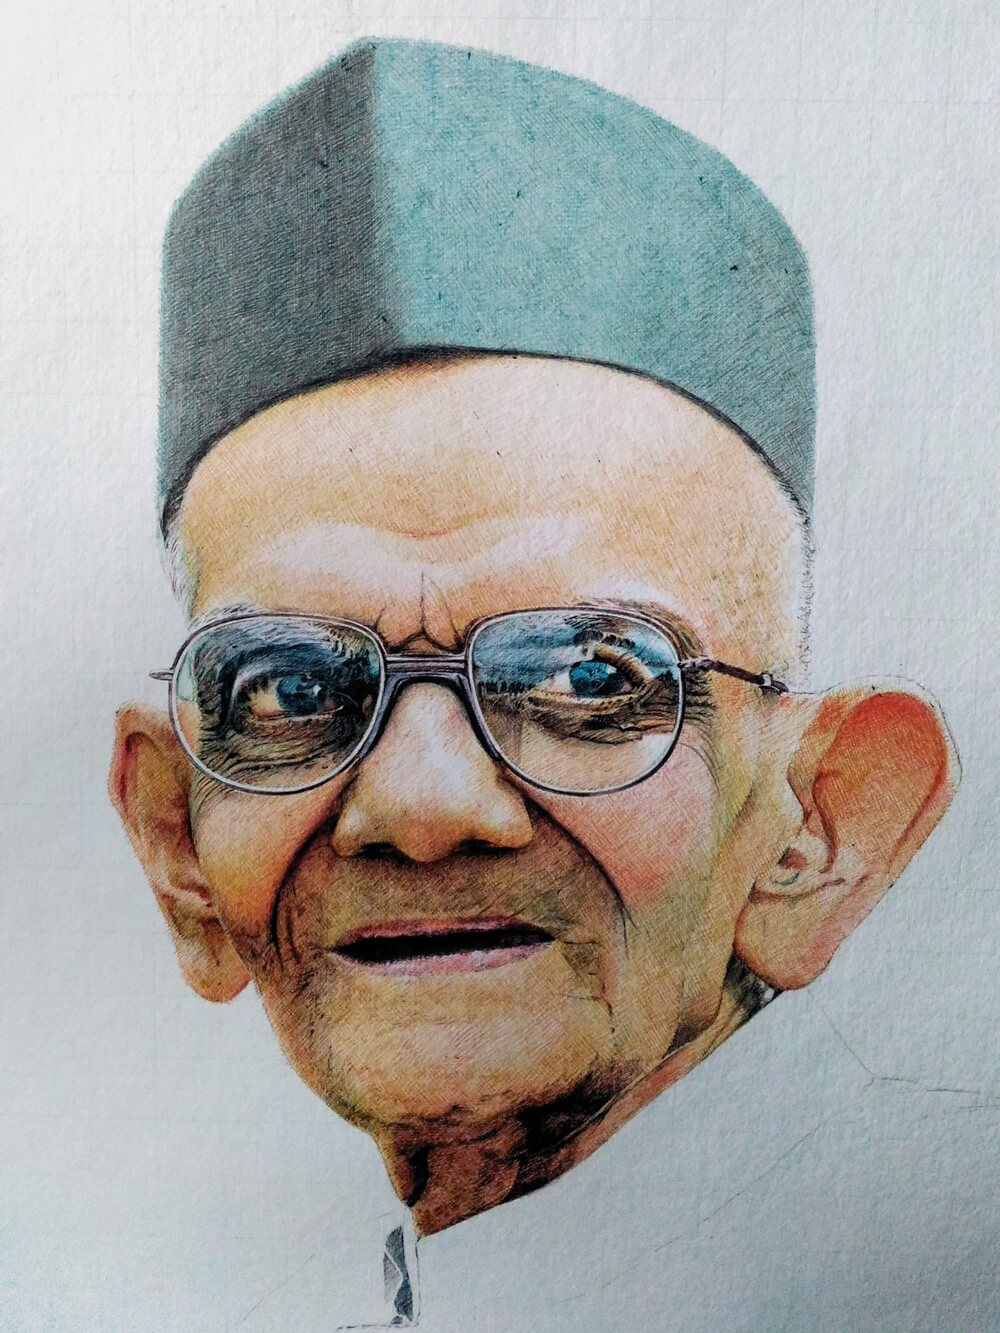
In the photo above, I started with a brown ink ballpoint pen to draw the frame of his spectacles. Then I used a green ink pen to begin to add color to the “Topi” (Cap/Hat) on his head.
NOTE: I use various cross hatching methods to fill an area. Since I am using ballpoint pen, I can only use only one color at a time, so I study the actual color/hue that is to be achieved and then break it down to its component colors and decide which of the limited available colors in my ballpoint pens are needed to be overlapped to get the final color.
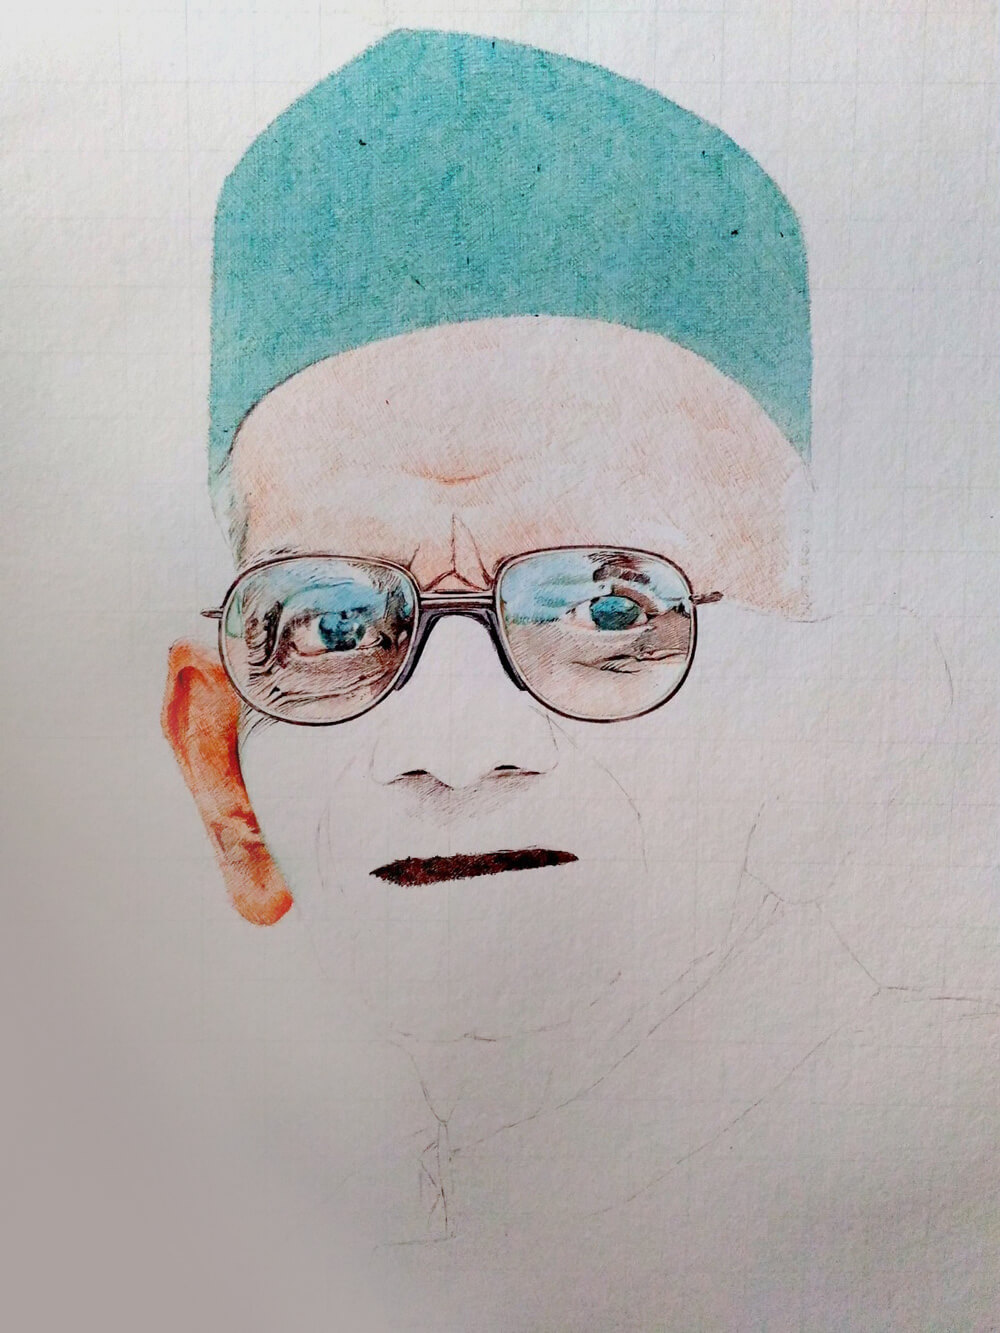
I completed the green tone on the Topi and also used a little brown lightly to draw a line on the forehead.
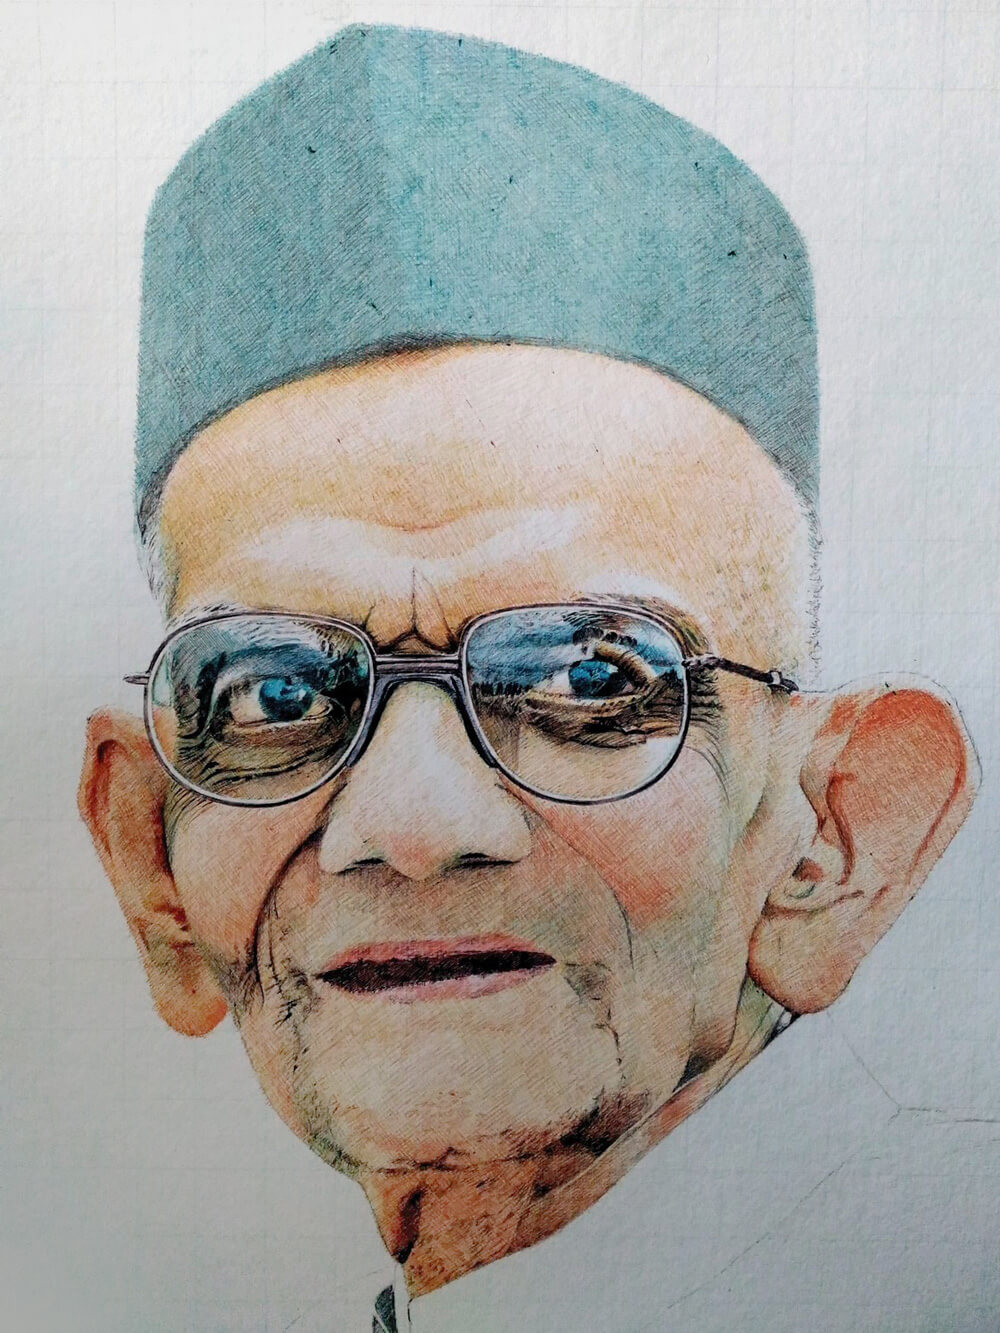
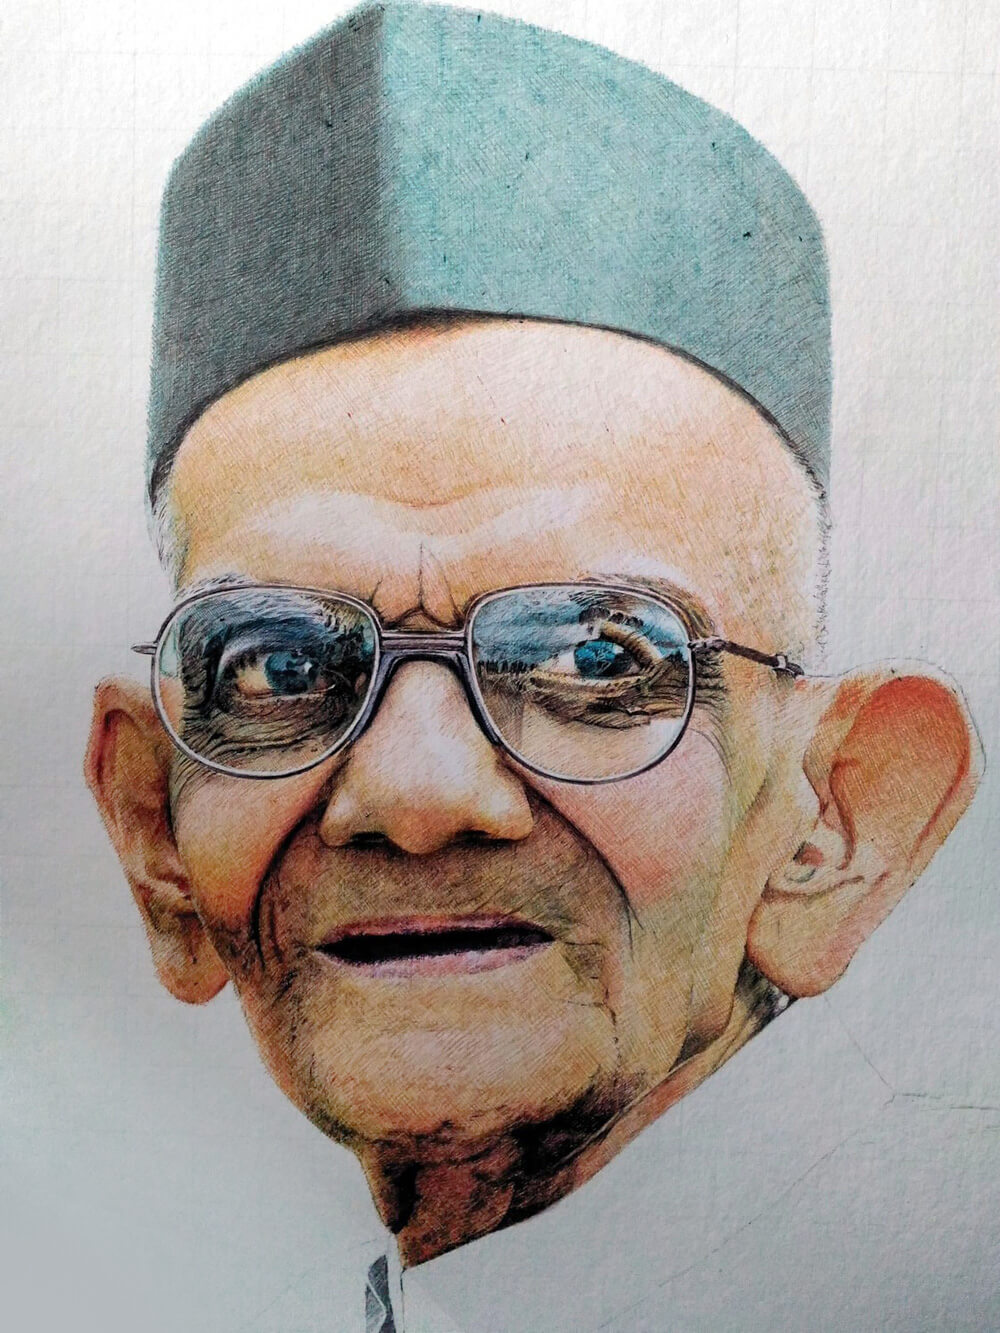
I continued with the brown ink lightly to cover the whole forehead and also around the eyes within the glasses. I also added a little light blue and green on the shine on the glasses. With the same brown I did the details of the eyes and the inside of the mouth as well. I also added the prominent orange color on the ear and then added a little shading with brown.
Now I added a little pink and red on the lips and with orange pen I colored the rest of the face very lightly. I also added a lot of details with the brown pen, like the shadow of the Topi, a little details of the hair and the details on the cheeks, nose, ear, neck and coat. I also added a little shade on the Topi with black.

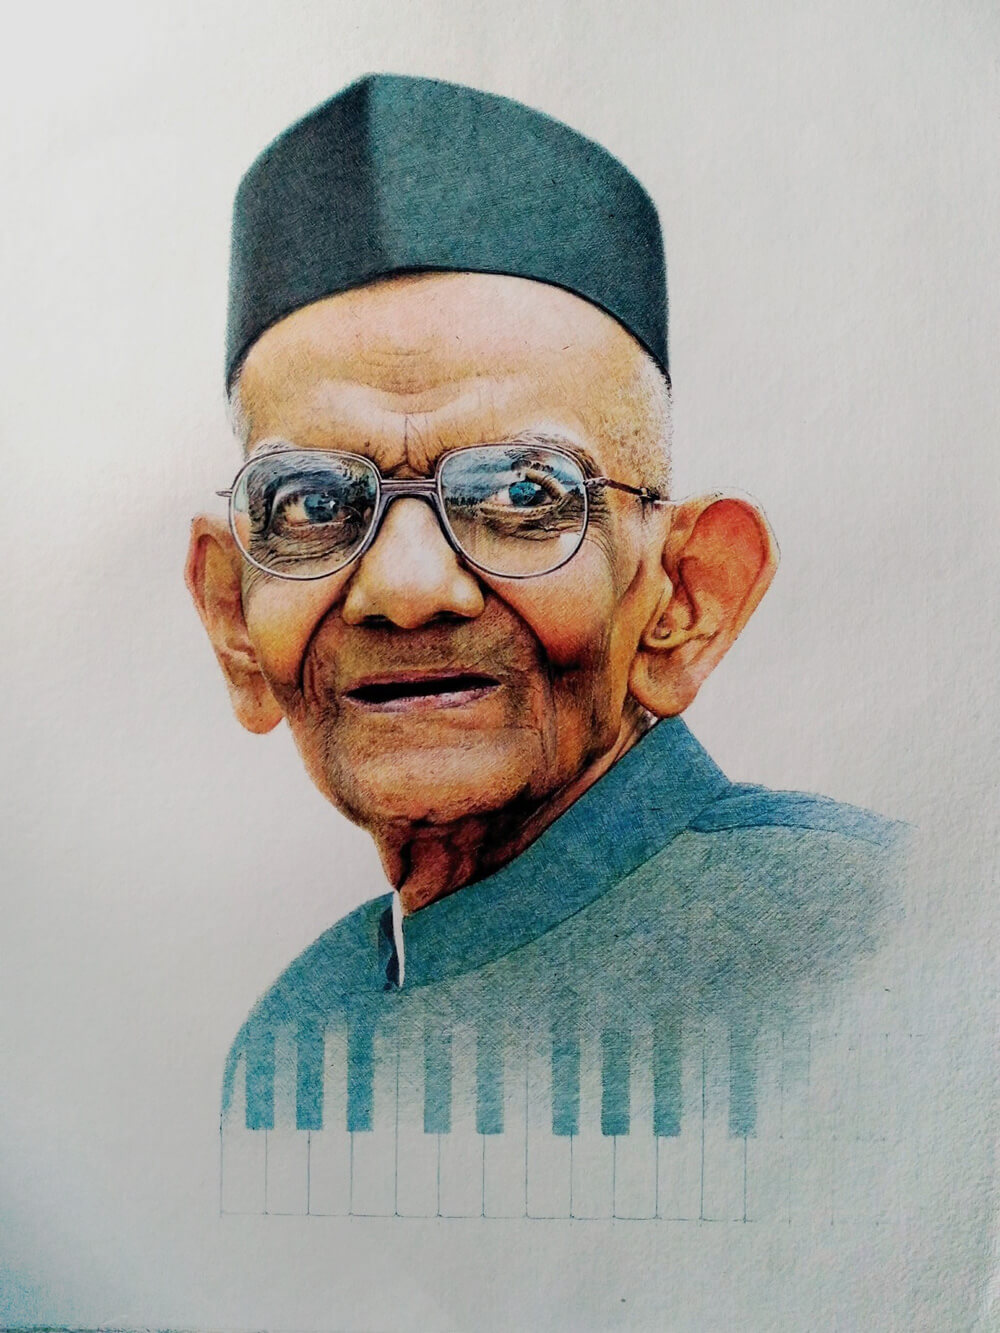
Here I worked further on the ear and other areas using red, orange, and also a little green.
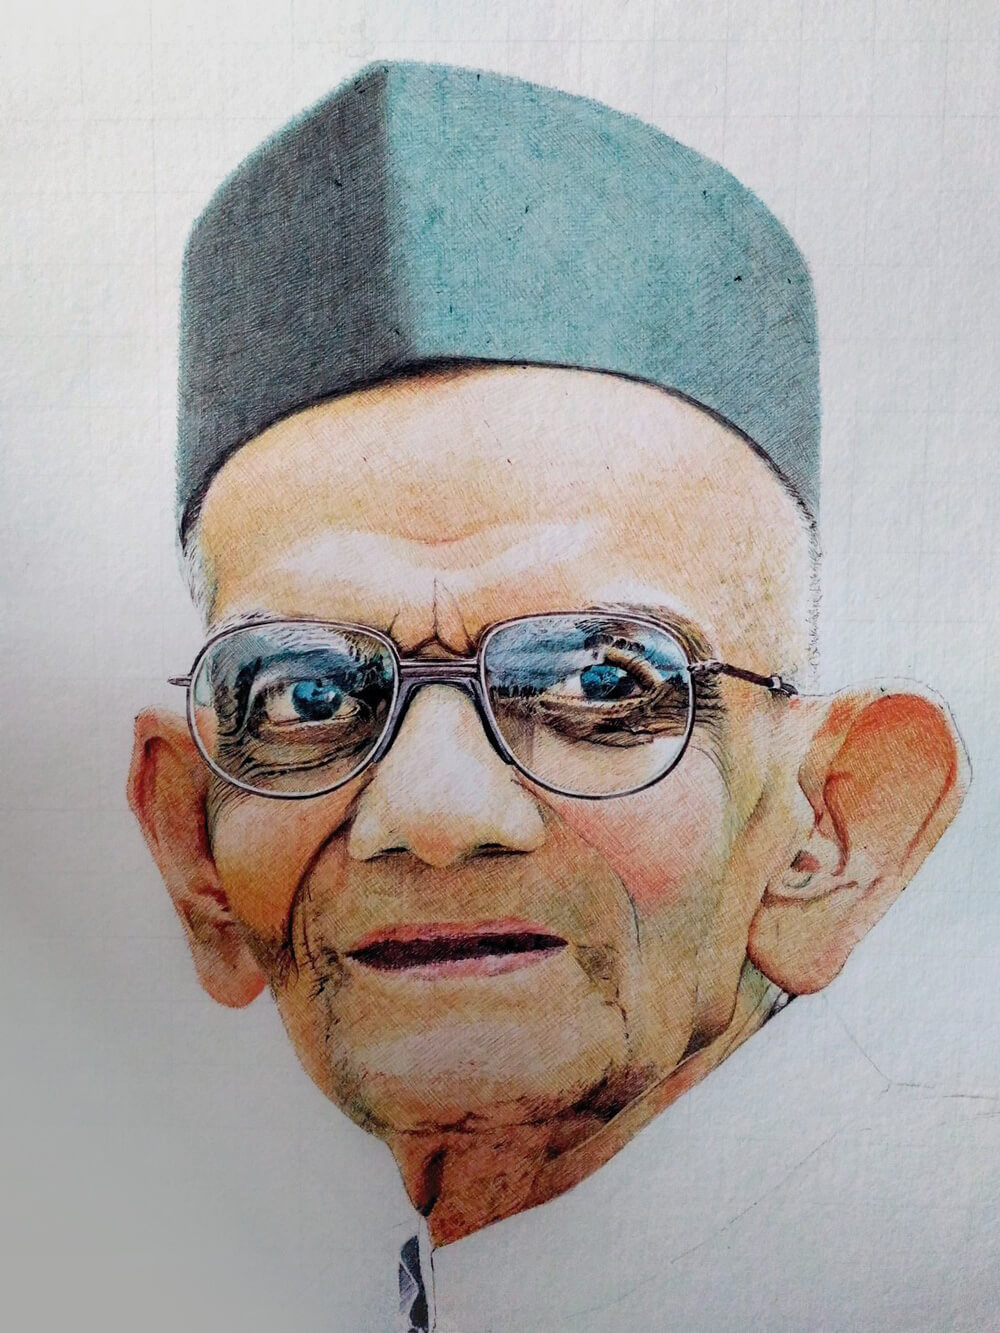
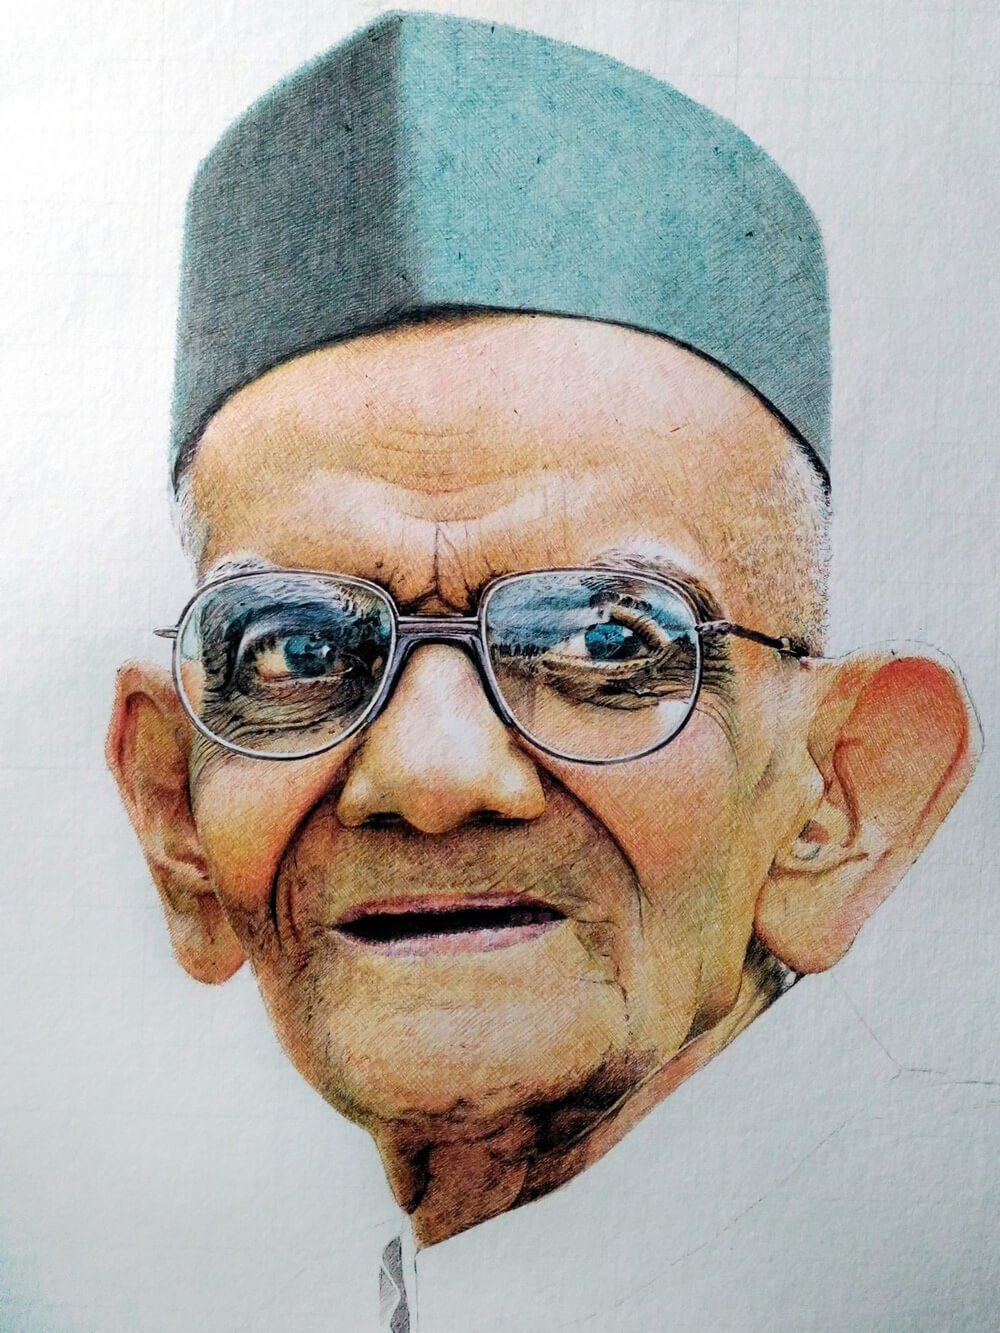
I added more green in some areas along with brown.
More green and brown were added. I also worked on the details around the eyes with brown and black.
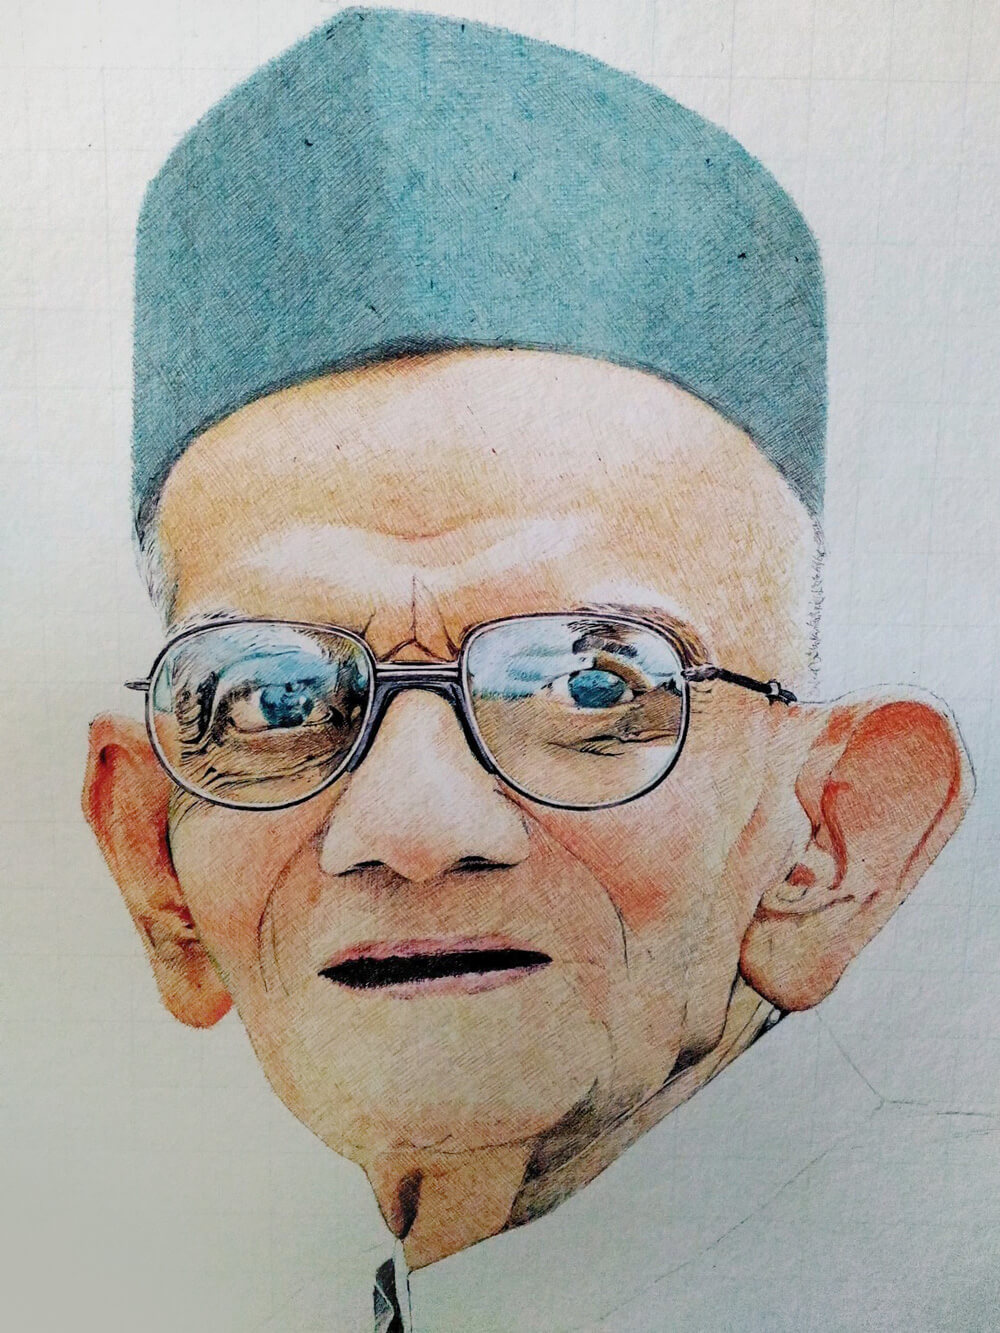
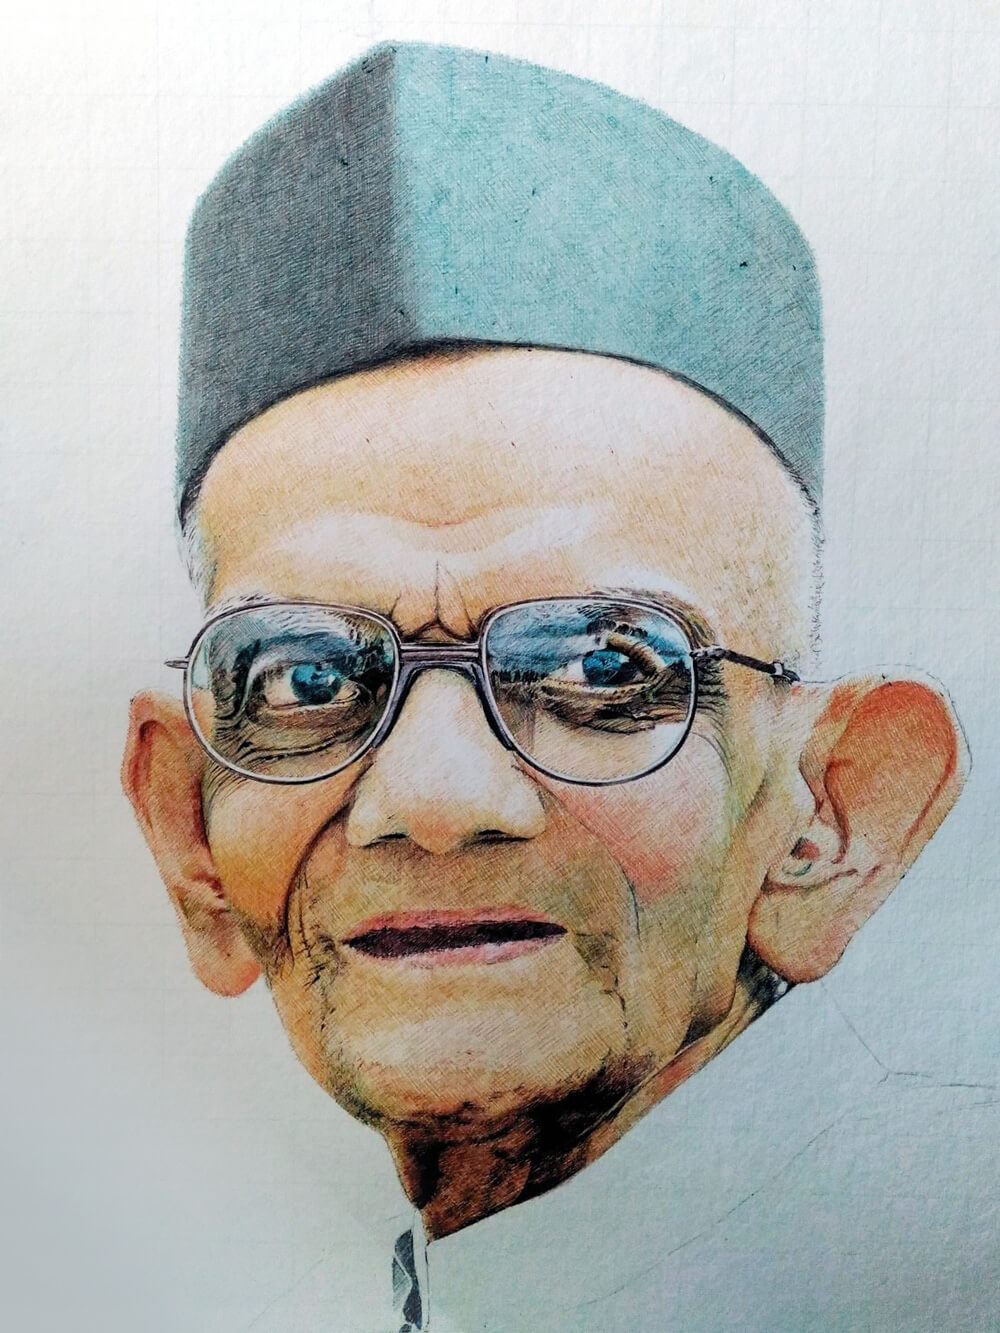
I add more black on the Topi, and deepened the shadow of the Topi on his forehead. Then I add more skin color by using orange, red, green, yellow and brown throughout.
Here I added more green on the face and deepen the shadows on the neck with brown and black.
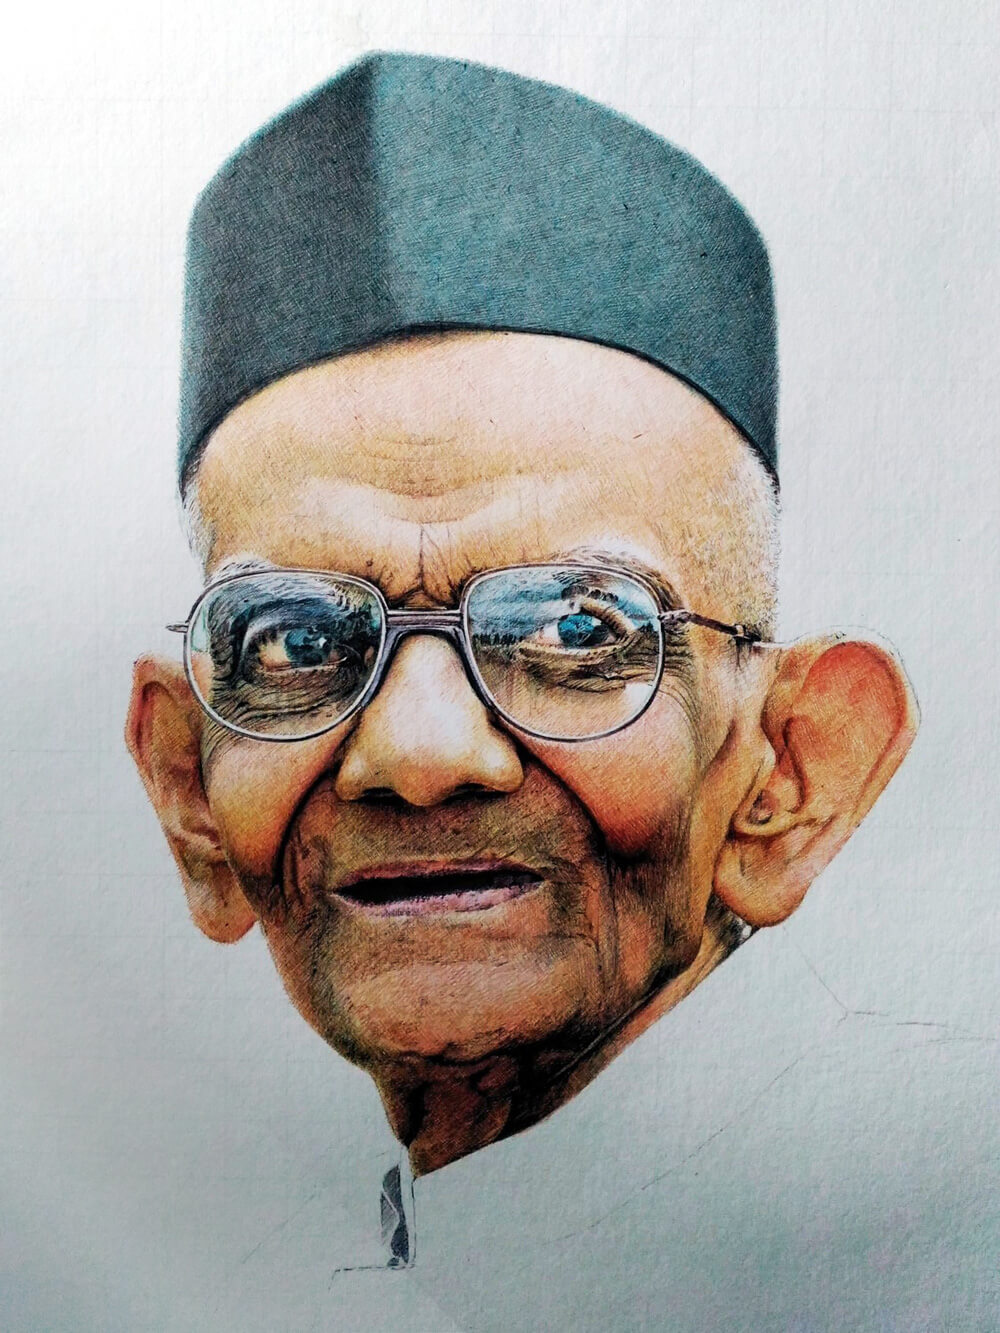
More details were added on the ear, below the nose, and around the eyes using brown, black and green.

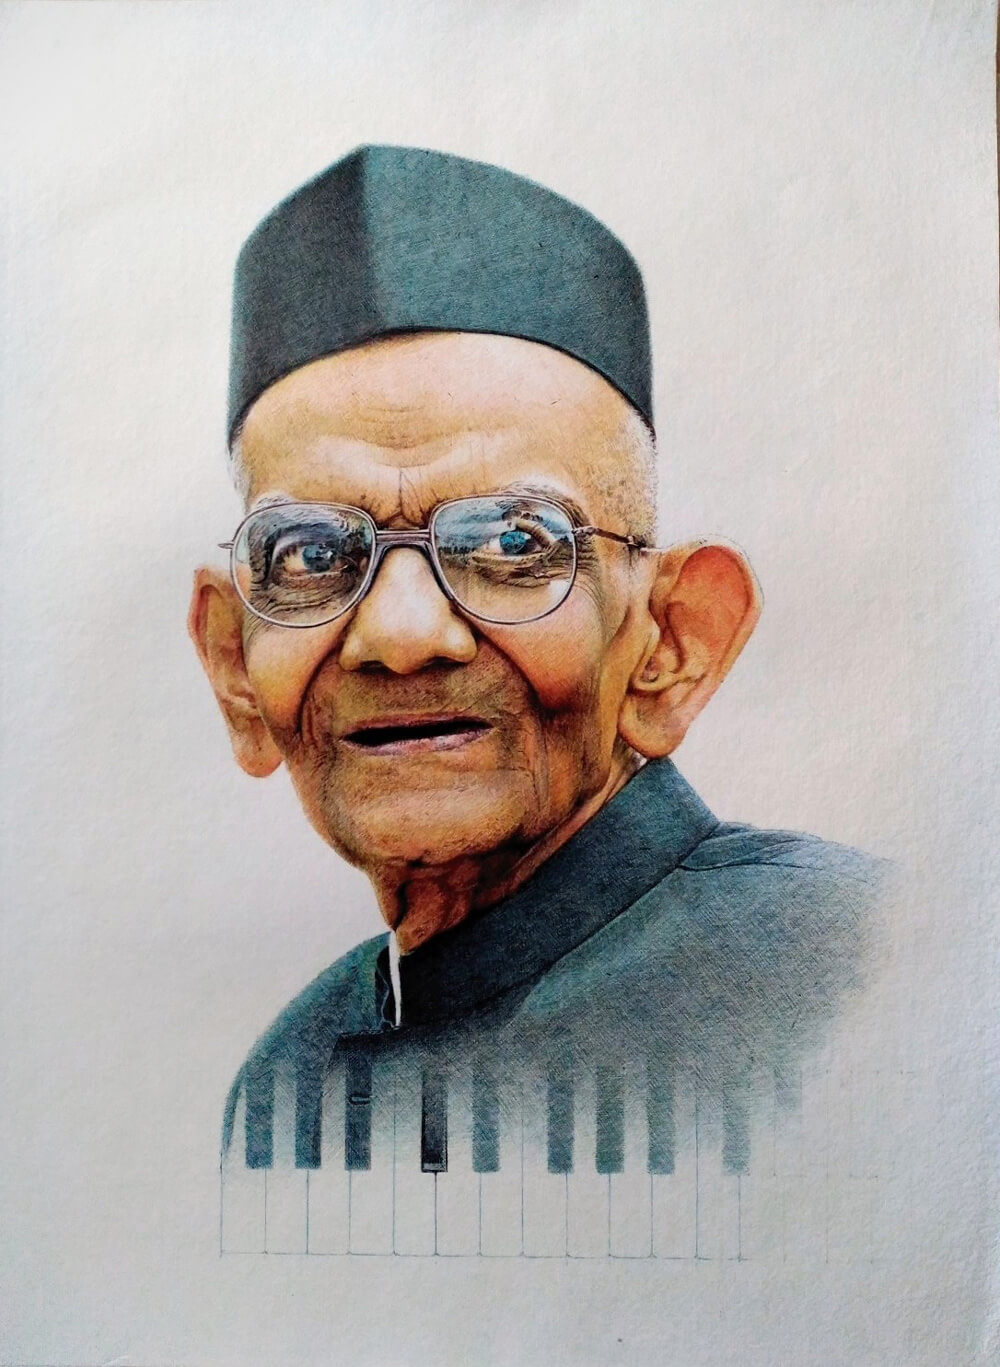
Another layer of shadow details were added below the nose, eyes, and on the chin.
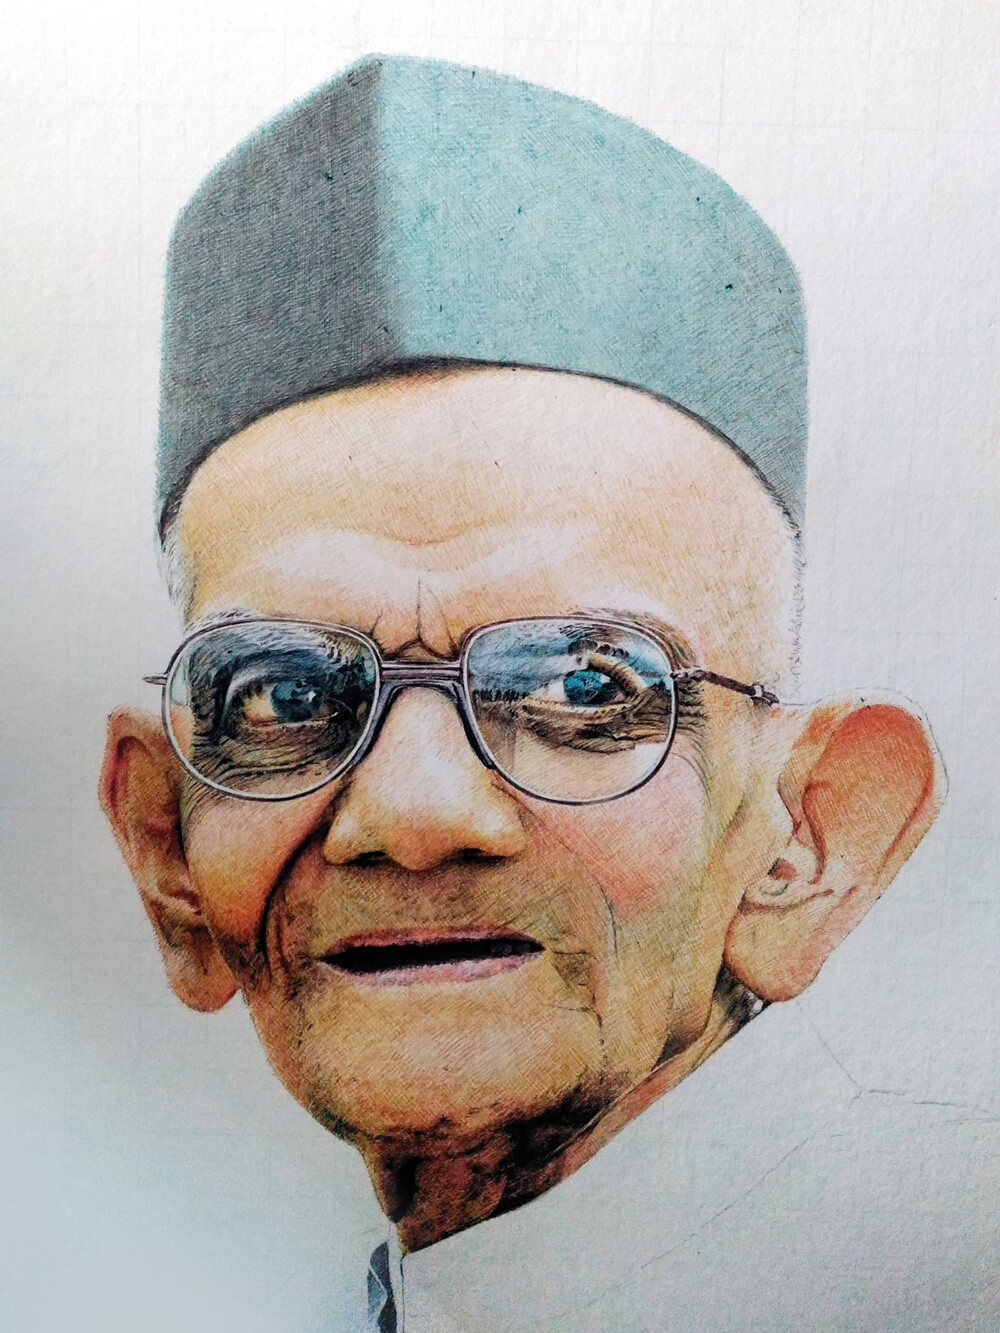
Many of the details are being fully fleshed out now, like the facial lines showing his age.
Once more I deepened the shadows on the ear, around the nose, mouth and the neck using brown, black, and green.
To make the skin tone look more lifelike overall, I added in some orange, yellow, brown and green. I also put some final details on the hair.
More shadows and details went on the face using brown, green and black ink.
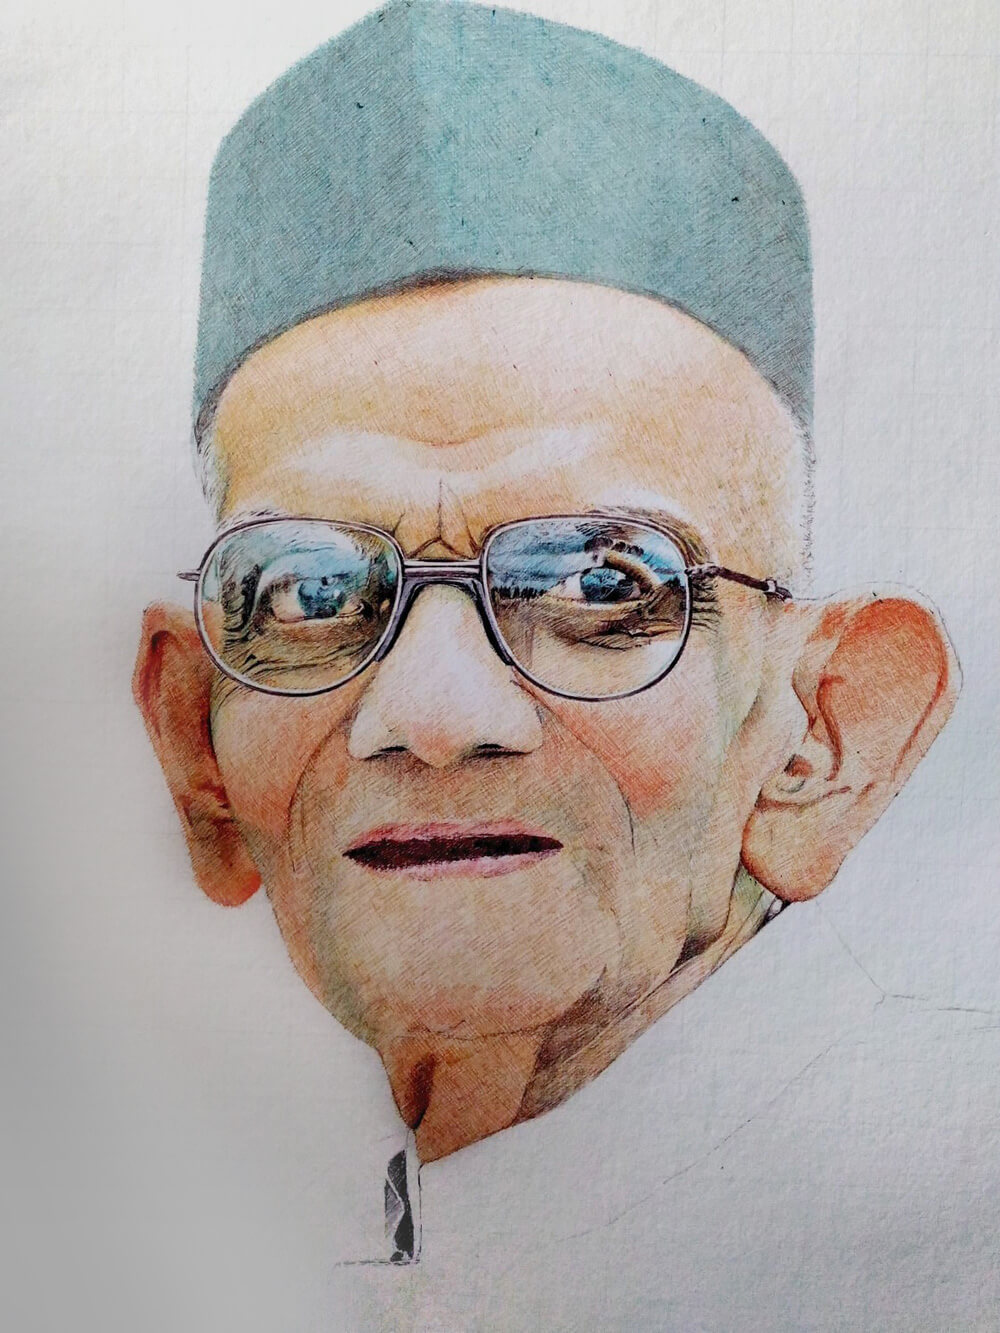
I added more black and blue on the Topi for a richer color, and also deepened the tones on the face.
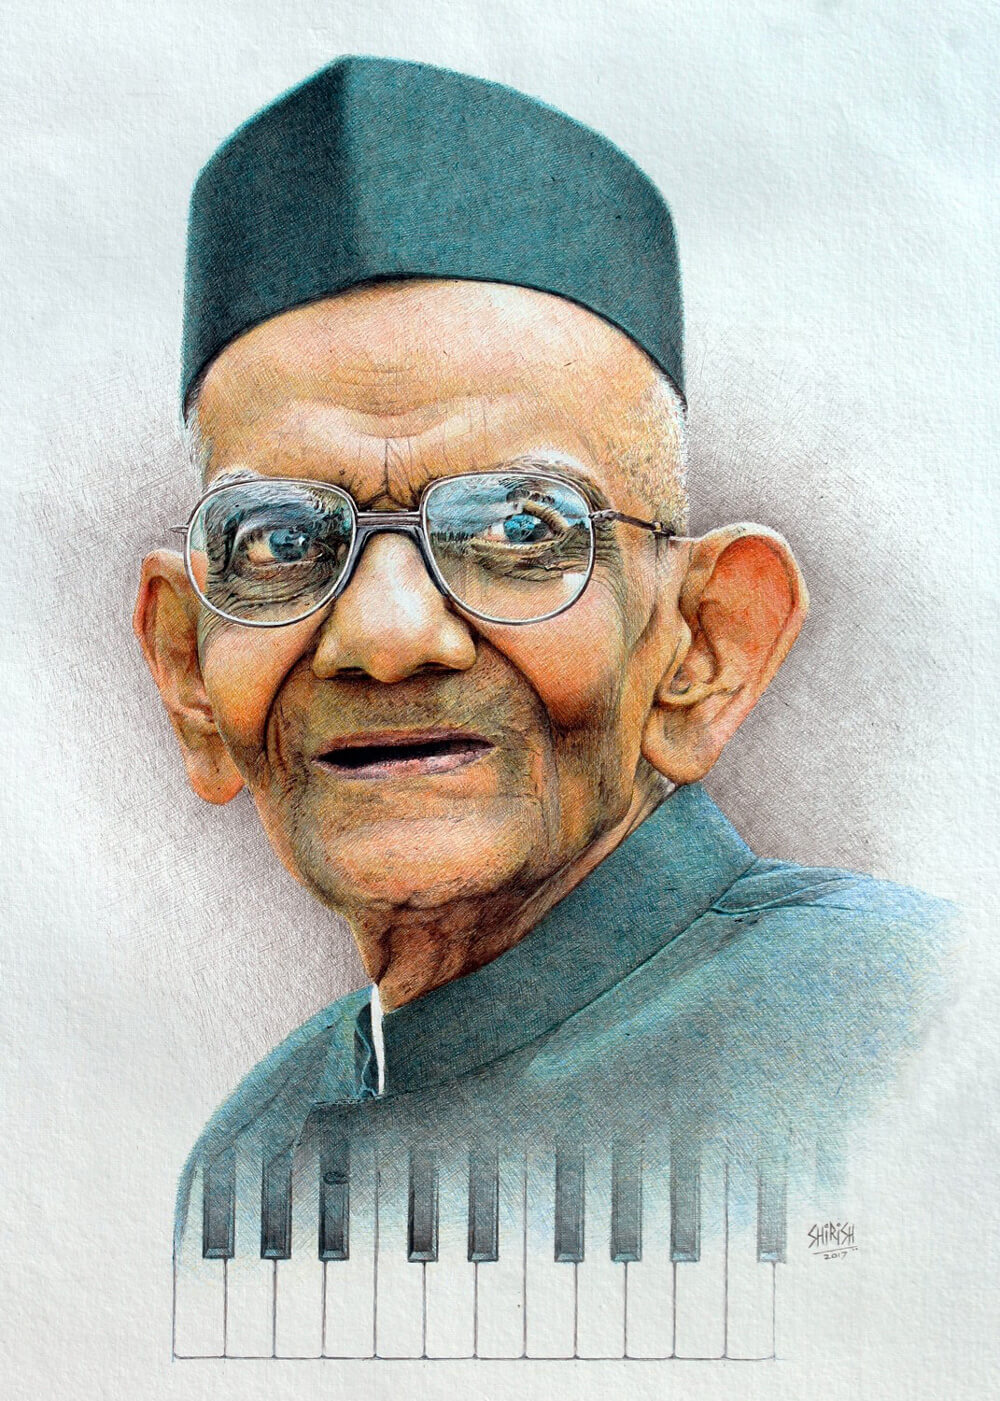
I colored the coat with blue and green, and in honor of his profession, drew the harmonium keys. As needed, I worked on the details on the face as well.
More work on the shadows in the coat and the Topi. . .
And finally, I added some light values in the background (using black) to enhance the highlights on the ears. This completed the drawing, and, satisfied with the result, I signed my name on the right bottom.
After reading the above process, it looks easy to make a drawing like this. But in reality it is quite difficult. In fact, the above text tells only about the actual drawing process and falls short of explaining the thought process that goes on in the mind while drawing.
There are numerous choices to be made when choosing a particular color, especially when drawing the tones of the skin. Ballpoint pens have many limitations when it comes to color. . . there are only about ten colors available: yellow, orange, red, pink, green, light blue, blue, purple, brown, black. I have to combine them by overlapping lines one after the other directly on the paper surface. There is no correction possible once you draw a line.
The only advantage is you can start or stop your work any time. There is no cleaning, and no mess!
During the entire drawing process (which takes about 40-45 hours to complete) I keep the reference photo in front of me. After a certain amount of time, we both connect and the photo starts to reveal what must be done to complete the drawing. I put my entire effort into getting it right. Each portrait is a new challenge.
I hope this is helpful to those of you interested in drawing portraits in ballpoint pen!
Special thanks to Shirish Deshpande for sharing his process! For more info about Shirish or to see his other fascinating portraits, please visit his Facebook page.
This post may contain affiliate links.