Ever wonder what’s the most difficult—and most time consuming—part of a landscape to draw? If you’re like me, it’s the grass. Even if your composition only has a small grassy area, it can seem to take years to get it finished, and get it right.
So anytime I find a different way to draw grass, I sit up and take notice. And since I know I’m not the only colored pencil artist struggling with this aspect of landscape drawing, I wanted to share a my latest method with you.
Ready to draw? Let’s get started!
Step 1: Lay down basic green colors in even layers
Choose two to four shades of green in a range of values and sharpen each pencil as much as possible. Then start layering your color on the paper, ideally working from a photograph to have an idea of where your lights and darks will go.
You want these initial layers to be as smooth and even as possible, with no visible pencil strokes. Most experts recommend horizontal oval-shaped or circular strokes, since those have no starting or stopping points.
Start with light to medium-light pressure. The lighter the pressure you use, the more layers you may have to draw. Be careful not to use such heavy pressure that you crush or press down the tooth of the paper, though. That will make it very difficult to add additional color.
The goal for this first layer is to have three distinct sections of different values—light, medium, and dark—with very little overlap between them.
Here was my base layer:
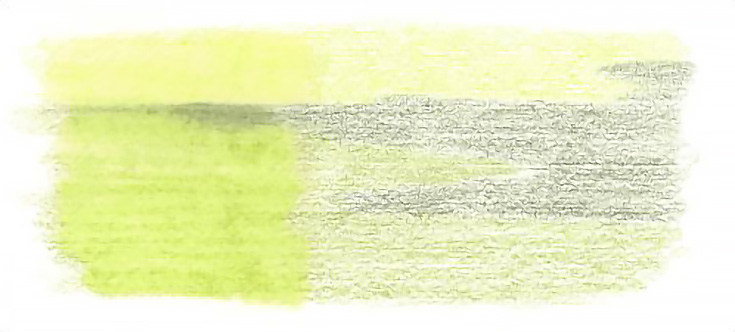
If you want, you can blend this layer with odorless mineral spirits when you’re finished. I blended the left side and left the right unblended, so you can see how it changes the final drawing. If you do decide to blend, let the paper dry completely before starting the next step.
TIP: When blending with odorless mineral spirits, wet your brush and blend in the same direction as your pencil strokes. Also, start blending in the lightest area of color, and rinse your brush between colors, so you don’t get unwanted darks in the light areas. Since my drawing was so small, I used cotton swabs for blending and used each swab just once to keep my colors separate!
Step 2: Darken your colors and values
For the second step, use the same colors to add a second layer over the top of the first one. Start to overlap your colors so your sections don’t feel quite as distinct.
NOTE: If you blend with odorless mineral spirits, you may find the next layer goes onto the paper more easily and is darker than the first layers. The second layers of color for this demo piece were markedly darker when applied over blended color than over unblended.
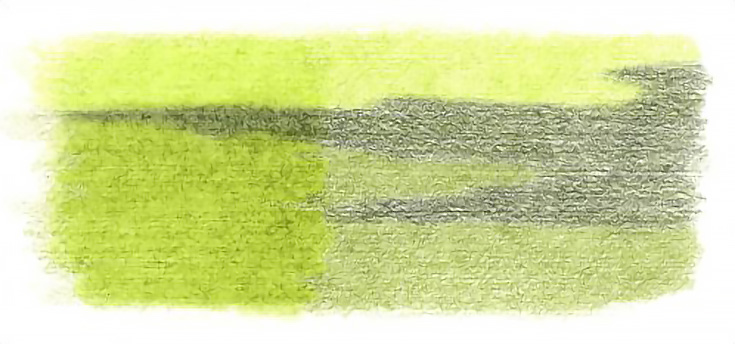
You may blend again at the end of this step. If you do blend throughout the drawing, use less odorless mineral spirits with each step. The more pigment on the paper, the less solvent you should use, or you could accidentally life the color off the paper.
Step 3: Add a unifying layer of color
In this step you want to layer the lightest color over the entire grassy area, including the shadows (even cast shadows such as I’ve drawn.) Add a couple of layers in the darker areas if necessary to provide a unifying color layer.
Then, lightly layer the middle value color over most of the drawing. Work into the lightest area, but don’t add middle value over all of the lighter values. Use light pressure and decrease the pressure as you work further into the background.
Blend again, if you wish.
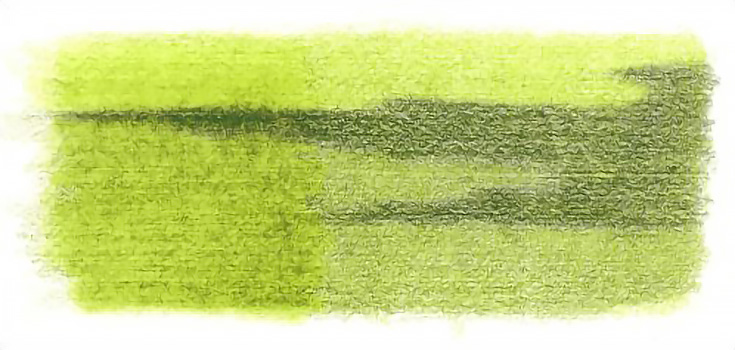
TIP: If your greens get a bit too bright, you can always tone them down with a glaze of earth tones. You can, of course, neutralize the vibrancy at any time, including after the grass is finished, but it’s easier to take this step before adding details.
I lightly shaded a neutral, light earth tone over the right side of the sample below so you could see how much difference a small amount of color can make.
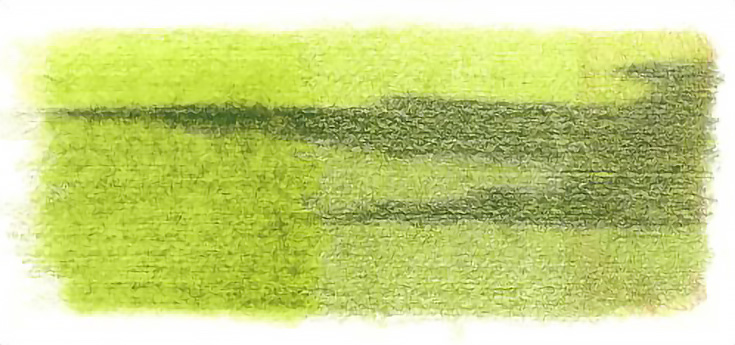
Step 4: Add grassy details
For the final step, it’s time to add details that will make the area look more like grass and less like carpet.
Use very sharp pencils and make short, vertical strokes to mimic the look of grass. You don’t have to add vertical strokes everywhere, but you can if you wish. You’ll find that vertical strokes are most effective when placed directly on the edges between your different colors and values.
So begin with the darkest value you used for the previous steps and add short, vertical strokes along the edges between the colors. Keep the strokes very short in the background—use a stippling stroke if you prefer. As you move toward the foreground, lengthen the strokes and add more variety in direction and angle.
Below, I’ve added “grass-like” strokes around the edge of the dark cast shadow (but not inside it) and along the bottom of the drawing, in the foreground.
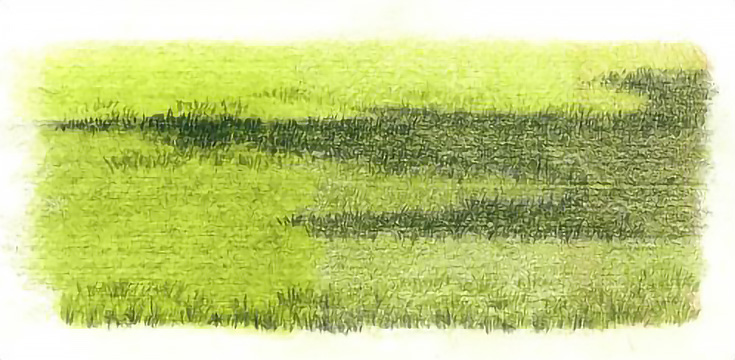
Obviously, at this point you no longer want to blend your colors, since these details are what makes the grass look like grass! :) But you can see how blending in the earlier stages gave a slightly richer, deeper color to the left of the drawing above.
TIP: If you’re drawing freshly-mown grass, you’ll want to keep these strokes fairly uniform. If you’re drawing tall grass, you have a little more wiggle room in the length and variety of the strokes.
Interestingly, this isn’t my favorite way to draw grass. I usually prefer using directional, vertical, and stippling strokes through all of the steps. But that can take a very long time, so on those occasions when a drawing needs to be done quickly or for much larger works, this method is great for speeding up the process.
If you have the time, though, feel free to cover all of the paper—or at least the foreground—with short, varied strokes like this, to emphasize the grass:
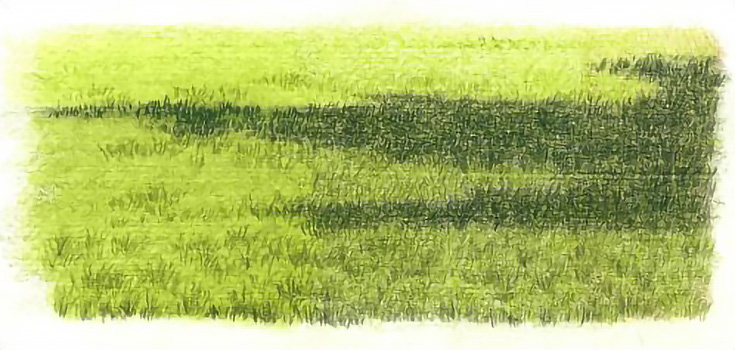
As you can see, the results are definitely worth it!
This post may contain affiliate links.