My good friend Susan has taken the leap in a new creative venture—and I’m so proud of her!
I wanted to make something special just for her today, so I went into my garden to check out what was blooming. Alstroemerias (Peruvian Lilies) were at their peak and an herb, Purple Sage, caught my attention. Hadn’t thought they’d ever team up—but their complementary colors presented the opportunity for an interesting arrangement.
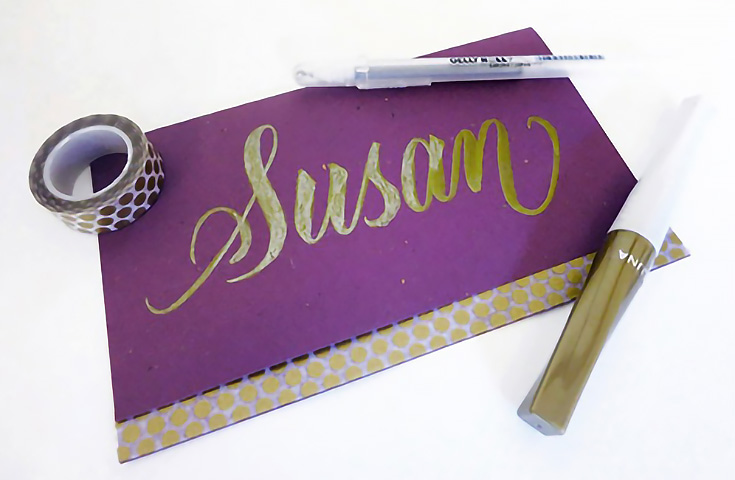
After repurposing a square vase (these are so travel friendly) it still needed something. A card? Yes, with her name on it! I gathered festive Washi tape, a Wink of Luna (Zig) gold brush marker, and a gold and a silver Sakura gelly roll pen.
Follow along with these next few steps to create a personalized card of your own:
The first step is to letter the name with the Wink of Luna brush pen on heavy paper. Then take the Sakura gelly roll pen to cover the darker gold, using any drawing technique (scribbles, circles, back and forth) you like. This makes the name glittery.
NOTE: Above you can see the original gold name at the right and the glitter effect on the left. l made several layers with the gelly pen for maximum sparkle.
Next, attach a strip of washi tape at the lower edge, fold and trim the card, and add more polka dots (some large, some smaller) around “Susan” using just a Sakura pen. On the inside, write a themed verse, such as: ‘May your days be dotted with much success. Love . . .”
For the final touch, I added a green and purple wired bow. It looked pretty special, just like I’d hoped! Attach the card to the bouquet, or just present it on its own. Here’s how the finished gift looks:
What do you think—I’m glad I spent a bit more time to make it special by hand!
I hope you enjoyed this tutorial! Check back for more soon. In the meantime, please visit me on Facebook. Blessings on your day!
This post may contain affiliate links.


