NOTE: Special thanks to Craftsy for giving us free access to review “Sketching People in Motion” and for creating a 50% discount on this class for EmptyEasel readers (good through June 15th, 2015). All links included in this article are affiliate links, and help support EmptyEasel.com; any opinions presented are my own.
Sketching people out in the real world is a unique way of recording your environment. There’s no “off” switch on your subjects—no way to slow down time, or keep them in the perfect position for your composition.
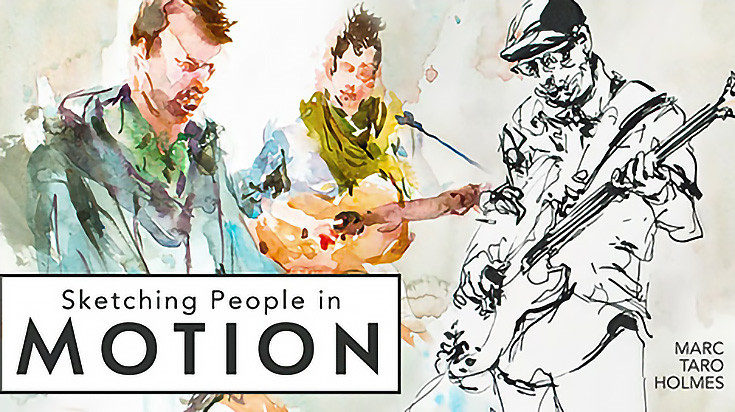
Instead, when you’re drawing people from life, it’s all about reacting to the moment, and Marc Taro Holmes (a sketchbook artist and plein air painter with 15 years in the concept art industry) is the perfect instructor at Craftsy to teach it. If you’re an illustrator, a figure drawer or painter, or just looking to improve your on-location artwork, this class will definitely help.
There are seven video lessons that make up this course. Here’s what’s included in each one:
Lesson 1. Gesture drawing instruction
In lesson one, Marc works with a reference video (which is shown alongside his sketchpad in a split-screen format, so you can see exactly what he sees) and demonstrates how he captures the motions of the person he’s watching.
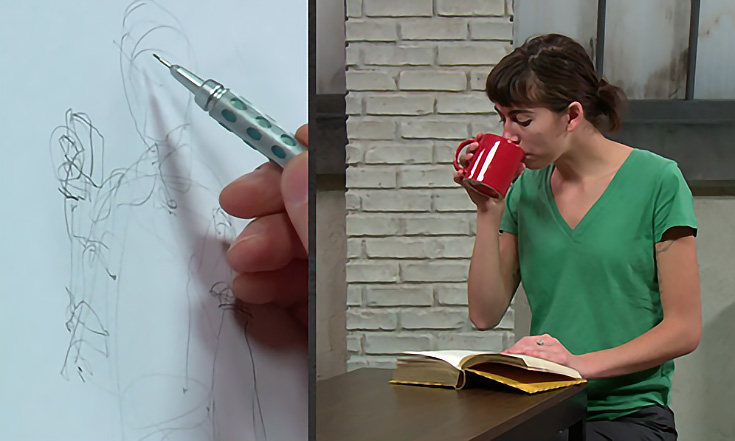
He covers topics like working from large to small, focusing on the major shapes of the figure (torso, then head, etc) and not worrying about details like facial features which you can fill in later. He also discusses the concept of “anchor points” and how drawing those can help you finish a drawing even after your subject gets up and walks away.
It’s fantastic to see how Marc knows (from long practice) which important elements to draw first, and explains why he’s choosing those as he draws.
To cement his instruction, he goes on to a second figure, and then a third figure, in different poses, and talks through his decisions again, showing just how loose you can be at this stage, and giving several more tips on how to make sure you’re getting your proportions and angles correct.
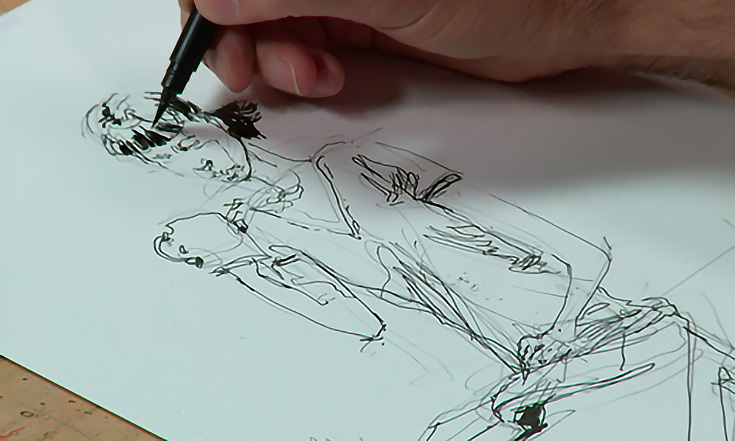
Lesson 2. Adding ink
Marc continues in lesson 2 with tips on how to keep your drawing loose and free, even when adding ink. He shows how to “paint” with a pen, focusing on the shadow areas so you can add color in later where the light hits, and create a fully-realized shape.
Some of the other tips he gives in this lesson are where to look for shadows, how to create “open lines” and how to focus on important areas on your drawing to capture the essence of the person you’re drawing.
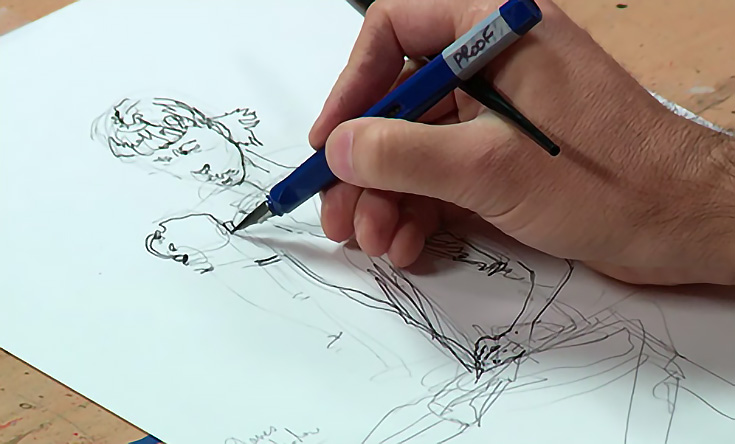
The continuity of the lesson is great, because you see each subject from lesson 1 get fleshed out more fully in pen and ink.
Lesson 3. Using brushwork and hatching
In lesson 3, Marc introduces a new tool (very important to this step) called a brush pen. He also explains the importance of “eye magnets” and “breadcrumbs” in your drawing, and then demonstrates a few different ways to reinforce the scribbled shadow shapes from lesson 2 with loosely-painted marks that will help keep the movement of your drawing alive.
Moving on from the brush pen, Marc discusses his philosophy of hatching, and how he uses it to add not only large shadow shapes, but also direction and flow to a drawing. For areas of very dark value, he switches to a paintbrush to cover the area more thoroughly.
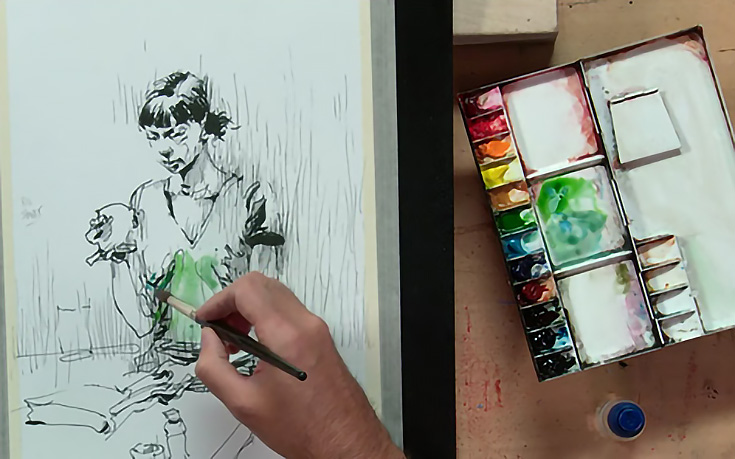
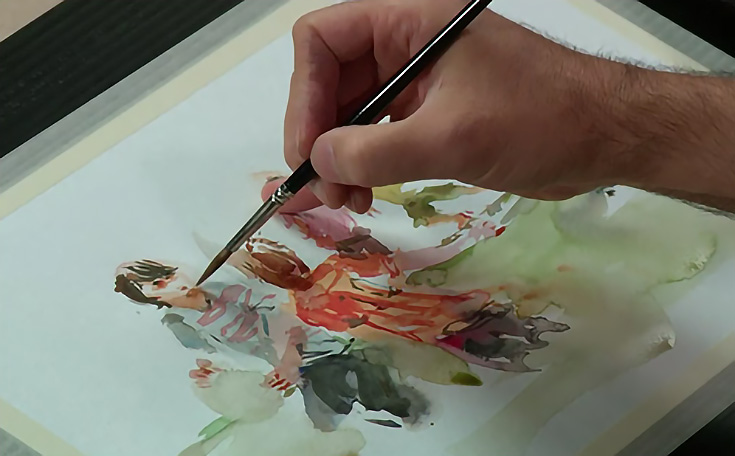
Lesson 4. Adding color
In this lesson, Marc starts by explaining how he chooses the colors for his painting palette, which he keeps somewhat limited to enable quick painting on location. He also gives several helpful tips for managing all the different brushes, water containers, and papers that watercolor painting—even quick sketches—require.
Whether you’ve used watercolors before or not, I think there’s enough information included in this lesson to pick up the process and add color to your drawings.
In fact, it’s a lot simpler (in my mind) than most watercolor lessons, since the emphasis is on quick color that builds off of the pen and ink you’ve already put down.
Lesson 5, 6, & 7. Advanced techniques
In the first few minutes of lesson 5, Marc shows how effective water-soluble ink can be at speeding up sketching and painting. Just by adding water to an existing water-soluble ink sketch, you can create realistic shadow shapes in seconds. As he puts it, it’s a “two-for-one” medium.
Painting watercolor sketches directly (with no pencil or ink outlines) makes up lesson 6. Since there’s no ink to put down before adding color, the process is faster, but the method is quite a bit different. Marc demonstrates exactly how it works by painting “silhouette” shapes, and then building up overlapping color for extra detail.
In the final lesson, Marc looks at the whole picture—creating finished compositions that tell a story, often with a variety of subjects and key “action” scenes.
I can easily recommend this class—there’s plenty of good instruction, and Marc makes it very easy to follow along and see how he gets from point A to point B. If you’ve ever taken any kind of drawing class, and you want to get to the next level by adding color or drawing realistic movement, this is an inexpensive way to start.
Make sure to view the required materials before you start (water-soluble ink isn’t in every artist’s toolkit, nor is a brush pen) but the rest of it seemed fairly standard.
For any other details, or if you’d like to sign up while the 50% off coupon is active, check out the class page and click on “ratings & reviews” to see what other artists are saying—if you end up taking the class yourself, I’d love to hear what you think!
This post may contain affiliate links.