Previously, I’ve explained how to use rubbing alcohol to blend colored pencils, and yes, rubbing alcohol is great for light blending. BUT. . . what if you want a more thorough blend? Or to blend heavier layers of color?
In that case, you need rubber cement thinner!
Not only is rubber cement thinner (I use the brand Bestine) ideal for blending heavy layers of color, you can also use it to correct or cover up nasty mistakes. Case in point, the drawing I’m using for today’s demonstration is one of those “mistakes.”
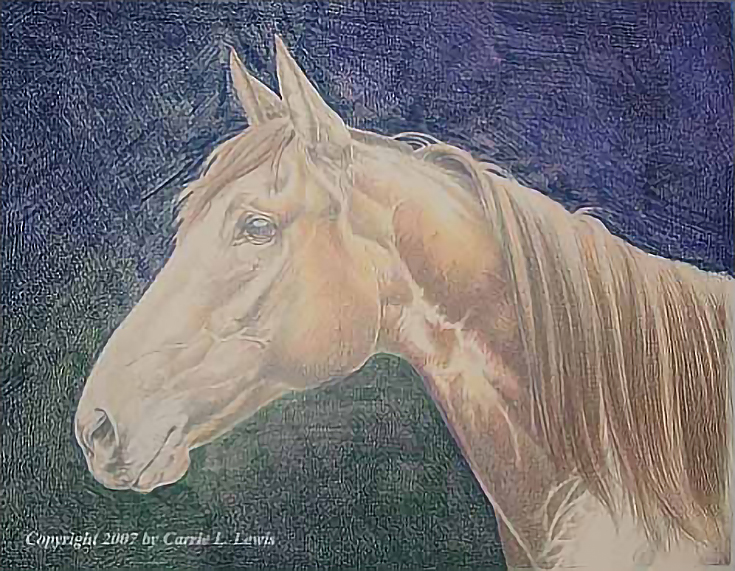
Below, you can see how I established the lights and darks and basic local colors successfully, then tried to create a landscaped background. The result was so displeasing that I tried lifting as much color as I could, and then attempted to blend the remaining color with ordinary paint thinner.
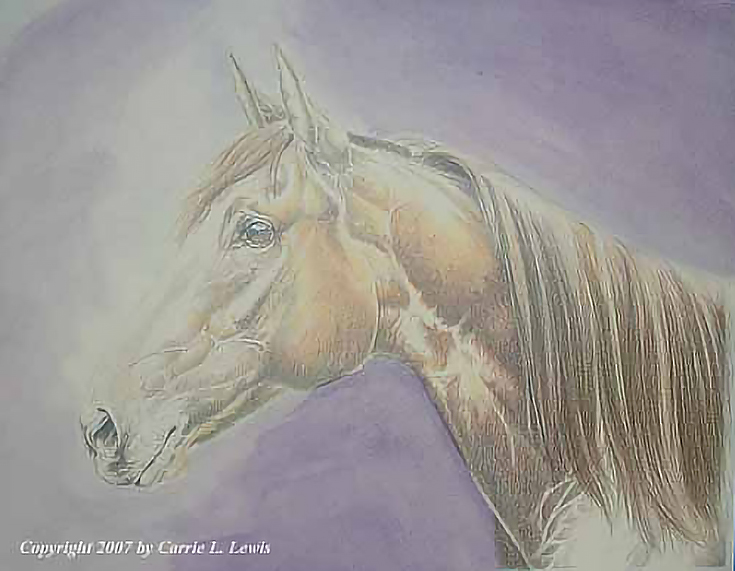
By the end of all that, it looked even worse. Disappointed, I set the drawing aside and forgot about it.
When I decided to try blending colored pencil with rubber cement thinner, this drawing was the perfect subject. I didn’t think it was possible to ruin it—it already looked ruined—and there was a chance it could be saved (a lesson to never throw any drawing or painting away, no matter how bad you think it is!)
Step 1. Cover up the mistakes with lots of layers
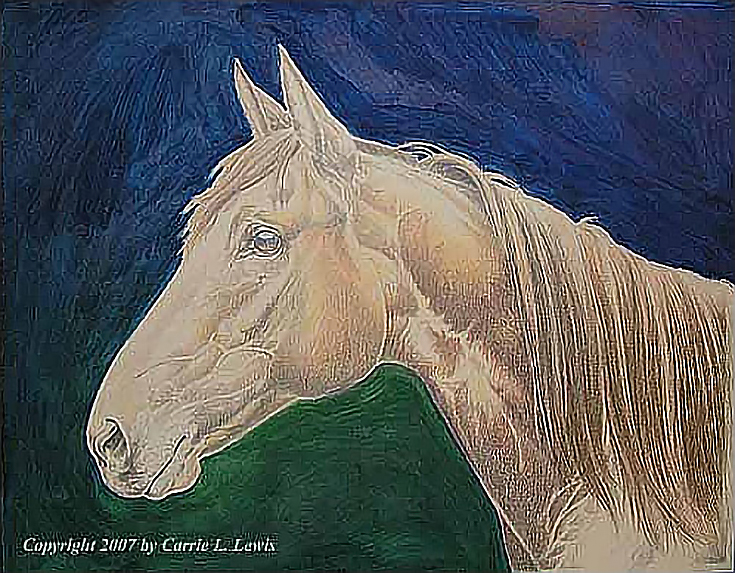
The first task was covering the mistakes in the background. I applied broad blocks of color over the purple wash using Prismacolor thick lead pencils. I used Indigo Blue, Ultramarine Blue, and Violet Blue, mixed with a little bit of Green in the top half.
The mixture was reversed on the bottom half, with the predominant colors being Grass Green, Peacock Green, and Dark Green toned with a little bit of Indigo Blue.
Strokes were broad and loose and applied with medium to medium-heavy pressure. I hatched and cross-hatched to get good layering and create random lights and darks. The purpose was to lay down as much color as quickly as possible.
Step 2. Blend all layers with rubber cement thinner
When the color was as deep as I wanted it or thought I could make it without scuffing the surface of the mat board, I took everything outside, where I blended and worked the color layers with rubber cement thinner and a well-worn bristle brush.
NOTE: This brush was once a standard oil painting brush, but now its bristles are worn down to less than half their original length. This makes it next to useless for oil painting, but perfect for the task at hand.
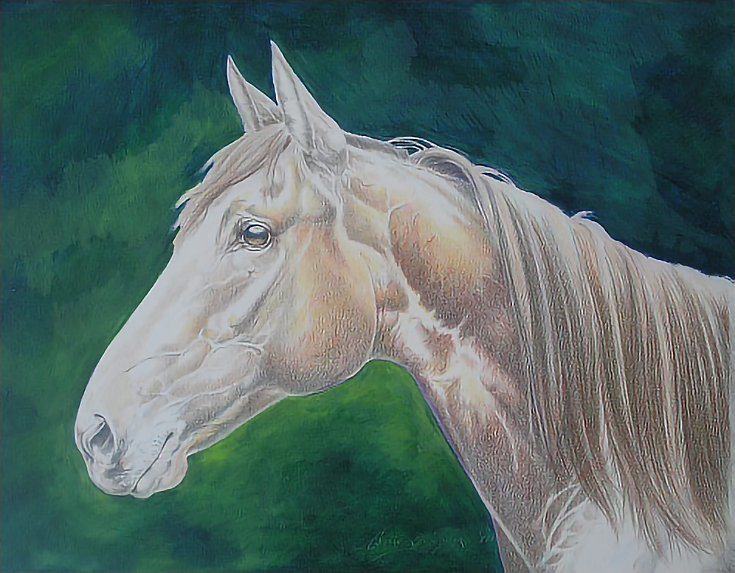
The first round of blending wasn’t very impressive, so I blended again, scrubbing lightly (and sometimes not so lightly) to produce a color field that was as evenly saturated as I could make it.
The end results were not at all what I was looking for. Visible brushstrokes were everywhere, with no way to smooth them out. This left chunky blocks of color with too well-defined edges. They were nice colors, but overall it wasn’t a very pleasant look.
Disappointed, I set the drawing up to dry thoroughly. I wasn’t convinced it was ruined, but I didn’t have a lot of hope for it, either.
Step 3. Repeat as needed
One of the advantages of this method of blending is that rubber cement thinner removes wax buildup and restores the tooth of the drawing surface. New color can be added over each blending as easily as on untouched mat board.
So once the mat board was dry, I layered Indigo Blue, Dark Green, Grass Green, Chartreuse, and Yellow Chartreuse over the background. Once again, I used wide, sweeping strokes in multiple directions and repeated layering of most of the colors. Color was applied with medium-heavy to heavy pressure and I used a facial tissue (non-lotion) to blend color when I’d worked my way through all the colors.
Then I added more layers of color and blended again with facial tissue. The third time, I added Apple Green, Peacock Green, Light Green, and Deco Yellow to the palette.
Next, I used Yellow Chartreuse, Chartreuse, Light Green, Apple Green, Deco Yellow, and French Grey 30% to burnish the previous layers and it was ready for rubber cement thinner.
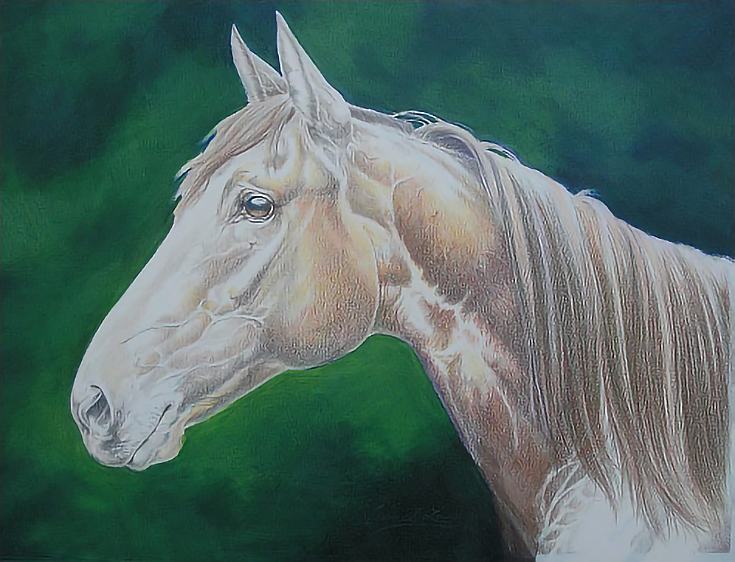
Once again, I used a bristle brush to apply the thinner and scrub the drawing. Repeated layering and blending produced a background I loved. I finished the drawing without doing anything more with the background than a few touchups after the horse was finished.
Overall, blending with Bestine was an excellent way to repair a background I didn’t like and to salvage a drawing. The mat board withstood even the most vigorous scrubbing with the bristle brush and it dried without buckling after heavily applications of rubber cement thinner.
It’s also a great method for producing rich, luminous color in any drawing.
Additional tips for using rubber cement thinner
• As with all solvents, work in a well-ventilated area. Outside is preferable.
• Rubber cement thinner works best with heavy layers of color. You can completely cover one layer with another layer (or more than one) and all of the layers will blend. Blending even works on areas that have been burnished. The less color on the paper, the less successful the blending will be.
• Test a scrap piece of paper before working on your drawing to make sure the support you’re using will stand up under blending and won’t buckle as it dries.
• Experiment with new methods before trying them on artwork. See what you can do with thin and thick layers of color, with sable or bristle brushes, and with cotton swabs or cotton balls.
• Allow at least thirty minutes of drying time after blending. Not only does the support need to dry; you also want to give the rubber cement thinner ample time to evaporate and the fumes to disperse. I generally let drawings dry over night in a well-ventilated area whenever possible.
• Always test first! I’ve never used rubber cement thinner with oil-based colored pencils, so the techniques described in this article may or may not work with such pencils. Try it on a small scale before jumping in completely.
Good luck!
This post may contain affiliate links.
