Today I’ll be continues my current series exploring the Flemish method of painting.
In my first article, I demonstrated how to draw the composition, ink it, and add the imprimatura layer. My second article described painting the umber layers. The next step in the Flemish method is the dead layer, which is our topic for today.
Let’s dive right in!
1. Test the dryness of the paint
It’s important to make sure the paint is completely cured before the next painting session. To test your previous work, lightly scrape it with a razor blade or some other sharp tool. Use very light pressure so you don’t damage the paint film.
If paint comes off in a roll along the edge of the razor blade, it needs to dry a few days longer. If paint comes off as dust or powder (as shown above), it’s dry throughout and ready for new work. A good rule of thumb is to begin checking a painting after four weeks, then check it each week thereafter until it’s dry.
2. Prepare your canvas for new paint
Because so much drying time is required between layers (up to seven weeks in the later stages), it’s important to prep the painting surface so it will accept new paint.
Using your hand, rub a small amount of linseed or walnut oil over the surface of the paint. The warmth of your hand helps the oil penetrate the paint film, creating a better bond between the previous paint and new paint. Remove any excess oil with paper towel or a clean cloth and you’re ready to paint.
3. Mix paint colors for the dead layer
In the Flemish method, the dead layer is actually a grayscale layer (it’s “dead” because of its lack of color). The colors you’ll need for your dead layer are traditionally mixed from Flake White, Lamp Black, Yellow Ochre, Prussian Blue, and Burnt Umber.
NOTE: Flake White does contain lead. If you decide to paint with Flake White, use it with caution. Titanium White is an acceptable substitute without lead.
It’s a good idea to mix a range of grayscale colors before starting to paint. A good dark mixture is two parts Lamp Black, one part Burnt Umber, and a small amount of Prussian Blue. Then for your lightest value, use Flake White (or Titanium White) with a small amount of the dark mixture to reduce the intensity.
Next, mix a middle tone with two parts of the dark mixture and one part of the light mixture. Then mix five intermediate tones between the light and middle mixture and five more between the middle and the dark mixture.
If you’d like, you can adjust your grayscale values with Yellow Ochre, Burnt Umber or Prussian Blue to get warmer or cooler tones. The “cooler” your dead layer is, the brighter and warmer your color glazes over the top will appear, so keep in mind how you’d like your final painting to appear.
4. Paint the dead layer
Since there’s already a detailed umber layer on the canvas, you’ll want to match the values of the dead layer to the values of the umber layer with small test strokes. Ideally, you shouldn’t have to change the value from umber layer to dead layer, but adjustments can always be made one step lighter or one step darker if necessary.
Here’s where we left off with my painting in the last article:
It’s best to begin painting the darkest values and work into lighter areas. Use two brushes, one for dark values and one for light values. Use a small brush even in the large areas and think of your brush like a pencil. Place short strokes next to each other, then blend them with a larger, soft brush.
I like to finish each section before advancing to the next. Because this painting is so small (6×9), that was easy to do. Larger paintings might take more than a single session to paint, but here I was able to complete the horse entirely in one go.
NOTE: Black and white are slow drying colors, so the dead layer will probably not dry overnight. This allows you to continue painting one section for several days if necessary.
After the major values were blocked in for my next section (the bridle and halter), I allowed everything to dry a little bit before dry brushing details such as the shine around the eye and highlights on the buckles.

The dead layer should dry a minimum of three weeks and may require as long as four or five. Begin testing the painting with a razor blade at three weeks.
You may wonder why you bother with the umber layer if the dead layer covers it completely. The reason is that even if you do cover the umber layer completely, it still influences the appearance of the dead layer and of subsequent layers. Each layer builds on previous layers.
5. More examples of dead layers
The next two images show two different stages of the dead layer for a 16×20 portrait I painted a while back. In the first photo, the area beyond the horse’s head has been painted with the dead layer. The umber layer is still visible everywhere else.
The second illustration shows the completed dead layer. More than anything else, this shows how I develop the dead layer section by section.
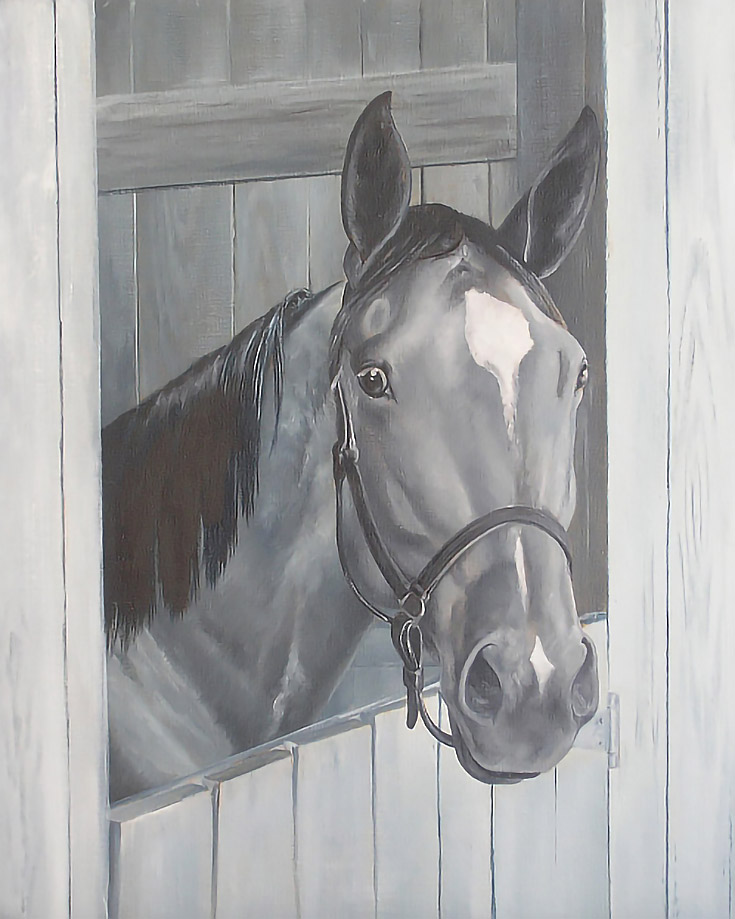
The portrait above is a few years old. . . if I were to do it over, I’d increase the value range on the horse’s head and upper neck to emphasize those areas. Since I didn’t, I had to add opaque highlights in the detailing phase to compensate for failing to push the values in the dead layer.
Here’s another finished dead layer for a more recent large landscape portrait.
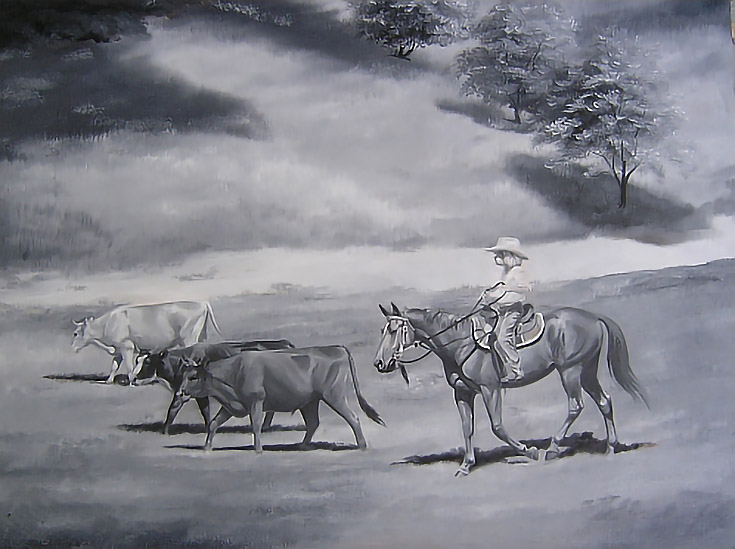
If you’re following the Flemish method, developing a complete and accurate dead layer should always be the final step before any color work begins.
It’s important to make sure you get a full range of values and all the detail that you want in your finished painting because most of the color work will be accomplished through transparent glazes. The better you do at the dead layer, the less work you’ll have during the color phase.
And that’s all for the dead layer. . . next time we’ll cover color glazing. Stay tuned!
This post may contain affiliate links.