Computer technology has opened a lot of doors for artists of all types. Today’s artists can capture images and videos spontaneously with a smart phone or camera, process photos into art forms all their own, and print them on any of a number of papers and in many different sizes.
For artists working in more traditional mediums, computers and computer software help in the composition process and in the drawing process. The options are quite literally limited only by your imagination.
For myself, I’m still pretty much of a traditionalist. I like the feel and smell of oil paint and colored pencil. . . and there’s nothing like a well-done original oil painting or colored pencil drawing.
But I have found ways to use the computer to speed up parts of my process that are time-consuming or not my personal areas of expertise.
Overlaying a grid on your reference photos
I now use photo editing software to draw a grid on my reference photos and I (sometimes) even print a corresponding grid on my drawing paper. Using technology for these steps allows me to get to the drawing process—the fun stuff!—more quickly.
So this week, I thought I’d show you how to put a drawing grid on a reference photo using the free photo program, IrfanView. (NOTE: You can download the latest version of IrfanView for free at www.IrfanView.com. Versions are available for PC only, but there are some Mac equivalent programs to be found here.)
This VERY useful software includes a collection of automatic grids. I typically place a grid of quarter- or half-inch squares over the entire photo, which helps me re-create the image more accurately on my paper.
Here’s how you do it:
1. Open your image in IrfanView
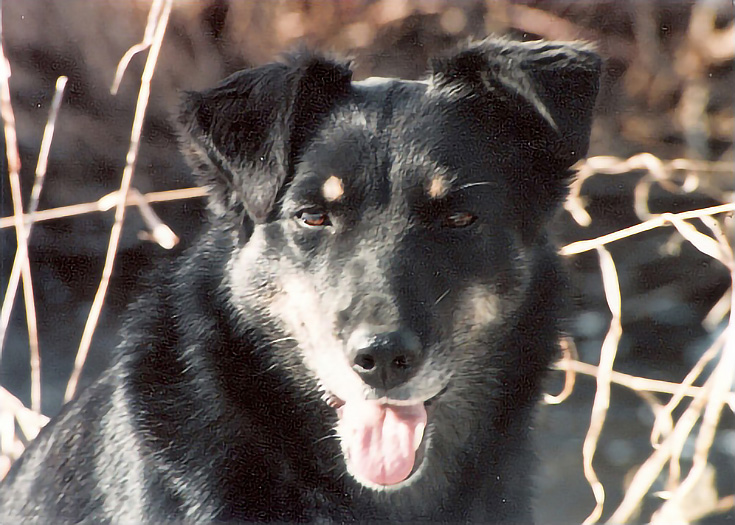
The photo below is an old print, which I scanned and saved. If you’re using digital images, your photos are already easily available. Open one in IrfanView.
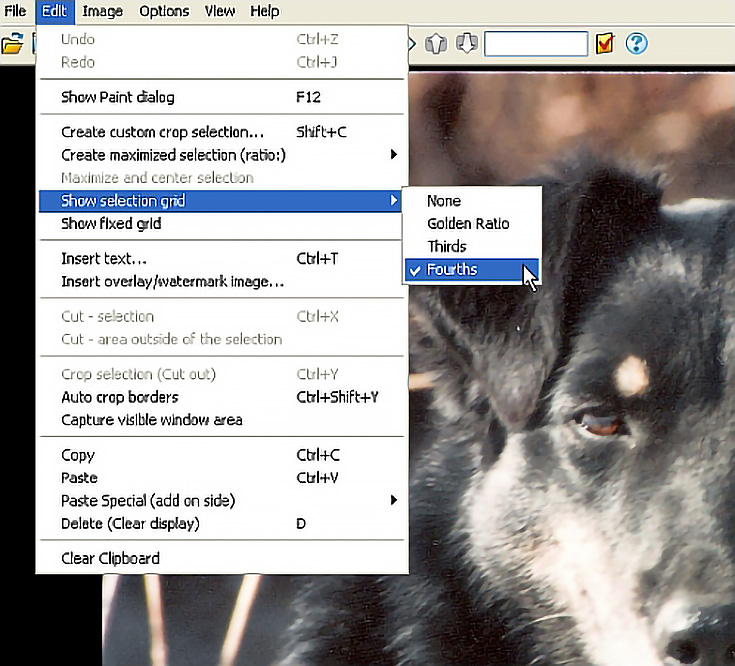
2. Select a type of grid
To draw a grid, click on “Edit” in the menu bar at the top. Select “show selection grid” from the drop down menu. A side bar will appear that offers you None, Golden Ratio, Thirds, and Fourths. I chose fourths to give myself the most squares possible.
3. Draw your grid
Click on the image where you want to be begin drawing the grid. The cursor will become a plus sign (+) (see the red arrow below). That means the drawing tool is active. Drag the cursor over the part of the image you want inside the grid. I started in the upper-left corner (blue arrow) and dragged down and to the right.
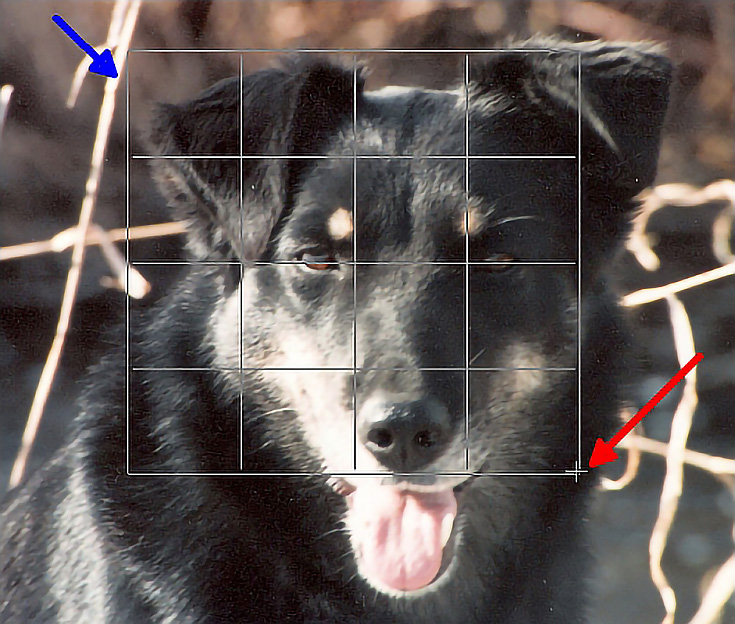
The screen shot above shows my grid partially drawn. This is the full grid in place:
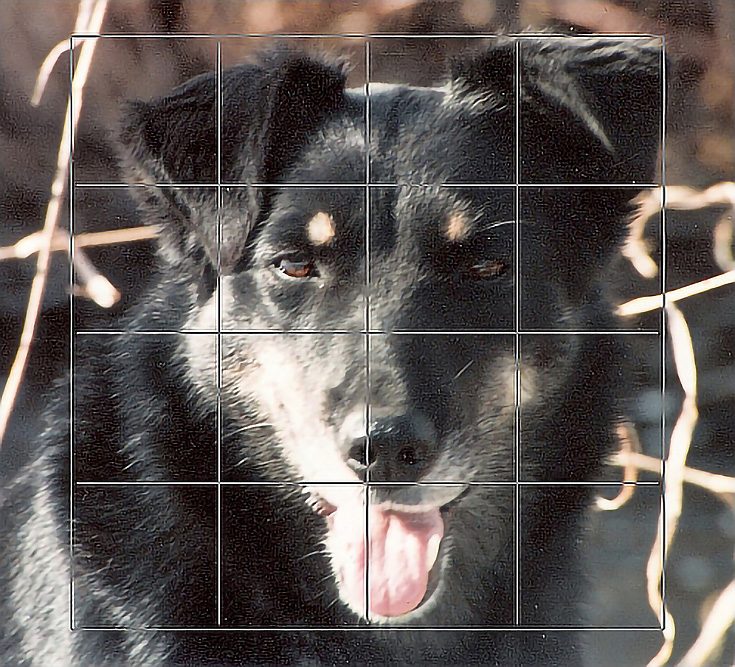
If you don’t like the placement of the grid, just “undo” the action in the “Edit” menu and redraw the grid. You can redraw a grid as many times as you need using the “undo” option. Then, reposition your cursor and try again until you get the right placement over your image.
4. Draw diagonal lines (optional)
I use diagonal lines because they add another way to determine placement, shape, and size of my subject matter. Diagonal lines are especially helpful with faces and complicated images.
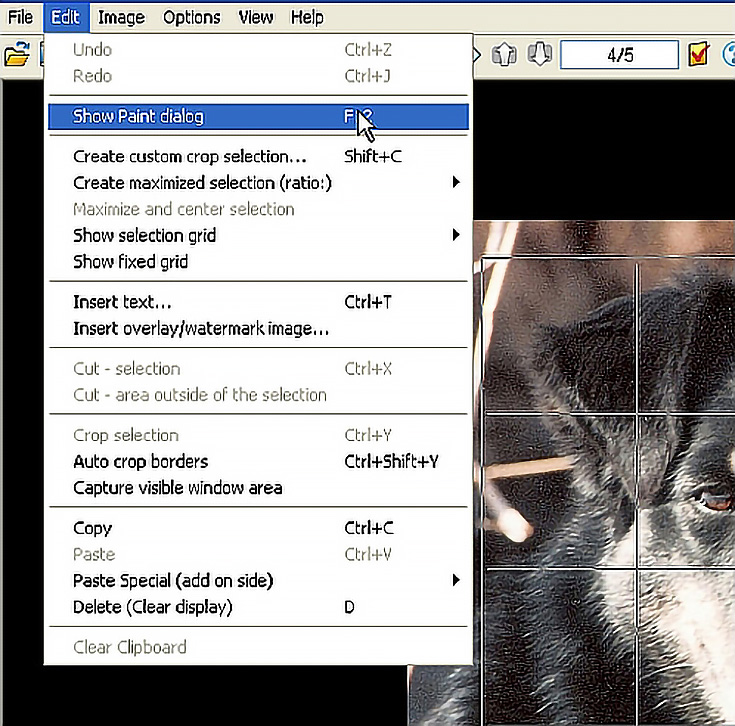
Under the “Edit” menu in the top menu bar, select “Show Paint dialogue”
The paint dialogue box is the box at the left of the photo in the illustration below. Select the arrow drawing tool (green arrow).
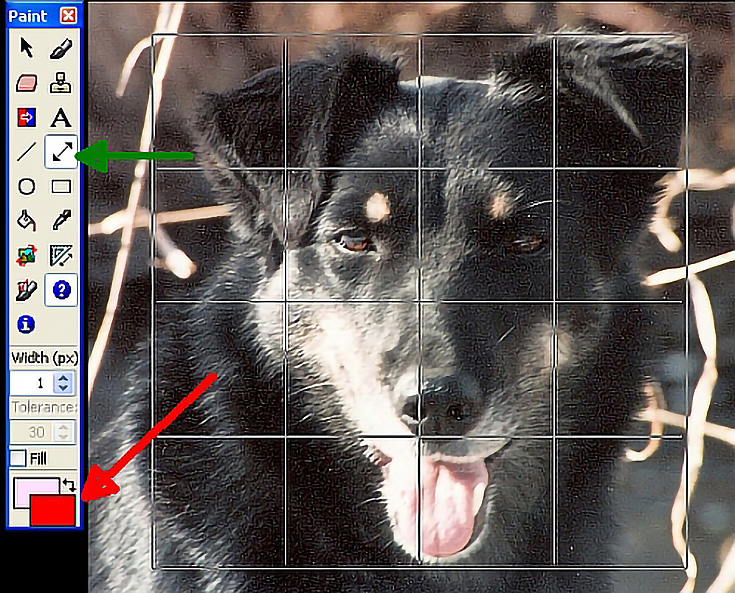
At the bottom of the paint dialogue box are two colored squares. By default, the foreground box will be black (it’s red in my example above) and the background box will be white.
NOTE: To change your foreground or background colors, just click on the foreground or background box. A color palette will appear. Click on the color of your choice, then click okay.
I generally use red to draw the diagonals because it’s easily visible on a wide variety of images. Make sure that the color you choose can be seen on your reference image. You may need to try several colors to find the best color for whatever reference photo you’re working with.
To actually draw the diagonal lines, select the line drawing tool in the paint dialogue box (see red arrow below).
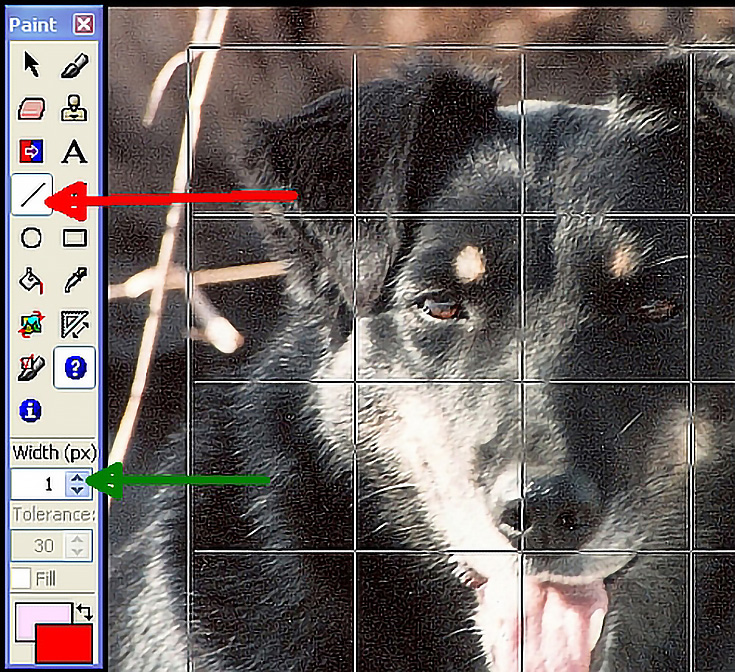
You can set the width of the line by changing the setting marked by the green arrow. The default width is 1 pixel. That’s the setting I use because most of my reference images are fairly small. If you’re working with a larger image, however, or if you just want a line that’s easier to see, you can change the width to make your line thicker.
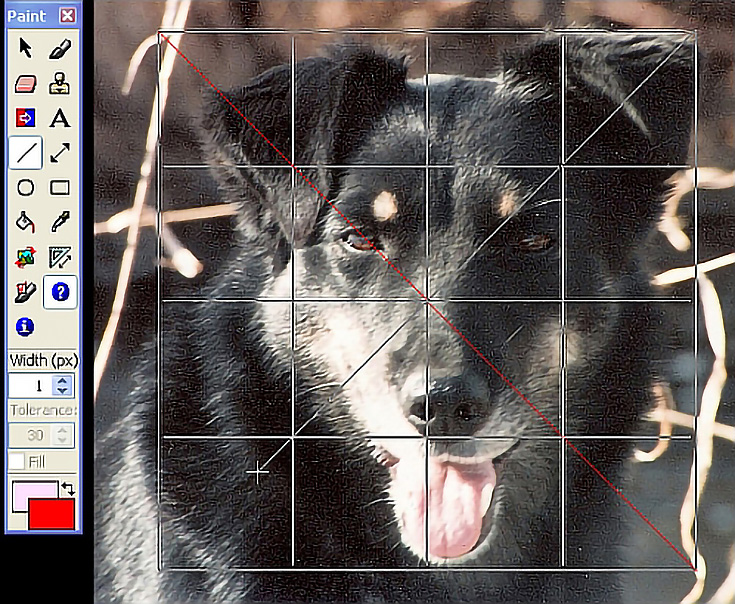
Once you have the line settings you want, it’s time to draw the diagonals. Place your cursor at one corner of your grid. It will appear as a plus sign (+). Click and drag the mouse across the grid to the opposite corner. In the illustration below, I’ve drawn the first diagonal and have partially drawn the second.
You can also draw diagonal lines in smaller segments of the grid. In this next image I added a light green diagonal to each quarter of the reference photo grid.
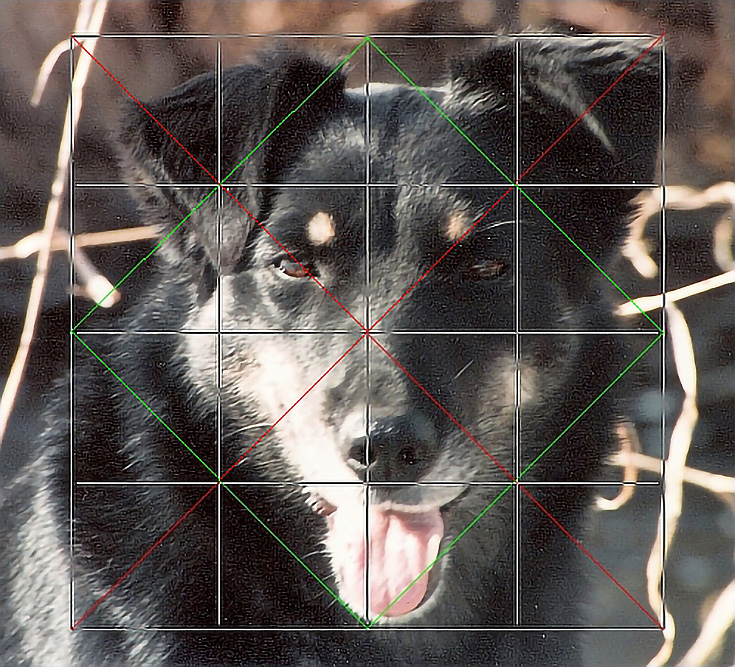
I don’t usually do this unless an image is quite large or very complicated, however.
5. Create a corresponding grid on your drawing paper
The next step is drawing or printing a similar grid on paper. If the final drawing is small enough, I make another grid of the same size and dimensions—just without the reference photo—and print that to draw on.
If the final drawing is too large for the printer, I reproduce the grid by hand. To do this, I draw a box with the same proportions as the one on the reference photo. Then I divide the box into quarters and add the diagonals.
Here is my full-size drawing grid on paper.
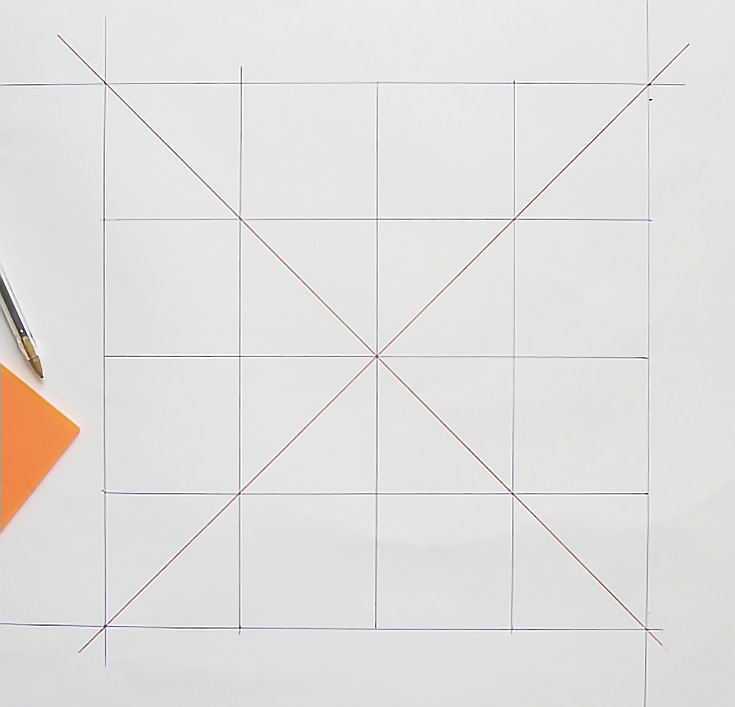
NOTE: It’s vitally important to draw this grid as accurately as possible. The slightest mis-measurement can lead to noticeable distortions in the drawing. That’s why I use a computer generated grid whenever possible.
Once you’ve finished all five steps above, you’re ready to start drawing! Instead of looking at the large, complicated image, you can visually break it down into small, easy-to-draw pieces. Just pick a square in your grid and jump in!
This post may contain affiliate links.