When drawing a traditional still life, if you want to create an accurate likeness you MUST be able to see and re-create the object’s shape, form (mass), value, and color.
With reflective objects, however, other factors must also be considered. Here are 4 rules to remember every time you draw something shiny, metallic, or reflective:
1. Things around a reflective object are also seen in it
The environment or setting in which you draw your subject always affects the subject. With reflective objects, the effect can be dramatic.
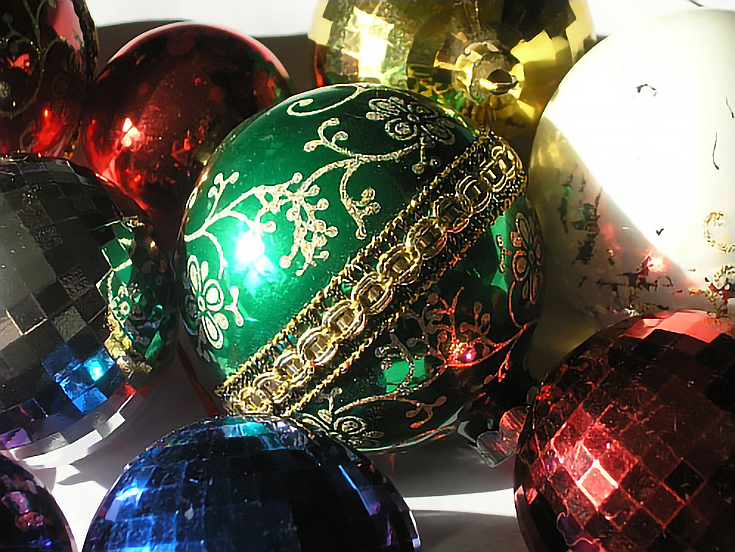
Lets say you want to draw the large green ornament in the illustration below. You certainly can’t just use green! If you want to successfully capture the reflective qualities of the ornament, you also need to draw the ways in which the other ornaments and the background affect the appearance of that ornament—just take a look at all the ways they do!
First, the red ornament in the lower right corner shines very brightly on the green ornament. That red reflection is very clear and dramatic. If you didn’t include that in your drawing, it wouldn’t look nearly as realistic.
Second, we can see that light also bounces off the shiny white surface of the white ornament in right corner of the image, which lightens the shadow on that side of the green ornament. And third, the white table-top also lightens a section of shadow on the lower right side of the green ornament.
Rule number one, whenever drawing anything reflective, always look to see how it’s being affected by its surroundings.
2. Reflective objects cast light into their surroundings
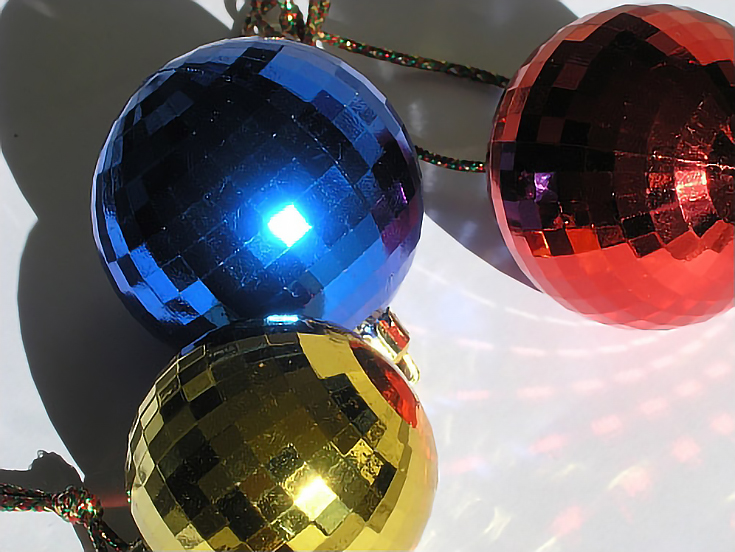
Below are three ornaments on white paper. Though these ornaments aren’t crowded together, each one is still reflected to varying degrees in each of the other two.
What I want you to see, however, is the pattern of reflected light on the paper. Light bouncing off each facet of each ornament throws a square of reflected light onto the paper. The square of light is not only brighter than the direct light falling on the paper; in most cases, it is tinted with the color of the ornament off which it’s being reflected. The brightest reflections are closest to the source of the reflected light and are whiter. See the narrow “slits” of reflected light closest to the red ornament.
Also notice how the light reflected from the blue ornament appears in the shadow of the red ornament.
Seeing and drawing these “tricks of light” are key not only to capturing the reflected nature of your object but in describing its shape and the surface on which it rests. Get them right and you’ll be several steps ahead.
3. Reflections in your object will always be distorted
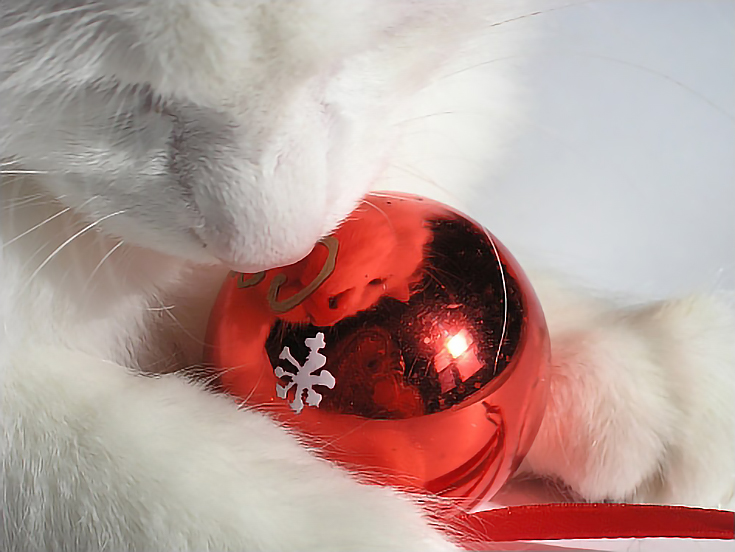
It’s next to impossible to do anything without help in a house where a kitten lives. :) Four-month-old Max loves helping as I draw, and in this case, Max is beautifully illustrating our third rule—distorted reflections.
The thing that makes reflective objects so much fun (and so frustrating) are the reflections. Look at all the reflections on this ornament!
• Max’s face, and especially his nose, are clearly visible in the upper left
• On the lower left, there is a less distinct reflection of his leg and paw
• The red ribbon is visible and so is a sliver of Max’s other paw
• The lighter reflection along the bottom is the paper on which Max and the ornament are resting
• The highlight is the shape of the window through which the sunlight is shining
• The sun is even visible through the upper right pane in that window
• If you look very close, you can even see me appearing like a ghost to the left of the window.
Now, look again at the reflection of Max’s face. The reflection of his nose is much larger than the reflection of his face. That’s because it’s closer to the reflective surface, but it’s also because the surface curves away from Max, giving his reflection a misshapen appearance.
Distortions vary depending on the shape of the object so the only way to get them right is to look and then draw them accurately. Don’t draw what you think should be there. Draw was really IS there.
4. Reflected colors are affected by their surroundings
Notice how Max’s white fur changes the look of the redness of the ornament. The reflection is still red, but it is a lighter red than the darker reflections around it.
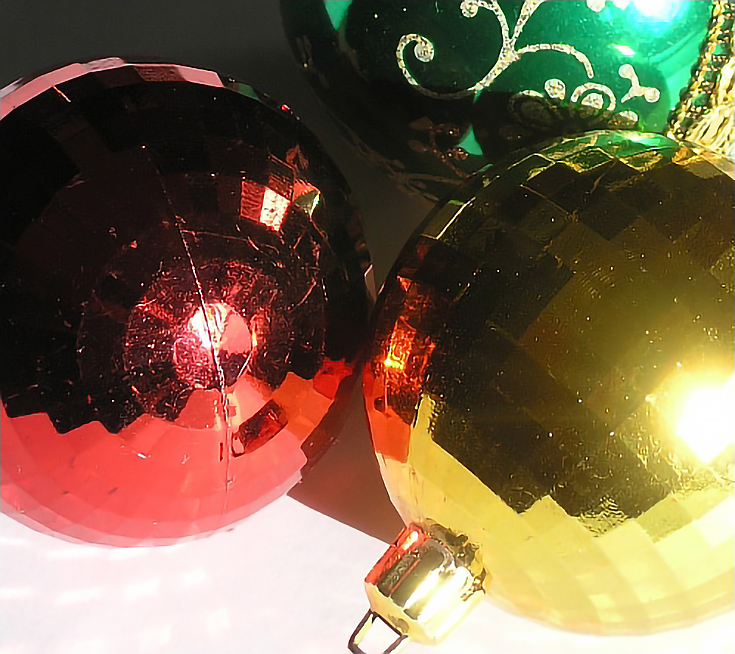
In the illustration below, the red ornament’s reflection on the yellow ornament changes the color of the yellow ornament quite distinctly. So does the white tabletop. The yellow ornament still reads as yellow, but the reflections of red and white are vital to showing the shape and color of the yellow ornament.
Also notice that the white tabletop and yellow ornament reflect onto the red ornament. The white is clearly visible because it contrasts with the darker reflection on top. But the yellow is barely visible.
Why is that?
There are two reasons. First, the red ornament’s bright side is reflecting onto the yellow ornament’s shadowed side. This means more light and color is reflecting from the red ornament onto the yellow ornament than vice versa.
Second, red is a naturally stronger color than yellow. Even if the lighting was equal, the red would have more influence than the yellow. With the combination of color and lighting in this illustration, the shadowed side of the yellow ornament has very little effect on the sunlit side of the red ornament, even within its own cast shadow. You can’t separate the yellow reflection from the white reflection in this photograph. It’s barely discernible in life.
When drawing reflective colored objects remember that the intensity of their color changes depending on their environment. The solution is to simply try draw what you see, not what you logically know a color to be.
‘
I hope these four rules of reflective objects helps in your next drawing. Good luck, and remember to watch those reflections carefully!
This post may contain affiliate links.


