Today I’m going to demonstrate how to do a limited palette colored pencil drawing on colored paper. The paper I’m using a Rising Stonehenge 90 lb. in a medium light brown color called Fawn. The subject is a light blond/brown Toy Poodle. I chose the paper color because it’s darker than the base color of the subject and will allow me to create a good likeness by adding darks and lights.
For today’s demonstration I’m using Verithin colored pencils in Dark Umber, Dark Brown, and White.
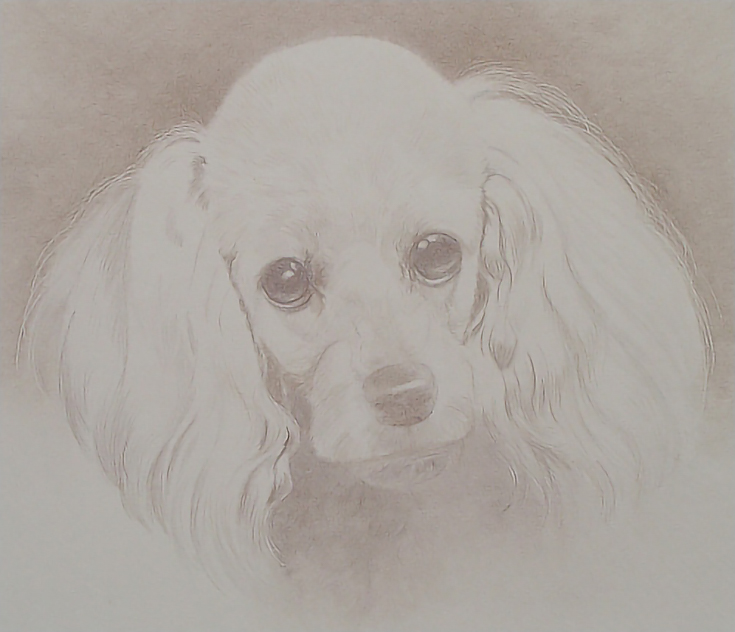
Step 1. Drawing the head and main features
I started by outlining the main features of the face with Verithin Dark Umber. I use Verithin because the lead is thinner and harder, so the pencil holds a point much better than a thick or soft leaded pencil. It’s also easier to erase when I make a mistake (which did happen today). Verithin pencils are the pencils of choice for the early stages in most of my colored pencil work.
Inside the eyes, I used medium pressure and a combination of circular and directional strokes to get a smooth, even color layer. For the hair around and between the eyes, I used light pressure and directional strokes.
I then did the nose with a flat layer of light to medium pressure laid down with a variety of strokes, then sketched in the shadows around the head with light to medium pressure and directional strokes. Shadows were created with several layers of light color, building dark values slowly to avoid getting too much pencil on the paper too quickly.
Once the face and main features were in place, I defined the top of the dog’s head and the shapes of the ears by darkening the background. With many works, the best way to establish lights is to darken the dark areas. This method is especially helpful when working with colored paper.
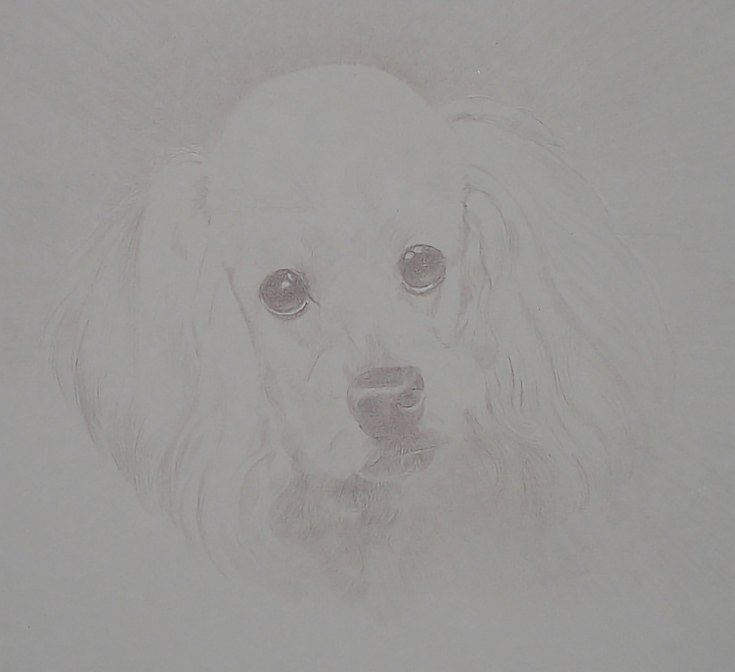
At this stage, the value range is still quite narrow, with very few dark areas and no highlights. Even so, the dog’s likeness is beginning to emerge.
Step 2: Filling in the background
As soon as the features and larger shapes were well established, I impressed lines into the paper around the edges of the ears and the lower ends of the hair on the right ear (the side in shadow). These lines will be flyaway hairs.
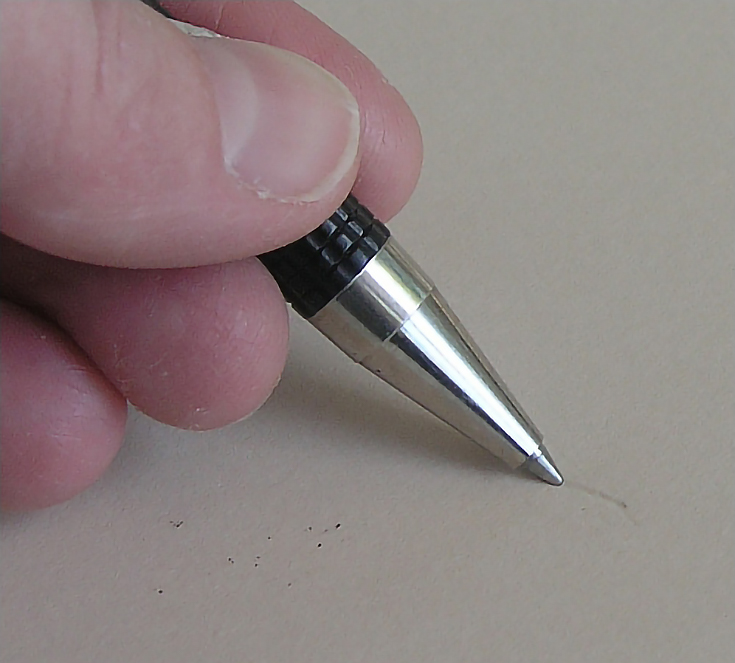
I used a Zebra .06 ball point pen (without ink in it) because the ball point glides smoothly over the paper and it’s an excellent tool for creating a variety of line widths and depths by varying the pressure. In this illustration, I’m impressing a heavier, deeper line by using medium-heavy pressure in a soft paper. With practice, you can impress lines that have all the character and variety of a drawn line.
The white lines below are impressed lines with background color applied after the impressions were made. The impressed lines in the darker background mimic the drawn lines in the lighter area of the dog’s ear. They vary in thickness and in value. Any lines I impress after this step will be slightly darker than these impressed lines. The differences in value will be small, but they will add depth and visual interest to the edges of the portrait.
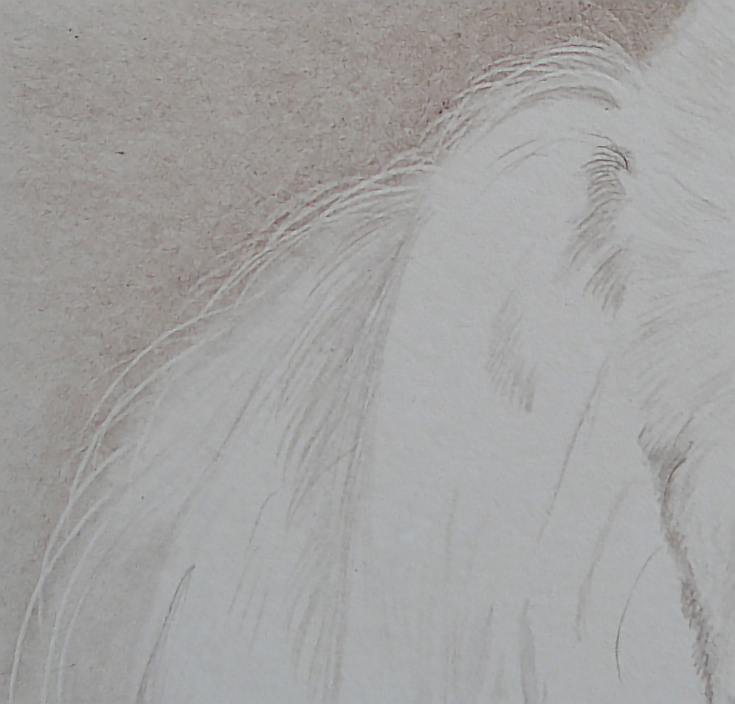
I then switched to Verithin Dark Brown to get a little variation on the background and some of the darker areas of the dog. I worked throughout the background, adding several layers of Dark Brown in radiating strokes, then in strokes shaped around the dog’s head, then in other directions to get a nice, even layer. When the background was as dark as I could make it, I blended it with my fingers and the background was finished.
Step 3: Erasing the nose
The longer I worked on the drawing, the more obvious it became the nose wasn’t correct. The shape wasn’t right. Despite the care with which you work through the drawing stages, it sometimes takes more in-depth work to expose inaccuracies in the drawing. The good news is, discovering such a mistake isn’t the end of the world!
In order to correct the problem, I first had to remove the work that’s already been done on the nose. I erased the nose with a combination of hard, rubber ‘click’ eraser and a white pearl eraser. I removed color the same way I applied it, using medium pressure and multiple passes over the area. I also turned the paper so eraser strokes were sometimes vertical to the dog’s face, sometimes horizontal, and sometimes diagonal. During the erasing process, I brushed eraser crumbs off the drawing frequently to keep them from carrying color to other areas or damaging the paper in other ways.
It’s in situations like this that Verithin pencils prove their worth. I was able to remove color with little or no ghost image left behind. There was also no damage to the paper.
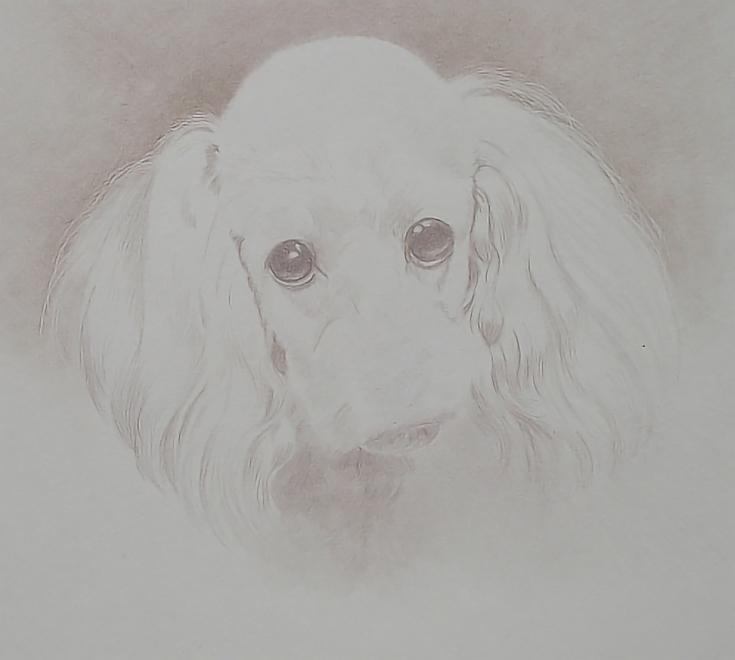
Much as I dislike erasing any part of a drawing, I knew it was the right thing to do in this case. The dog looked more like my subject without the nose than it did with the nose!
Step 4: Re-drawing the nose and muzzle
I redrew the nose very lightly with Dark Umber, then darkened it gradually with repeated shadings of Dark Umber and Dark Brown (still using Verithin pencils). I also changed the contours of the muzzle and chin, and a few other areas around the face. The result was much more pleasing.
There are still a few adjustments I’d like to make to the under drawing, but they are minor. I’ll let the drawing sit idle for a few days so that when I return to it, I’ll be able to review it with a fresh eye. At that time, I’ll make any adjustments that still seem necessary, then move into the second half of the process (the color work).
Make sure to check out Part 2 for the finished pencil portrait!
This post may contain affiliate links.