Today I’m going to share a tutorial on drawing wood grain, as well as explain how to render a few familiar features of weathered wooden boards. I’ll be using Prismacolor thick lead pencils and heavyweight white drawing paper.
Ready? Then let’s get started!
1. Always find a good resource
Different woods present different grain patterns, density, and colors. It’s always best to work from life, as I did for this demonstration.
2. Start by drawing your board outlines
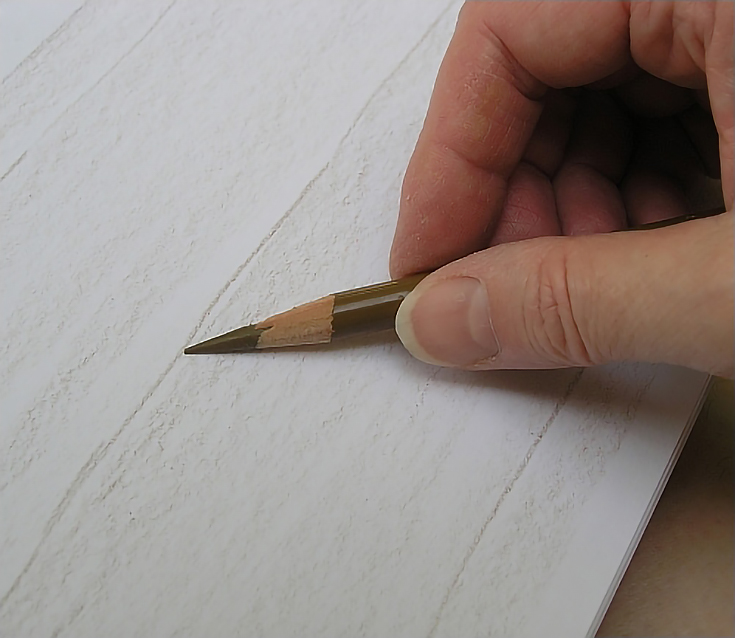
I began with a light brown pencil in a neutral shade. I prefer Raw Umber Prismacolor, but any color will work as long as it’s a fairly light colored pencil.
Holding a blunted pencil upright, I drew a freehand line, turning the pencil to vary the width of the line. This type of line is ideal for weathered wood such as a fence, porch, deck, or barn. (For more uniform wood, like interior paneling or wood siding, use a straight edge to draw cleaner, straighter lines.
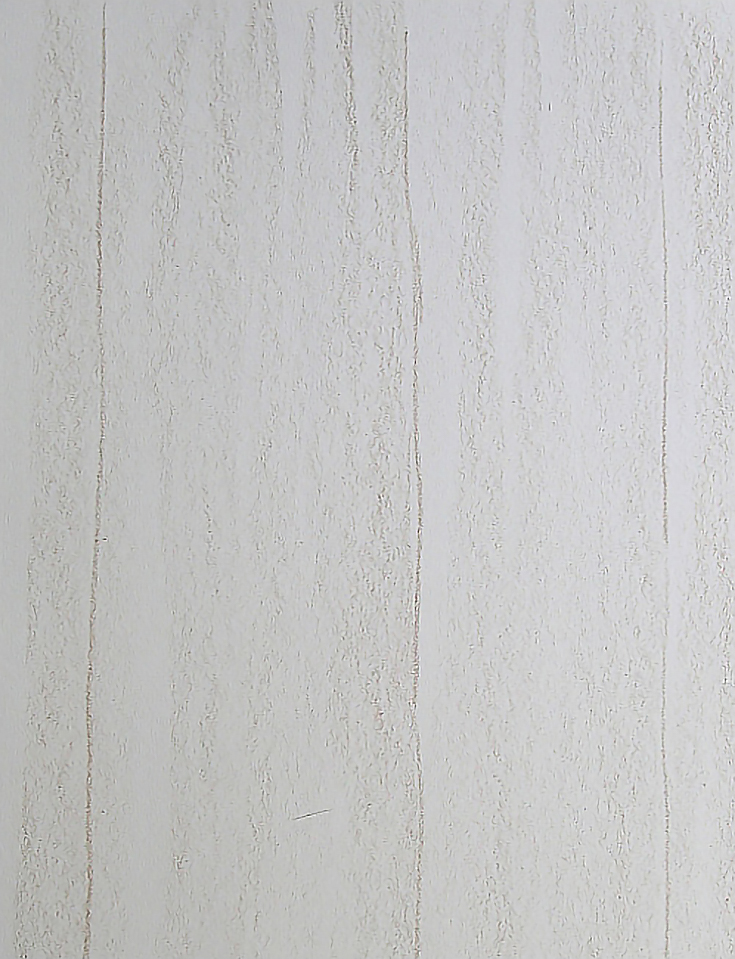
Next, I sharpened the pencil and used the sides to add thin color for all the boards.
Notice the lightness of the strokes. There’s a lot of white paper showing through the color, and that’s what you want. Also, leave some areas of the paper completely untouched, for example, on either side of the the line where two boards touch. Since wood is three-dimensional, its edges will catch the light and for now you should leave some of those edges entirely white.
For all other areas, feel free to overlap two or three layers of color. This will be your base color for the wood, and this kind of random coverage simulates wood grain fairly quickly and easily.
3. Draw the wood grain and knots
I darkened parts of the cracks between the planks to separate the planks. Then I drew a knot and began adding wood grain around the knot and along the length of the plank.
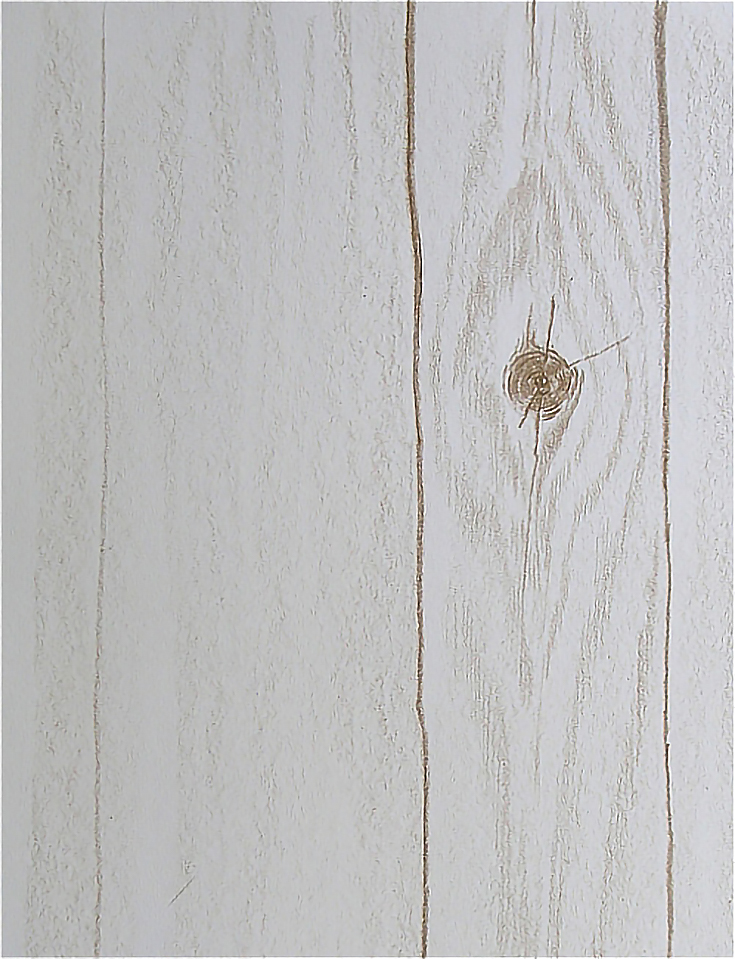
For the knot, I sharpened my pencil and used the tip to draw an open, circular pattern for the center of the knot. I then darkened the area by repeating partial circles. A few cracks radiating from the knot darken the center and finish the illusion.
4. Add extra detail by drawing old nails and cracks
What’s an old board without nails? I added nails to each plank. The nails were shaded enough to expose the light source.

With a freshly sharpened pencil, I sketched in the wood grain with parallel strokes and light pressure. At this stage, I’m concerned more with establishing the shape and placement of wood grain than creating detail. Some of the strokes are short and close together. Others are longer and more open. All of them follow the pattern of natural wood grain.
I used the pattern of lights and darks created by shading in the first step to decide where to place wood grain. I didn’t follow those patterns exactly, but used them to establish value variations in and around the wood grain.
I continued shading and darkening, and filled in another knot in the second plank, using the same circular stroke to establish the placement and shape before sketching in the wood grain and cracks.

Up to this point, I’ve used only Raw Umber. I established value by overlapping multiple layers, changing the shape of the pencil (sharp or blunt), and varying pressure. In the darkest areas, I used pressure of about 6 or 7, slightly heavier than normal writing pressure. For most of the rest of the work, pressure was medium, 2 to 4.
5. Layer more colors into the wood, nails, and knots
Now it’s time for finishing work. The following image shows all of the various steps I took (and each step is written out below it).
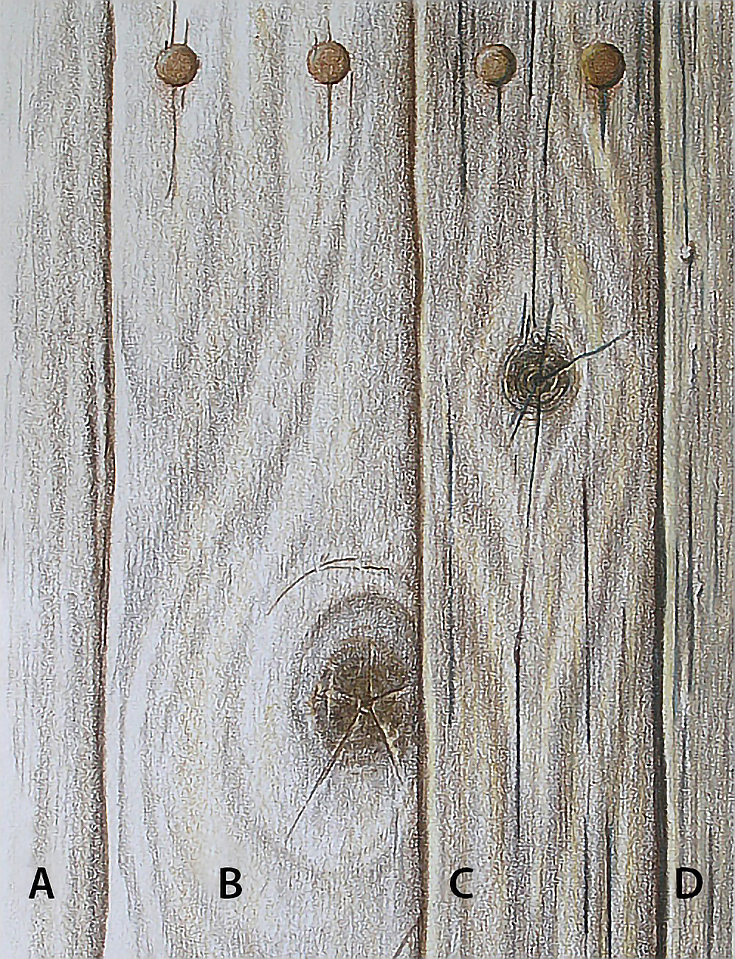
A. I shaded this section with the side of the pencil, again working lengthwise. I used two layers each of Light Umber and Dark Umber and one layer of Warm Gray 70%. With the tip of the pencil, I applied Warm Gray 60% in short, overlapping vertical lines.
B. I used Dark Umber and Indigo Blue to darken the cracks around the knot and the hole in the center. To make rusty nails, I used Sienna Brown for the base color, Dark Umber for the shaded edge and Jasmine for the lighted edge of the nail. A touch of Sky Blue Light for a highlight, then I burnished with the colorless blender. I also shaded Sienna Brown around the nails to stain the wood.
I continued to build color with alternating layers of the same colors used in Section A, drawing with the points of the pencils and working with overlapping, vertical strokes to create the look of texture and wood grain. I followed that up by shading Yellow Ochre over the plank with the side of the pencil. In some areas, I let strokes overlap. There are also areas where no Yellow Ochre was shaded.
C. I continued to build color by applying alternate layers of Light Umber, Dark Umber, and Warm Gray 70% throughout the wood. The first layer was Light Umber, applied in diagonal strokes across the grain. All other colors were applied in varying lengths with the grain. I darkened the knot with a layer of Indigo Blue, followed by Dark Umber.
NOTE: To create highlights along the edges of the cracks, I used Cream with heavy enough pressure to indent the paper slightly. This allowed me to draw across the highlight with other colors without jeopardizing the lighter value or color.
I then added Cream and Warm Gray 10% to the lighter areas with blunted pencils and heavier pressure (6 to 7). Strokes were all vertical.
D. I finished this area with a shaded layer of Light Umber and a shaded layer of Yellow Ochre, then I applied another layer of each with vertical strokes. I capitalized on the natural patterns formed between color and paper.
The three “flaws” you see were suggested by the way my base color went onto the paper originally. All I had to do was add shadows and preserve highlights, then use Warm Gray 70% to place the cracks in the wood.
Final touches included using Cream and Warm Gray 10% in the lightest areas, and then Sky Blue Light applied with heavy pressure (9 or 10) to smooth and blend a few areas of color.
And now it’s your turn. . . step outside, find yourself a weathered fence or old wooden pallet, and have at it!
This post may contain affiliate links.