Rubbing alcohol is a great solvent for colored pencils. It breaks down the wax binder in most colored pencils and allows the pigments to blend more like paint. It’s also wonderful for restoring the paper’s tooth. When compared to other available solvents, it’s much less toxic and much more accessible.
I use rubbing alcohol in three main ways:
1. Creating washes by blending thin color layers
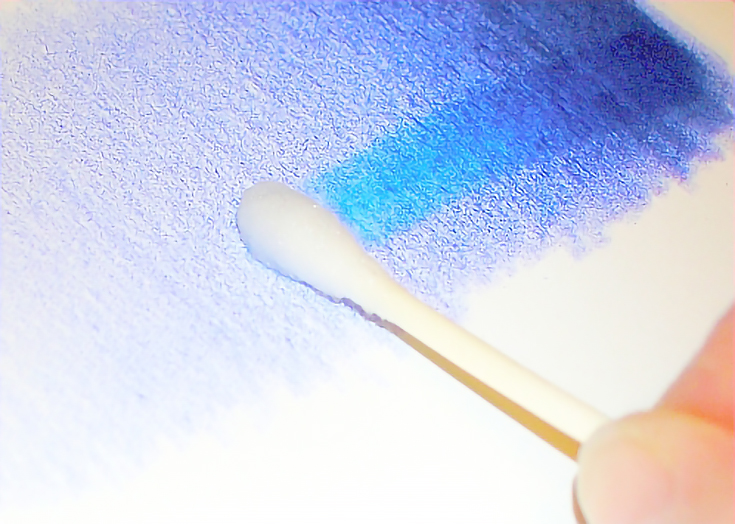
Light blending can be used in a variety of situations. I most frequently use it when I’ve layered all my necessary colors over an area and want to blend them more than I could just by layering them.
I also use rubbing alcohol to create a more saturated color field. The alcohol turns some of the pigment into a liquid form and seeps into the paper, filling in ‘paper holes’.
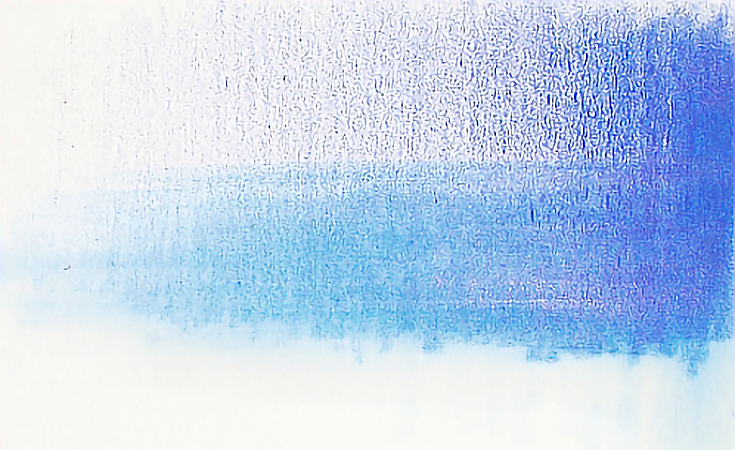
Color can also be pulled into an adjoining area by wetting the layers of color and dragging or drawing it into areas of blank paper. This produces a very soft tint similar to watercolor.

For any of these methods, use a cotton swab or cotton ball. Dampen the swab or cotton ball with alcohol and move it gently over the surface of the color. You can use the swab almost like a paint brush for smaller areas. Turn the swab between your fingers as you stroke the paper to avoid laying down unwanted color.
Cotton balls are bigger, so they are great for larger areas. You can apply the rubbing alcohol with sweeping strokes or with a tapping stroke.
The only thing to watch for with either cotton swabs or cotton balls is migrating color. They will pick up color very easily and leave that color in unwanted places if you’re not careful. Generally, the color left behind by accident is not very dark or saturated, so it can be covered, but the less “covering up” you have to do, the better.

In the image above, you see the difference between blending with rubbing alcohol (bottom half) and no blending (top half). Some pencil strokes are still visible in the blended area, but they are muted because the white of the paper has been filled in.
On the left side, you can see how I was able to tint bare paper by dragging color out of the colored block. The tint was darker where I’d applied heavier color, but it was still very soft and light.
Take care in using this method to tint paper. Once it’s down, it’s done. Light tints like this can be covered with fresh applications of color, but they cannot be removed.
2. Blending many layers of thick color together
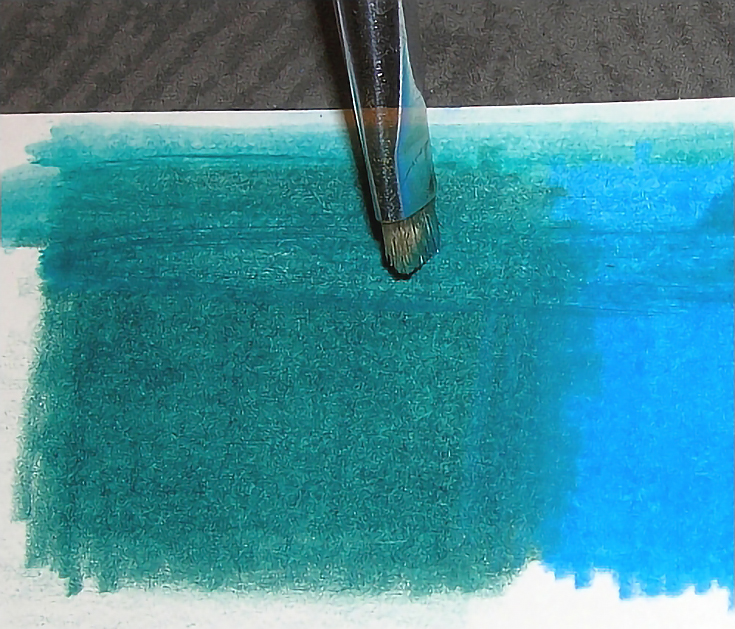
I use a bristle brush and a “scrubbing motion” to get down through multiple layers of colored pencil. I have a 1-inch hog bristle that is very worn down, so it is unusable for oil painting, but excellent for blending colored pencil with rubbing alcohol.
In areas where I want to do heavy blending, I apply many colors with a hard, burnishing pressure. Whatever colors you want to blend, you should layer onto the paper.

Then lay the drawing flat, dip the brush into rubbing alcohol and stroke it onto the paper. You can use the brush with light to medium pressure and blend the surface layers with normal “painting strokes” or you can use heavier pressure and “scrub” into some of the deeper layers.

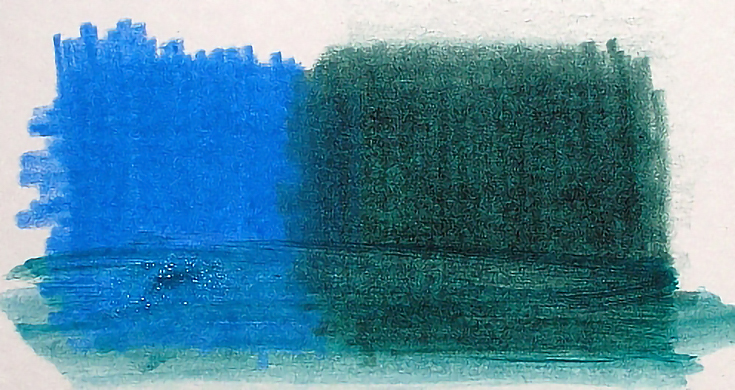
You can pull color from one area to another with this method. (Notice how the green and the blue mix, and the wash of color that occurs below both.)
Many darker tints made possible with this technique, but you can also lift color, creating a lighter value, as seen in the block of dark green above.
One word of caution: This method can cause paper damage. Lighter weight paper especially is easier to damage. Some softer papers are also vulnerable. If you scrub too hard or too long on these types of papers, you may scuff the surface or even puncture it.
I have yet to puncture a piece of paper, but I have scuffed the surface more than once and have caused almost irreversible damage a time or two.
3. Clearing wax buildup and restoring paper tooth
Many times I’ve added color to my drawings until the wax buildup made the surface so slick that no more color would stick.
Even if you’re not interested in blending color, you can use light applications of rubbing alcohol to restore some of the original tooth of your paper.
In this case, you don’t want to pull a cotton ball or cotton swab across the paper. Instead, using a light tapping motion. (I’ve also had success with a very soft cloth or paper towel, which can be folded into small squares and used in tight places.)
A few caveats
• I’ve never used rubbing alcohol with vegetable-oil based colored pencils. The techniques described in this article may or may not work with such pencils. Test first!
• Always try your rubbing alcohol technique on a scrap piece of paper before attempting anything on your drawing. There’s nothing more frustrating than spending hours on a project only to damage it in the blending process.
• Watch for bleed through. The first sample that I created for this article bled through 60 lb. paper. The second sample, with a thicker color layer, did not bleed through. Be aware of the weight of the paper you’re using and the thickness of the color layers. The more color on the paper, the less likelihood of bleed through (unless you really saturate the paper with alcohol.)
• Experiment with new methods and applicators to get the best results. See what you can do with thin and thick layers of color; with sable or bristle brushes; with cotton swabs and cotton balls.
• Whatever method you use, allow at least fifteen minutes of drying time before adding more color. (And more if you’re using a softer paper.) Not only do you want to give the alcohol time to evaporate; you want to give the paper time to dry out.
• As with all solvents, work in a well-ventilated area.
Have fun and good luck!
This post may contain affiliate links.
