Almost all colored pencil instructional books cover topics like varying pressure, burnishing, blending, edging, lifting, and etc.
These techniques are great for learning how to “paint” with the medium. . . but coming up with super-realistic colored pencil drawings takes a different skill.
For realistic drawings, you should first be able to make a detailed contour outline.
Creating a perfect contour drawing
There are several ways to draw perfect contour lines. The easiest ways are through mechanical means.
For example, you can take a good digital photo reference of your subject matter and print it out, very large. Then it’s simple to use tracing paper or vellum to copy the outline and contour lines of your subjects.
You can also use a light-box or light-table to trace your composition, or set up an opaque projector to project your image onto the wall.
Mechanical copying has been done for centuries—the oldest mechanical copying method is the grid, and it’s still useful today if you don’t like to mess with projectors or light tables.
To use the grid method, draw a grid of squares over your photo reference. Create the same grid on your drawing paper. Instead of struggling to draw the lines of your entire composition all at once, you can focus on the lines within each square of your grid.
The grid method really does make drawing a lot easier, and it’s also the cheapest way to copy, or enlarge an image.
Of course, if you’re able to draw your contour outlines from life, freehand, then all of these methods are unnecessary.
Drawing freehand has several advantages. It’s much quicker, for one. And you can combine different objects seen at different times, or include objects from your own imagination.
Starting your contour sketch
Whatever method you use, when you do a contour drawing, the goal is to clearly show where the value and hue changes are inside the objects that you’re drawing.
Start by using a ruler to draw a border around your picture area, leaving enough room around your composition for matting at the end.
I’d suggest using a hard or medium-grade graphite pencil, but barely touch the paper with it, especially if you’re working on your final surface. Keep a kneaded eraser and hard white vinyl eraser handy to remove incorrect lines. The lighter you draw, the less the graphite will show through your finished colored pencil drawing.
You can also use erasable colored pencils like Berol Col-Erase. If you use colors that will be in your final drawing (preferably medium or dark colors, so they’re easy to see) your outlines will essentially vanish by the end. You still don’t want to press hard though—indentations can still show up.
Place a hand bridge or an extra piece of paper under your drawing hand where it rests on the sketch, so that your skin oils don’t smear the graphite. This will help later on during the coloring too.
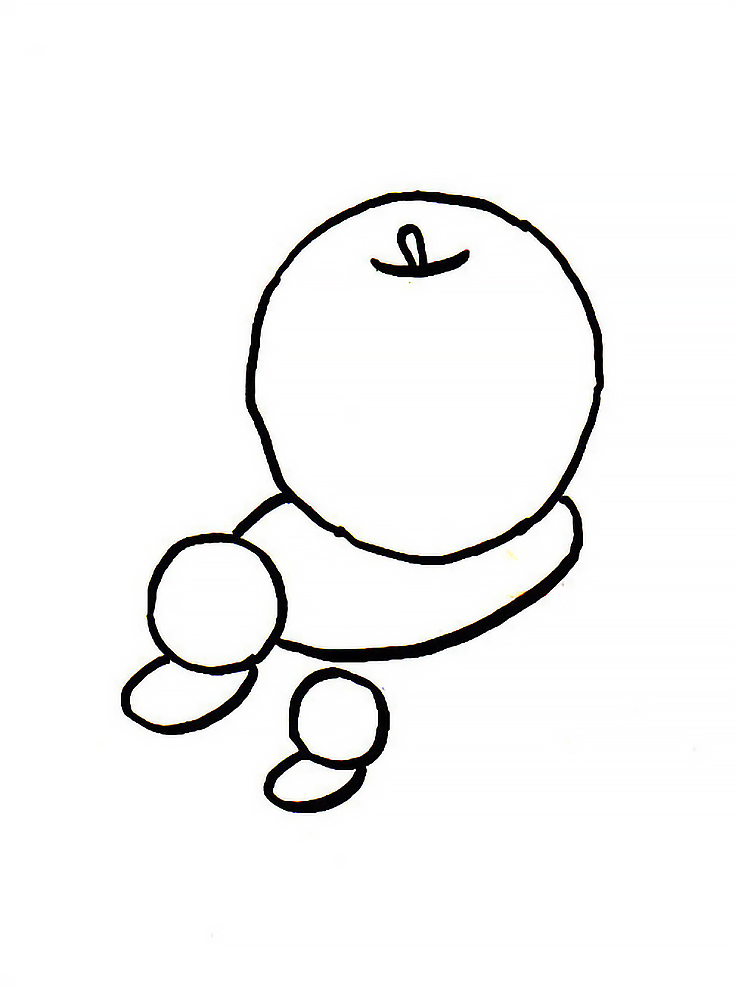
The following example is of a simple still life I did recently. As you can see, the first stage of my contour drawing just establishes shapes and placement.
(Since my contour sketches were very light, I traced all of my lines with ink for easier visibility. Your contour drawings shouldn’t be anywhere near as dark.)
Do your rough outlines fast and easy. Correct the shapes after getting them down, and focus on the basic outlines of the objects plus their cast shadows. It may help to do several versions of this first stage, just so you’re comfortable with the shapes.
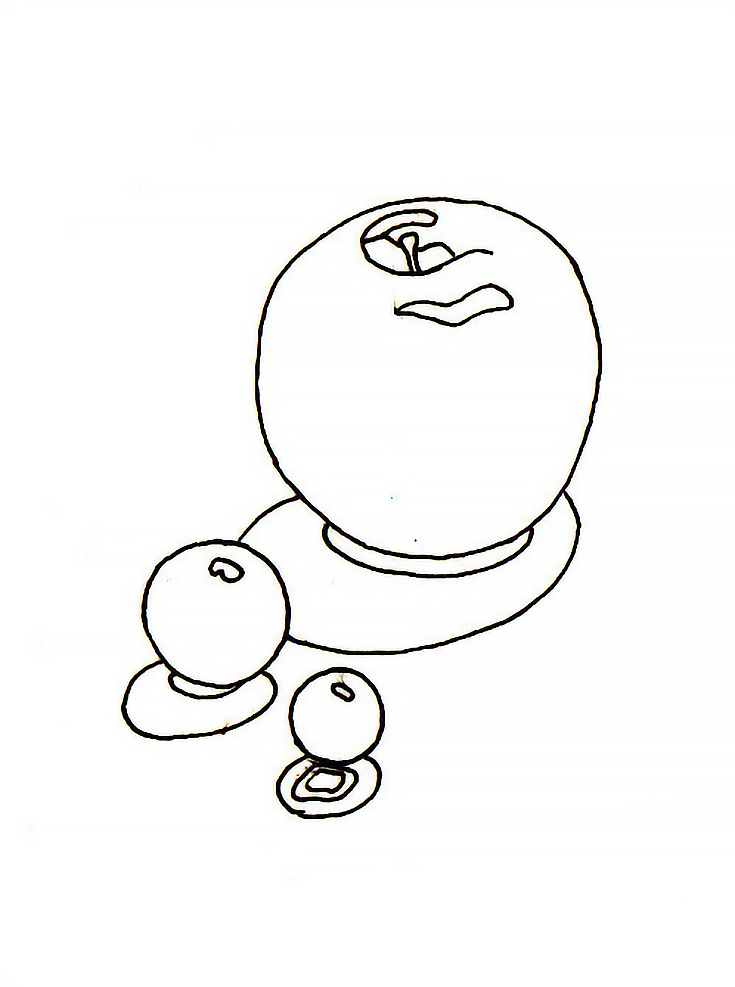
The second stage is shown below:
Continue to refine your contour drawing, tracing it onto another piece of paper if necessary. Erase any extra lines and make sure your shapes are correct, then add concentric lines within the cast shadows to show strong value shifts. You will also want to place your highlights. Remeber to keep your lines light.
If you’re going for realism, it’s very important to make sure that the contour shapes of your highlights and shadows are accurate. Don’t guess! Look closely. And be careful not to straighten edges or turn highlights into perfect circles, triangles or rectangles (they never are).
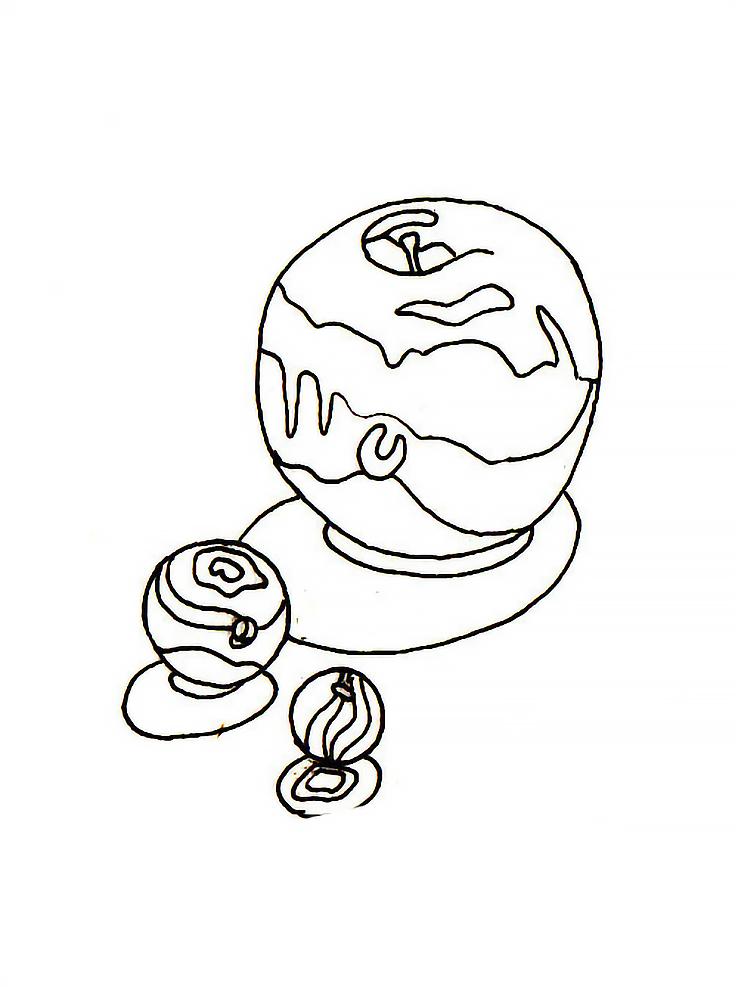
In the next stage, your contour drawing will become even more complex, as you break the drawing down into different sections for every hue and value shift that you see.
In this stage, draw the largest details and contours first, then work your way down to the smallest. Adding the smallest details at the end makes it much easier to place them correctly, and to spot any errors.
If your composition had a complex background, such as a lace table cloth or drapery, all of that would be included too. . . it takes a lot of time to do one of these.
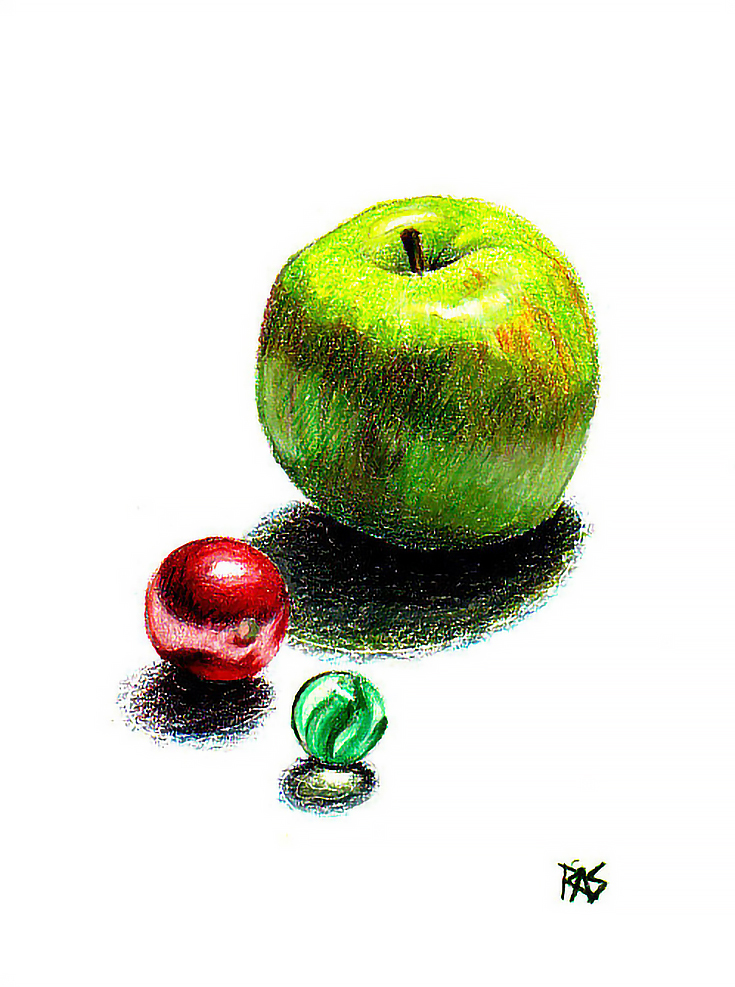
Once your contour drawing is completely finished, it’s time to add in the colored pencil. Contour drawings are not pretty by themselves, but they will lead to amazingly accurate colored pencil drawings in the end.
For this final stage, just use all the different techniques that colored pencils are known for—your contour drawing will act as a map.
Here is my finished piece, entitled, Apple with Glass Marbles:
The above example is a simple one, but the process is the same no matter how complex your subject may be. To recap:
1. Get the main outlines and contour shapes blocked in
2. Refine them to accuracy and place your highlight and shadow contours
3. Add all the internal contours of hue and value shifts
4. Use colored pencils to complete your realistic drawing.
The more often you follow these steps, the easier (and quicker) it will become to create realistic—or even super-realistic—colored pencil drawings.
This post may contain affiliate links.


