How much do you think about the rules of linear perspective when you draw or paint?
One-point, two-point, three-point—just establishing a horizon line and setting up orthagonals can be such a chore that many artists find it too stifling to deal with.
Luckily there’s a way to find the correct angles of perspective for any object without having to memorize a single rule. . . and it’s something that artists have been using for centuries: the angle finder.
A brush handle, pencil, finger or even a stick can be turned into an angle finder. All it takes is holding your angle finder at arm’s length, closing one eye, and aligning it with the edge of the object you’re planning on drawing.
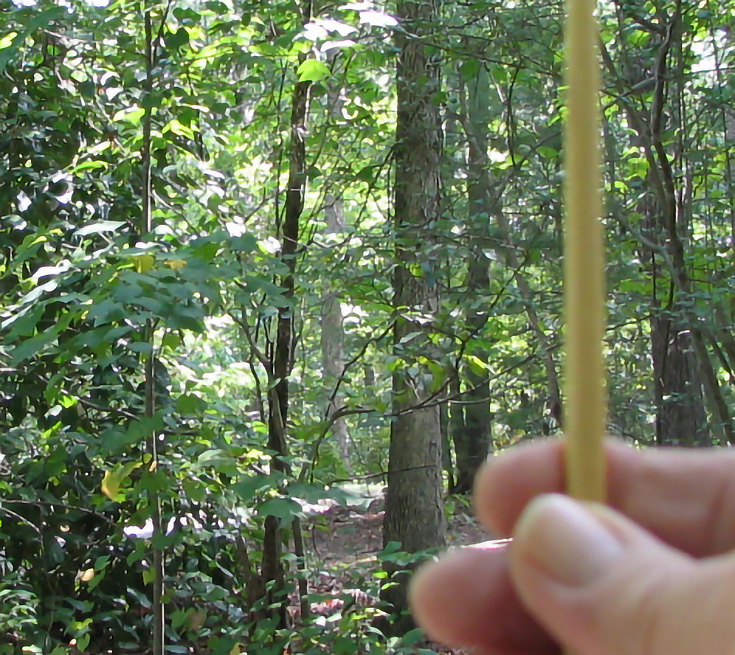
Finding the angle is simple enough, but there’s often a disconnect that occurs somewhere between reading the angle and translating it to a drawing or painting.
Years ago I recognized this problem among a number of my college students and came up with a method to teach angle finding by reading the angles of a clock face.
Here’s how it works in four easy steps:
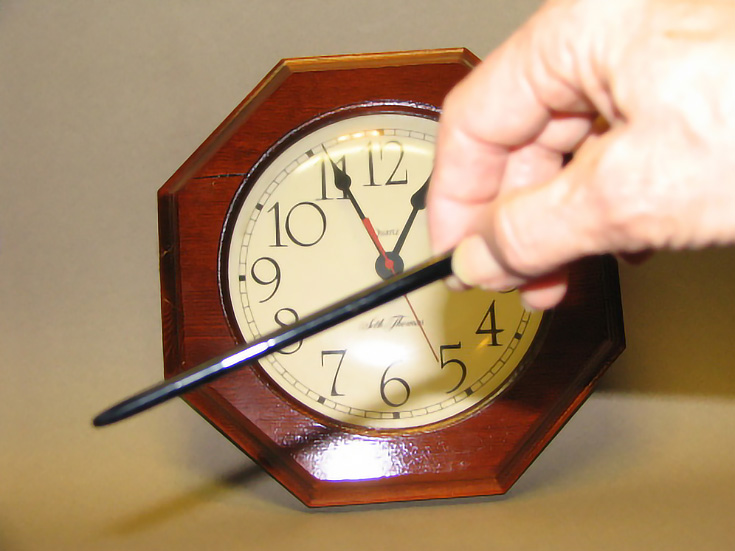
Step 1: Start by reading a clock with an angle finder
Stand in front of a clock face holding your angle finder at arm’s length. Position it so that it becomes like another hand on the clock as if connected to the center. With one eye closed align it toward any number on the clock.
Before going to step two, do several more alignments just to get the hang of it.
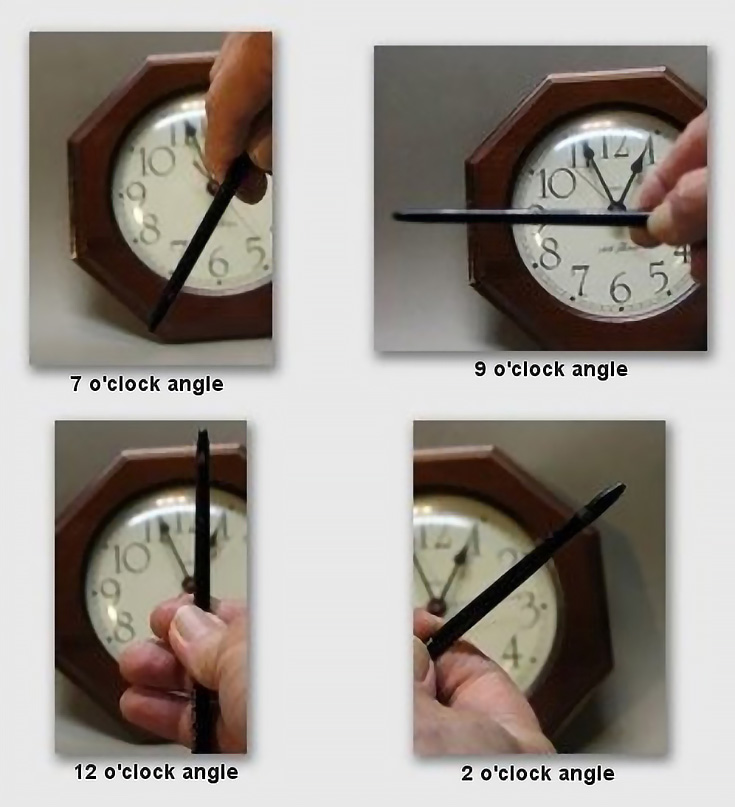
Step 2: Imagine the clock positions in your mind
Hold your angle finder parallel to a blank sheet of drawing paper. Position it toward an imaginary 12 o’clock, then 3, 6 and 9, fixing those angles firmly in your mind.
Those are the horizontal and vertical angles, the easiest to read and to translate onto your paper or canvas.
Now find 1,2,4,5,7,8,10 and 11 and try to get a solid grasp of those as well. Any angle you see in life will be found on the clock, either at one of those twelve numbers or between them.
Step 3: Begin translating angles into clock positions
Let’s put this new skill to work. First, go here and print out your own clock diagram. This will be useful in double-checking your work for correct angles.
In the following photo I’ve located three angles with a blue line, and have labeled them with the appropriate clock angle. Check my work with your own clock diagram by holding it next to your computer screen.
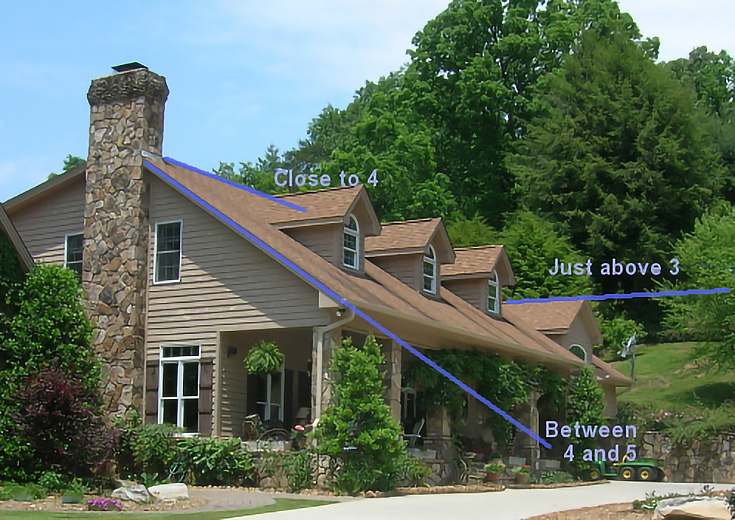
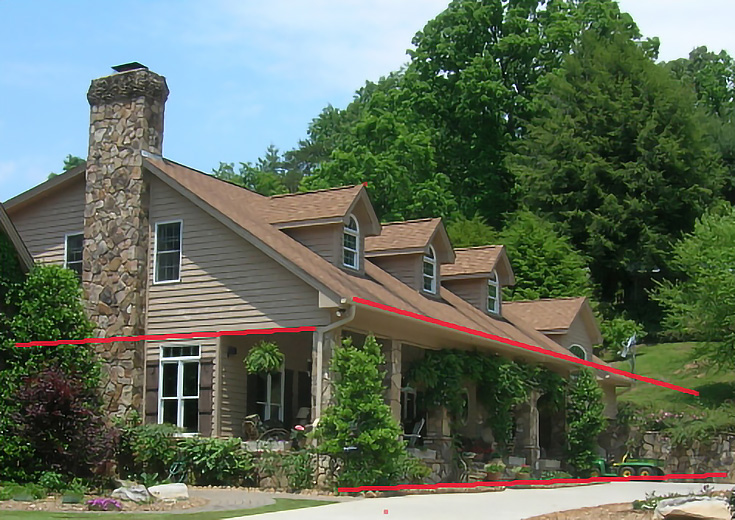
Now it’s your turn. In the next image, figure out where the red highlighted angles fit on the clock. Refer to your clock diagram as needed.
Go one step further by taking your angle finder and clock diagram outside to see what angles you can find in real life.
Step 4. Get comfortable depicting any angle you see
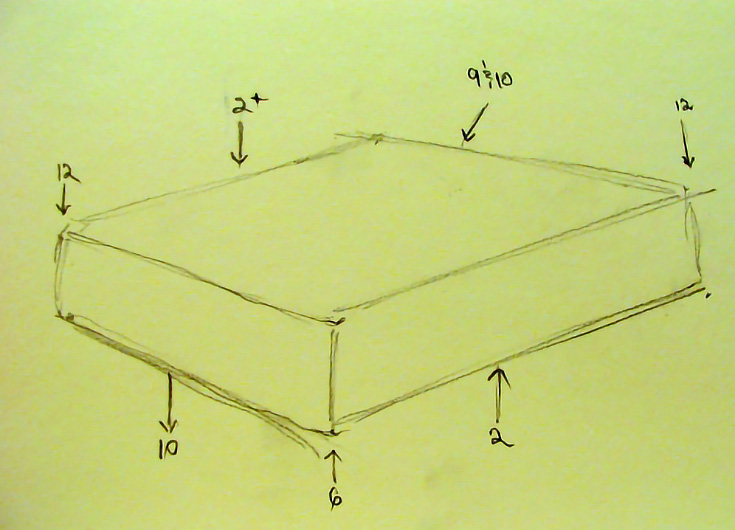
For this step, you’ll need drawing paper, a pencil (which will double as your angle finder), the clock diagram and a thick book.
Start by locating and reading each angle of the book with your angle finder.
Then do a simple line drawing of the book, translating the angles to paper as you see them in real life. If you have an easel handy and can place your paper upright in front of you, you may find it useful to hold your angle finder at the correct angle in front of your paper right before you draw it.
Check your accuracy with your clock diagram and then practice this excercise again by moving the book into a new position.
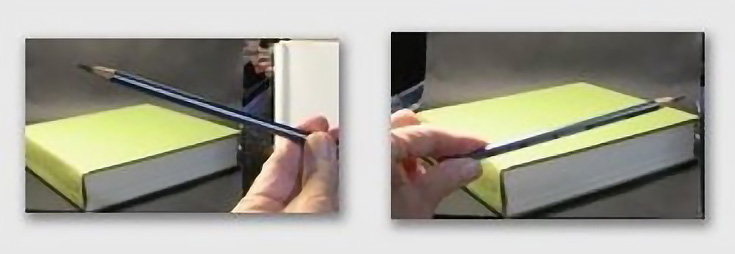
You may have noticed that while you were finding the angles of the book, your angle finder wanted to tip forward toward the book.
It’s very important to control your angle finder so that it only moves as if on a fixed two-dimensional surface—like a car’s windshield wiper. Allowing it to tilt toward you or away from you will give a false reading.
Just like any skill, the more you practice at this the more adroit you’ll become at using it. Eventually you will have the clock positions firmly engraved in your memory and you’ll no longer need the clock diagram to help you out.
You will also discover that you’re recognizing angles in many more places, and that it’s much easier to reproduce them accurately—without ever being concerned about the actual rules of perspective again.
This post may contain affiliate links.