So far I’ve written Part 1 and Part 2 of this series on drawing a three quarter view portrait based on classical proportions. (If you haven’t read those yet, I encourage you to go back and read them before continuing on.)
Now, let’s continue drawing this girl’s portrait:
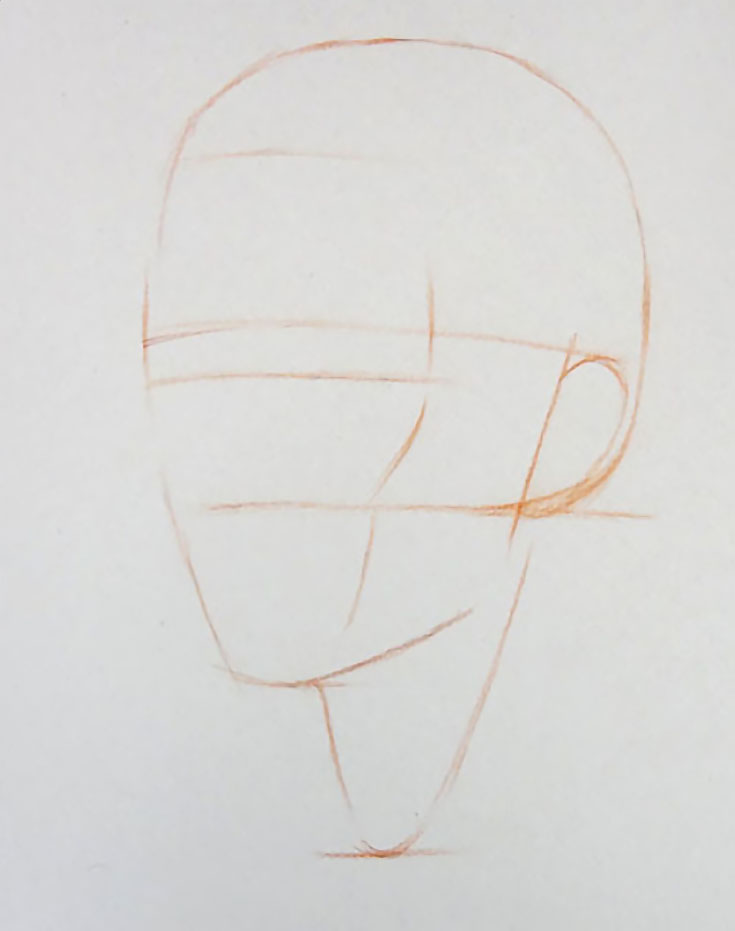
11. Adding the sternocleidomastoid muscle
This particular muscle with a very long name—sternocleidomastoid—is an important landmark when it comes to drawing the neck.
It connects the top part of sternum and clavicle (the breastbone and the collarbone) with the base of the skull just behind the ear which is called the mastoid.
We draw this muscle with two diagonal lines joining at the bottom, as though we’re drawing a “v” or “u” shape below the head. This will help define the shape of the neck, while separating its frontal plane from its side.
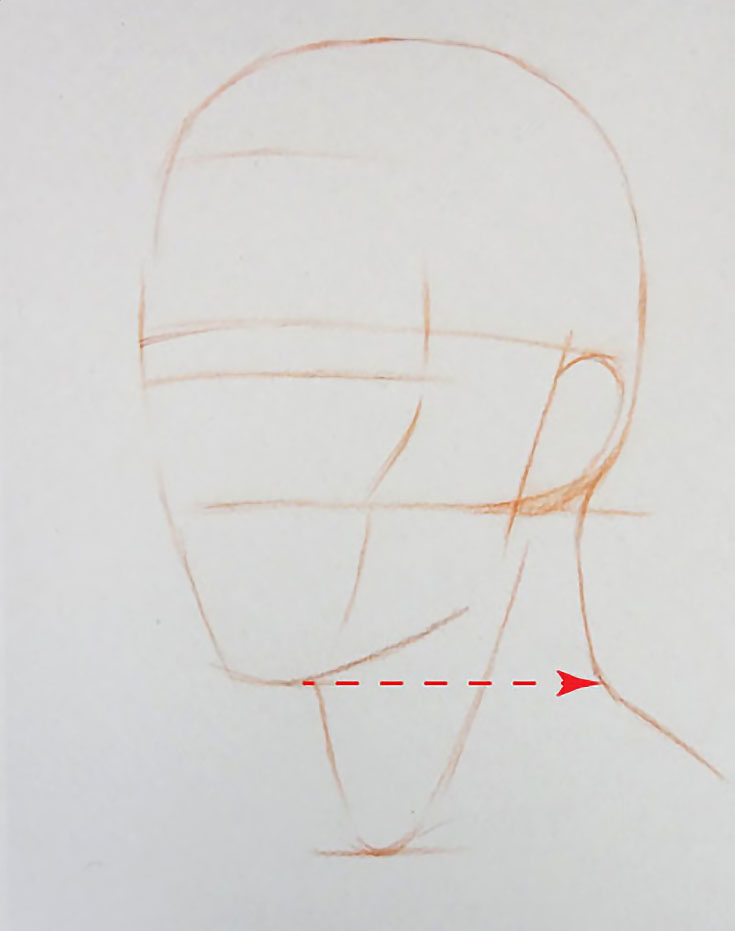
12. Drawing the trapezium
The trapezium is another important muscle that defines the shape (specifically the back-side angle) of the neck.
When you’re drawing a neck in the three quarters view, the trapezium is where the neck changes direction. For placement purposes, it’s on the same level as the bottom edge of the chin (note the dotted line on the drawing below).
Once you’ve added the trapezium, the neck clearly begins to take shape.
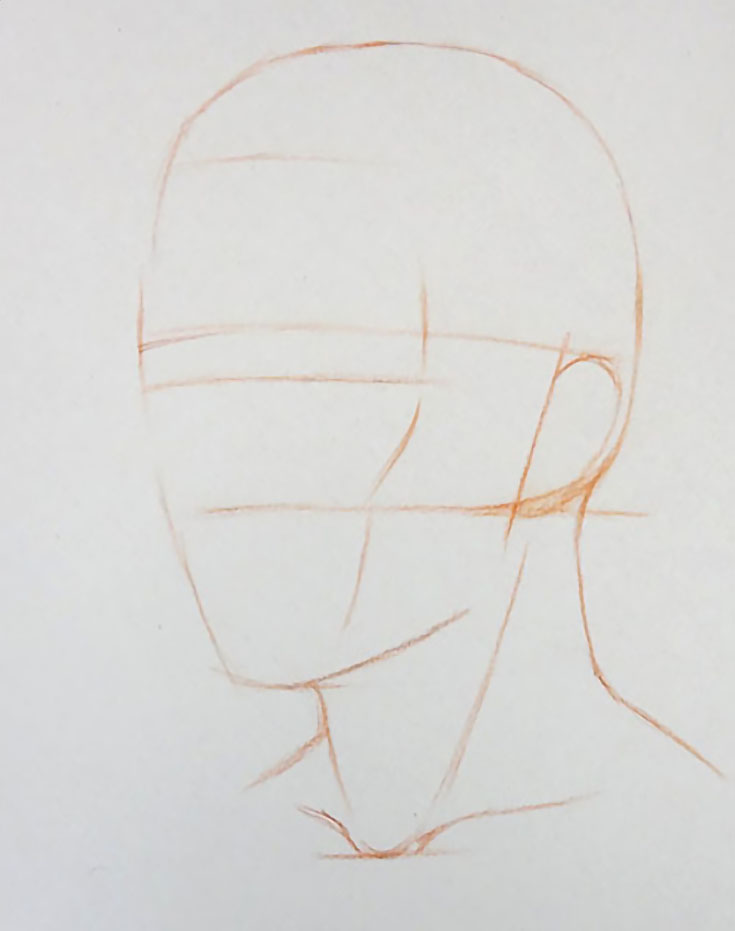
13. Finishing the neck and collarbone
If we follow the constructive drawing principle, we draw not what we see, but what we know. This often applies to collarbones, which can be covered by model’s dress, or otherwise invisible.
Note that in the image below, the axes of collarbones appear foreshortened and tilted. The closer collarbone will always seem longer than the other due to perspective.
However, even with foreshortening, a pair of collarbones is curved like a cupid’s bow or a stretched double “S” and will connect the breastbone with the shoulder blades.
Keep in mind, the dimensions and shape of a neck will change with each individual, so you have to observe its shape on the model.
As you draw both sides of the trapezium leading into the shoulders, you may also want to draw a guideline across both shoulders to ensure that they are on the same level and look natural.
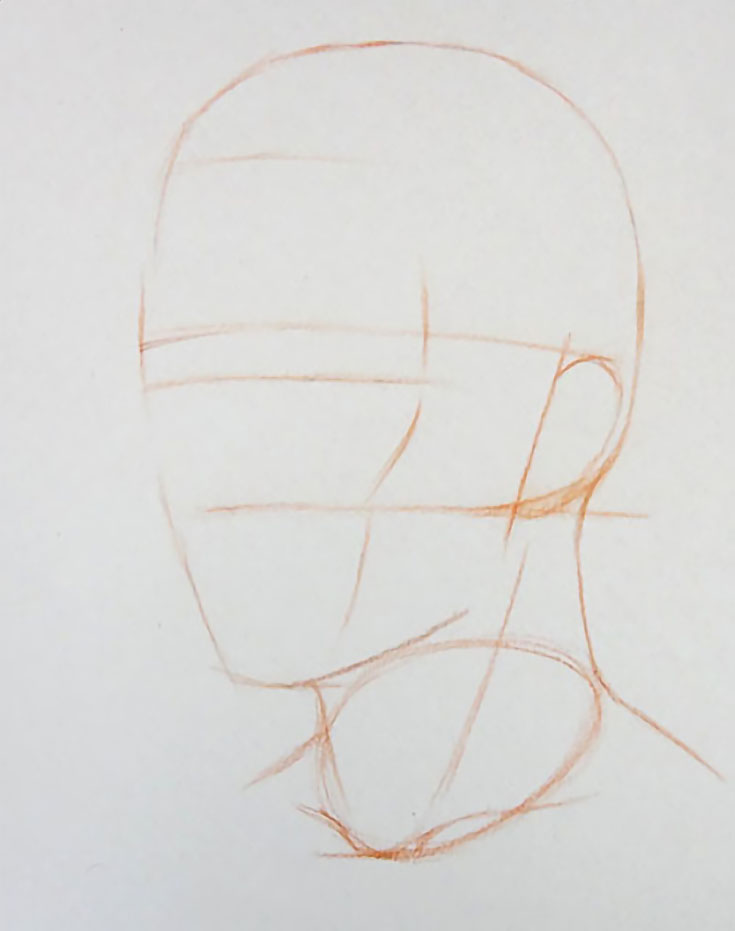
14. Drawing the base of the neck
With the main outlines and contours of the neck in place, we’ll also make sure to mark the base of the neck, giving it volume and mass.
The base of the neck has a circular shape and in perspective appears as a tilted oval. It goes through the top pair of ribs and defines the width of the neck at its base, as well as marking the size of the top of the ribcage.
This is an important contour line because it separates vertical planes of the neck from the more horizontal surfaces of the shoulders. As such, it serves as a visual reminder of the border between light and shadow on those surfaces.
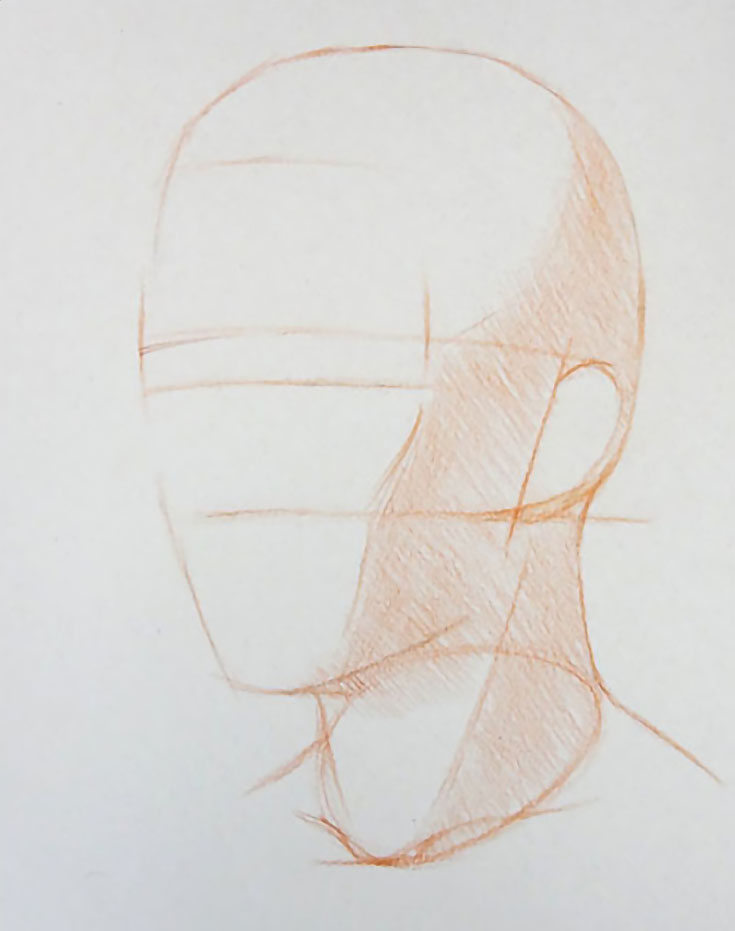
15. Shading the planes of the head
So far, we have not drawn any facial features or worried about small details. Instead, we’ve built a solid, well-proportioned construction of the head with just a few lines.
When the time comes to add facial features, what we’ve drawn so far will help us avoid mistakes and misplacements. To help us further, it is now time to block-in the main shadow areas of this portrait:
Use light pencil pressure to render the shaded areas of the head and neck, and then move on to Part 4 of this series!
Portrait drawing expert Vladimir London is a published author and founder of the Drawing Academy, an online class for learning traditional drawing techniques from home—make sure to click through for full tutorials, drawing tips, and more!
This post may contain affiliate links.
