Recently, I wrote an article describing how I use Photoshop to explore redesigning a drawing. (If you missed that tutorial, feel free to check it out via the link.) The reasons for reworking an old piece of art will probably differ from artist to artist and piece to piece, but they might include:
• The subject is too specific, such as a portrait study
• The artwork no longer fits into your body of work
• You just don’t like the artwork
• You want to freshen it up
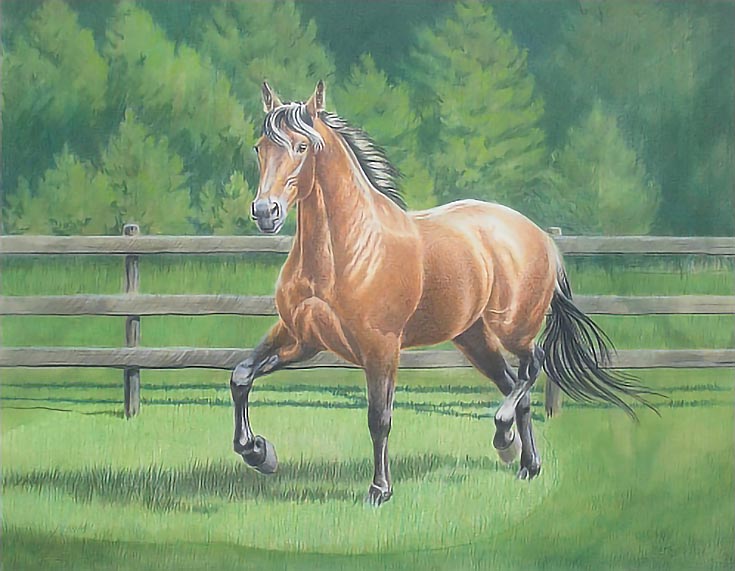
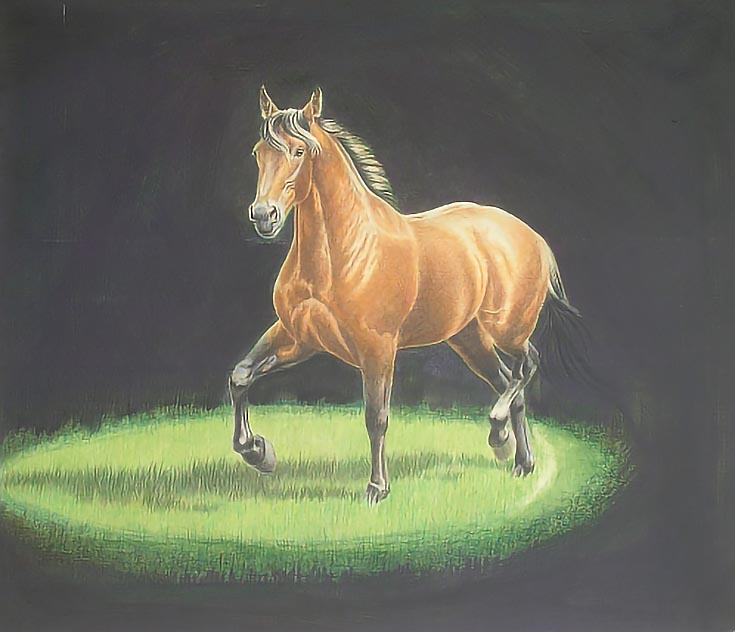
Here’s the piece I wanted to change—it’s a 16×20 colored pencil drawing on Rising Stonehenge paper, and originally it was created as a study for a full-size painting.
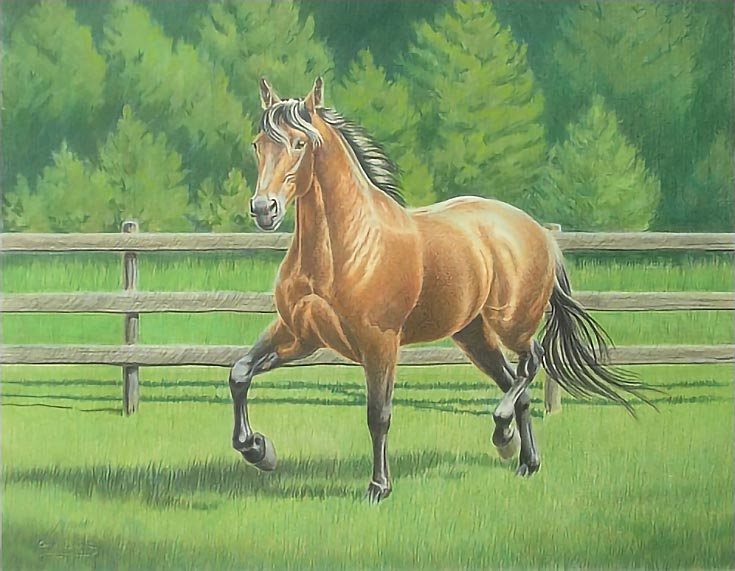
The reason I decided to rework it is because it’s a drawing of a specific horse in a specific setting, which means it has a very narrow—aka, non-existent!—target market. By making some changes to the drawing, I hope to make it more appealing to a broader market.
My plan is to focus the eye on the horse, rather than the background, by darkening the outside of the drawing considerably, and creating more of a “vignette” style piece. I may also make other changes to the horse itself to make it less specific (but we’ll see how everything goes!)
Step 1. Preparing the drawing
The first thing you’ll need to do when altering an old drawing is to mount the drawing so you can work on it.
For my own colored pencil work, I use a laptop drawing board made up of a mat, a rigid support, and a back board. The drawing is mounted to the rigid support, then sandwiched between the working mat and the backboard and held together with binder clips. I can work with this lightweight assembly propped in my lap or resting on an easel or drawing table.
NOTE: This setup is also ideal for travel if I want to take a drawing with me. I have laptop drawing boards in several standard sizes and can make individual laptop drawing boards for non-standard sizes as needed.
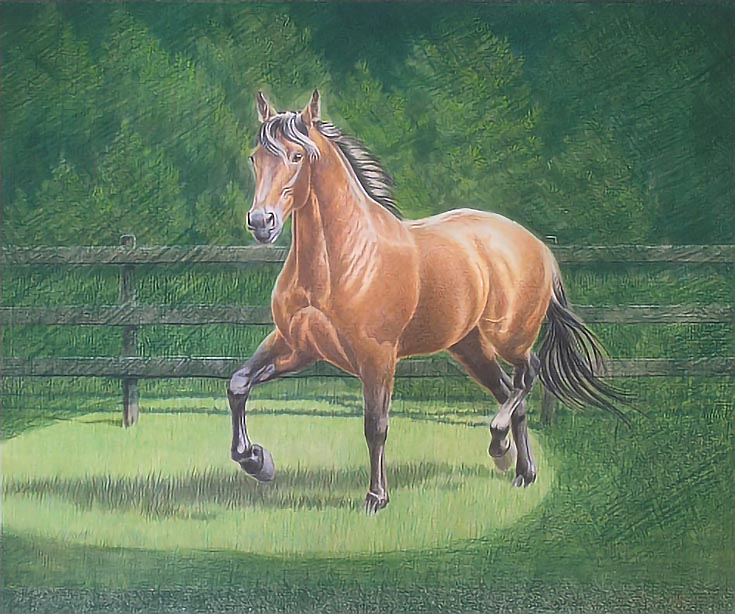
Before adding new color over the top of your old colored pencil drawing, you’ll want to cut down some of the wax so the color will stick. I also decided to very lightly mark off the part of the background that will remain, using a dark green Prismacolor Premier pencil and light-medium pressure.
To cut through the wax, I used turpentine on the remaining parts of the background. Not only does this cut down wax buildup, but it blends the colors on the paper and blurred the patterns of trees and fence. I applied the turpentine with a well-worn #22 bristle brush originally used for oil painting.
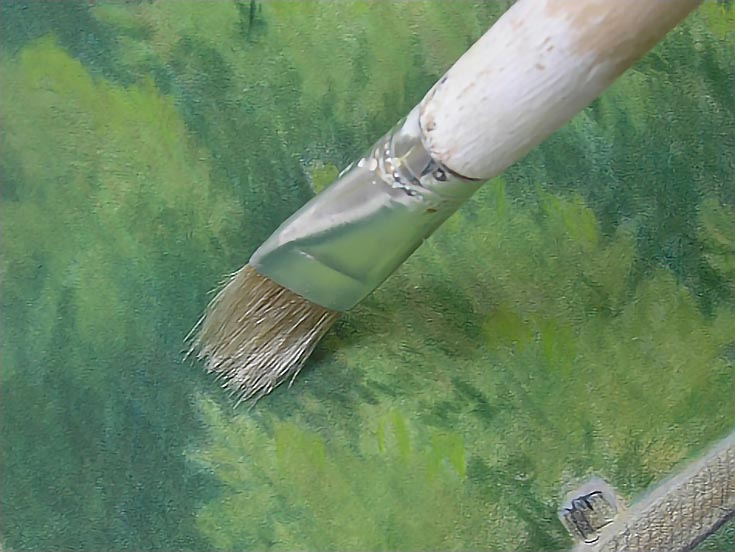
NOTE: To avoid scuffing the paper, I didn’t trim the bristles of my brush. Ordinarily I trim the bristles down, because shorter bristles provide more control and allow me to use more pressure if necessary. This time, I played it safe.
I applied turpentine liberally and spread it around with the brush without scrubbing the paper. After the paper was dry, I blended again. The paper was then allowed to dry and air for a couple of days.
Step 2. Making changes to the drawing
My goal is to change the background from fully landscaped to a vignette-style background that’s nearly black. But I don’t want to use a lot of black itself, so in order to get a rich dark color, I laid down several different hues, beginning with Dark Green.
I applied color with medium to medium heavy pressure in diagonal, cross-hatching strokes. The strokes were fairly open (with space between them) and longer than I would ordinarily use. I chose this method in order to cover the most background possible as quickly as possible.
I increased pressure and the number of layers around the outside portions of the drawing. I also used a blunt pencil most of the time. The flatter tip created broader strokes and made it less likely that I would puncture the paper.
When working around the horse, I used a sharp pencil and medium-light pressure to outline the horse, then shade around it. These strokes were shorter, more controlled, and closer together.
Each additional color was applied in the same way. First, Indigo Blue…

then Dark Umber…
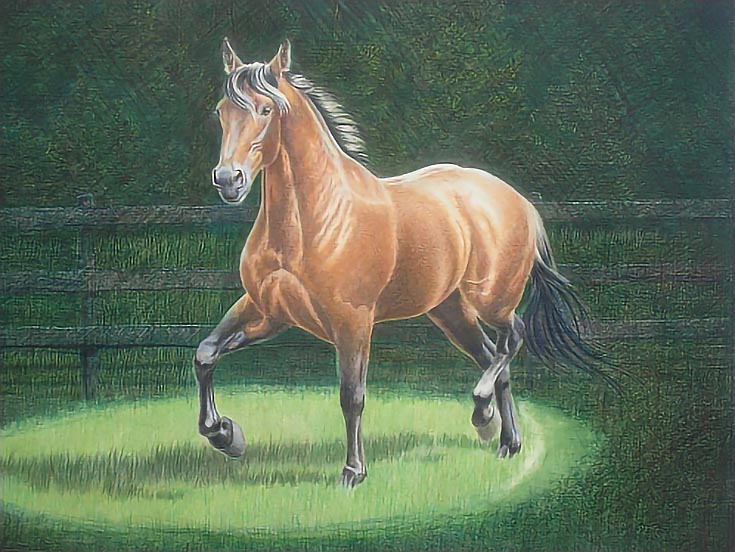
and finally, Black Grape.
With each of the previous colors, I’d covered the background as completely as possible, but now I allowed some of the previous layers to show through the Black Grape layer to create subtle color variations.
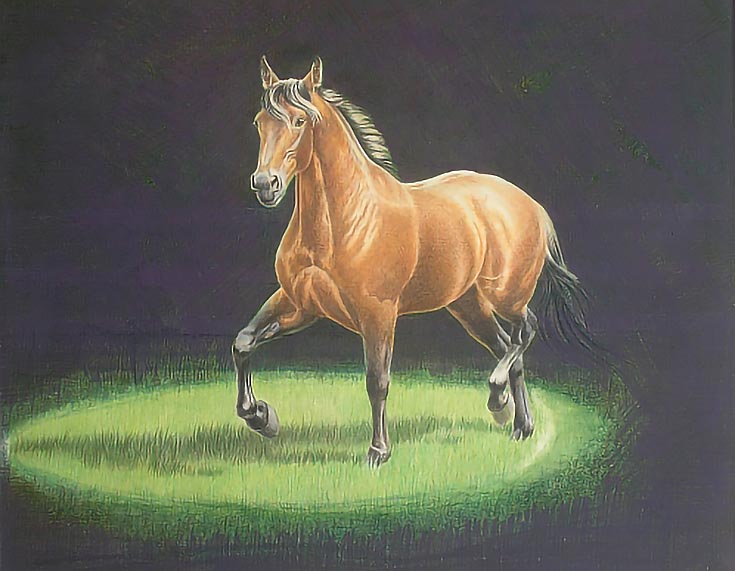
By the time I got to this point, there was so much wax on the paper again that I had to use heavy pressure to get the Black Grape to stick. It was almost a burnishing layer. So, I spent some time blending the layers with turpentine. I blended twice, allowing the paper to dry for a minimum of one hour between blends.
After the paper dried for a few hours, I burnished the background with black. Despite the turpentine blend, there was still a lot of wax on the paper, so this was the last color on the background.
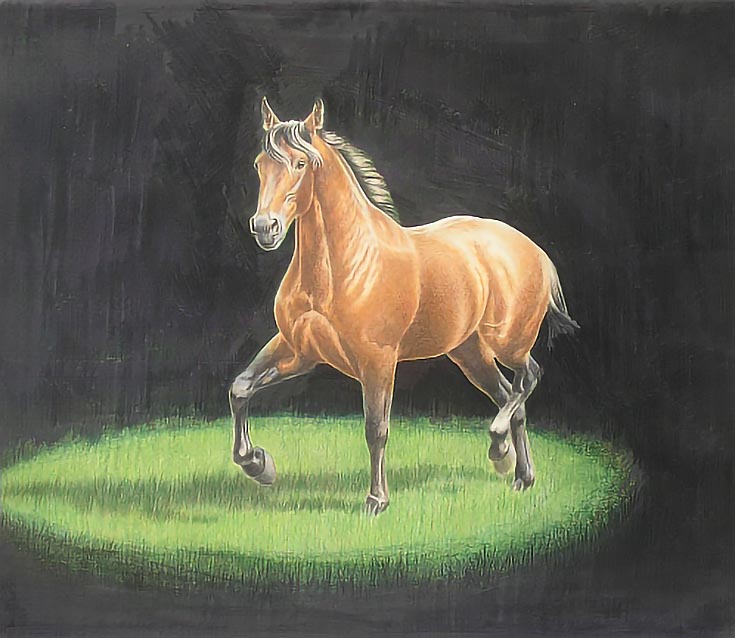
There are still a few areas that need adjustment. . . for example, I need to soften the edges between the grassy area and the dark background. Right now, that transition is much to abrupt. I also still need to make some changes to the horse.
The background is a bit uneven, and needs some touchups, but that will have to wait until the drawing is complete and I can spray it with retouch varnish to restore a working surface.
Pros and cons
Obviously this method is not for the faint-hearted. I’m still not sure this drawing is salvageable (although I do like the new background quite a bit better than the old).
You should also know that the process positively chewed up pencils like a hungry dog. I used up all my stubs and some of the longer pencils in the colors I used.
On the positive side, the paper withstood the additional work much better than expected. Although some color lifted in the later layers, there wasn’t the slightest damage to the paper itself, which I’m very happy about.
That’s all for now, but I’ll make sure to finish up the other bits of this drawing and post a “Part 2” within the next few weeks! Stay tuned. . .
This post may contain affiliate links.