Imagine someone strumming guitar slightly out of tune. No matter how lovely the melody, or how impeccable the technique, if even one string is out of tune the rendition is bothersome.
Likewise, a painting with inconsistent color temperature feels “out of tune” and will be disconcerting to the eye.
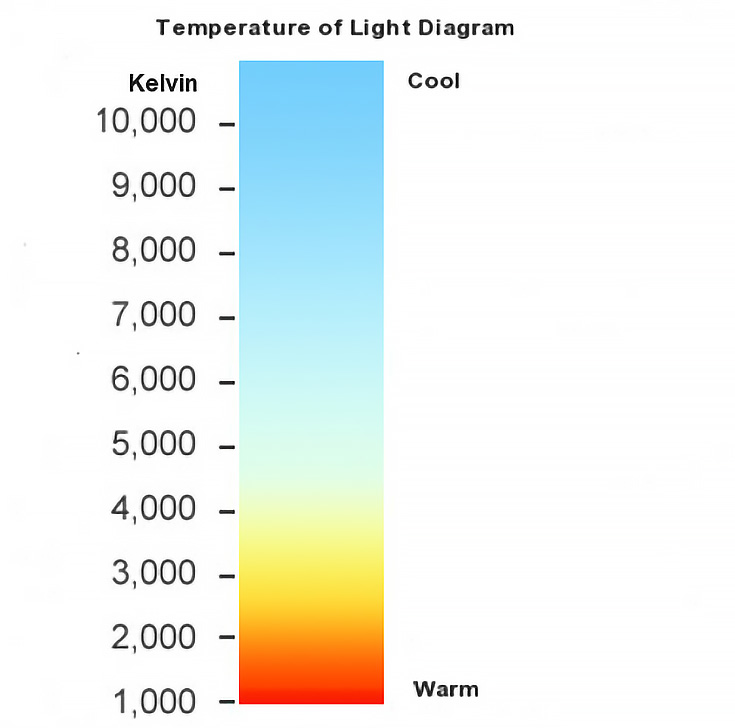
In normal life we hardly ever notice the light source’s temperature—but as artists, we should always understand the temperature of the light, since it controls the color of everything else we see. In other words, it’s the overall “tuning” factor of a scene.
If an artist neglects the principle that light affects colors, color throughout his or her painting may easily get out of kilter.
Opening your eyes to color temperature shifts:
To illustrate this idea in the extreme, find a colored transparency and look through it. You’ll notice that the color of everything changes. Or better still, put a colored light bulb in a lamp and notice how its own color changes every other hue in the room.
Another limited way to experience this is on your computer. Load a photo in GIMP or Photoshop and add a new, single-color layer over the top of your image. Change theblending mode of your new layer to Overlay and take note of how it alters the rest of the colors in the photo.
Below I have added three different colors to a single photo by Cathy Hauck. To make it easier to see how these three colors affect the image, I’ve sampled three color swatches from each instance.

You can see how an artist might just attempt to paint the grass “green” or the fire truck “red” and thereby misrepresent the color temperature of one or the other.
This is less likely to happen once we’ve trained ourselves to correctly see (and translate onto canvas) the temperature of the colors in a scene.
Here’s how to find the correct temperature of a color:
1.Round up some old white business cards or cut a batch of 2” x 3.5” strips from a heavy weight paper.
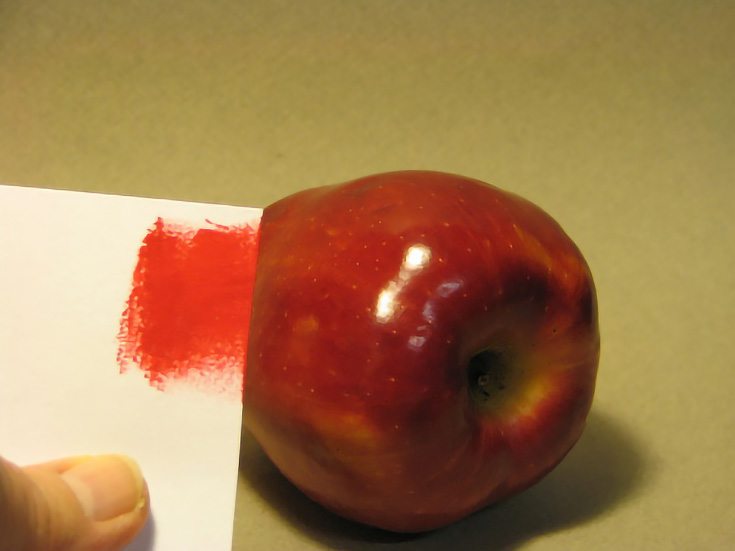
2.Set up a simple still life object under a lamp. Zero in on a single area of color and mix the color you think you’re seeing. (In the example below, I’m aiming for the reddest part of the apple using napthol red light with a touch of alizarin crimson.)
3.On the edge of a strip, paint a 1/2-inch square swatch of your mixture. Be sure to paint to the edge of the strip.
4.Close one eye and hold the sample at arm’s length between you and your target color, comparing the two.
5.Is your mixture the same or different? If different, is it lighter or darker? Warmer or cooler? My mixture is too light and too warm so I added more alizarin crimson to the mix, knowing that it is both darker and cooler than napthol red.
Now I compare again, with a much better result.
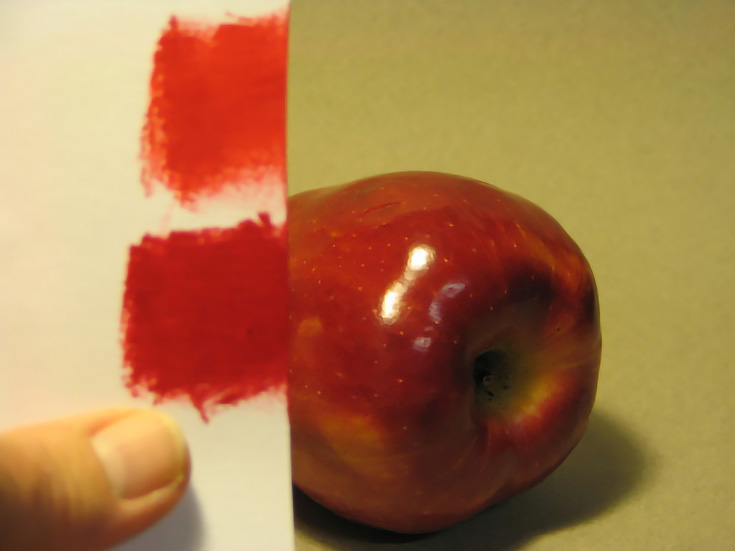
NOTE: When you do this, always change the value (lightness/darkness) first, then adjust the hue or temperature, if needed.
6.Repeat the exercise for any major colors in the subject you’re painting. Once you have at least three colors in tune, it will be easier for you to maintain the correct color temperature throughout the painting.
Ultimately, the key to correct color temperature is accurate observation, and this little method of direct comparison can do wonders for tuning the temperature of our colors.
By using this method to keep our colors in tune, two things will happen: first, we will start making paintings with the correct color temperature. . . and second, we will begin training our eyes so that—eventually—no painting will ever again be out of tune.
This post may contain affiliate links.