Artists who sell original work will (in a sense) always be competing with the seemingly inexhaustible print market. Luckily for us, discriminating collectors appreciate the unique surfaces that signify that a painting is an original.
That’s the main reason I like to give my paintings a lot of texture: so everyone can immediately see that they’re originals.
The following paragraphs explain my three-step technique for adding unbelievable, thickly painted texture to any acrylic painting. There’s only one secret—the texture comes first.
Creating the texture
After drawing out a basic sketch of flowers on my canvas, I mixed together equal amounts of acrylic heavy gel and acrylic modeling paste. Then, following the lines I’d drawn, I sculpted the petals, flower centers, and leaves with a small palette knife.
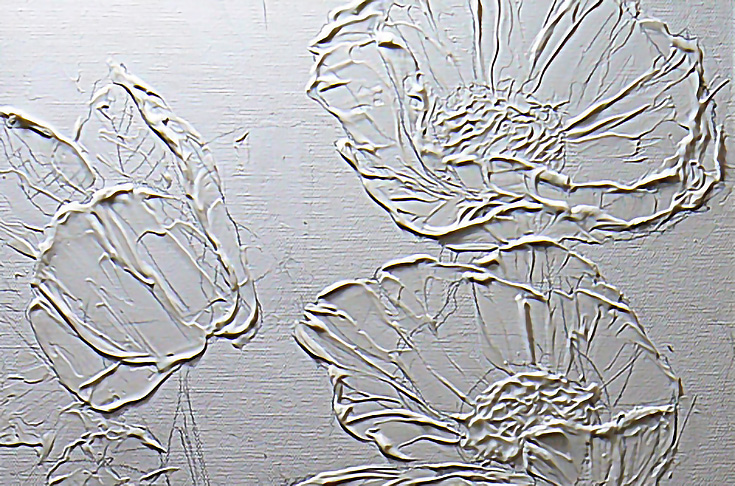
(NOTE: If you want a more abstract texture, here’s a great technique for applying modeling paste with paper.)
Painting over the texture
After drying for about two hours, my textured flowers were ready to paint.
I like to paint quickly and use really vivid acrylic paint colors for my poppies, such as Cadmium Yellow Deep, Cadmium Orange, and Naphthol Red, with deeper tones of Bordeaux Red and Violet for the shadowed areas.
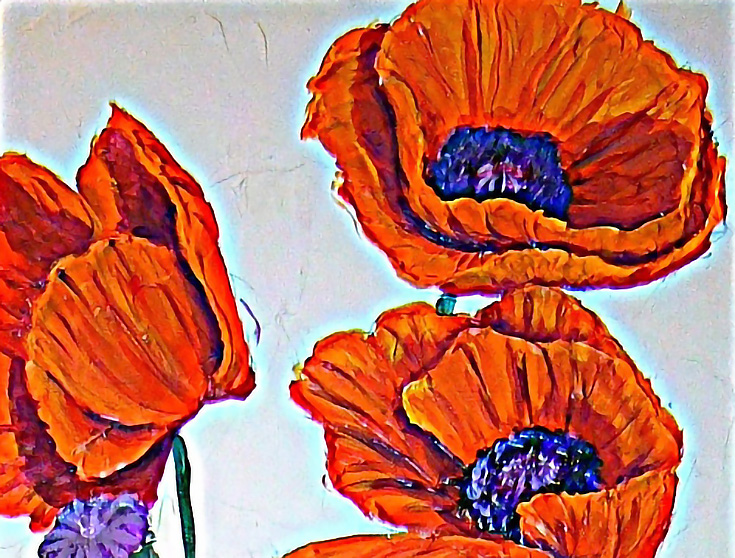
Working fast isn’t a problem because the texture allows me to correct any errors easily in the last step. I don’t usually find that a lot of detail is necessary, but simply let the texture (and vivid colors) do the work.
Glazing the painting for contrast
Once the paint was completely dry again, it was time to glaze.
I covered the entire canvas with watered-down burnt umber, then quickly lifted it off with a damp paper towel. This process allows the burnt umber to stay in the valleys and around the edges of the flowers while being removed from the raised petals.
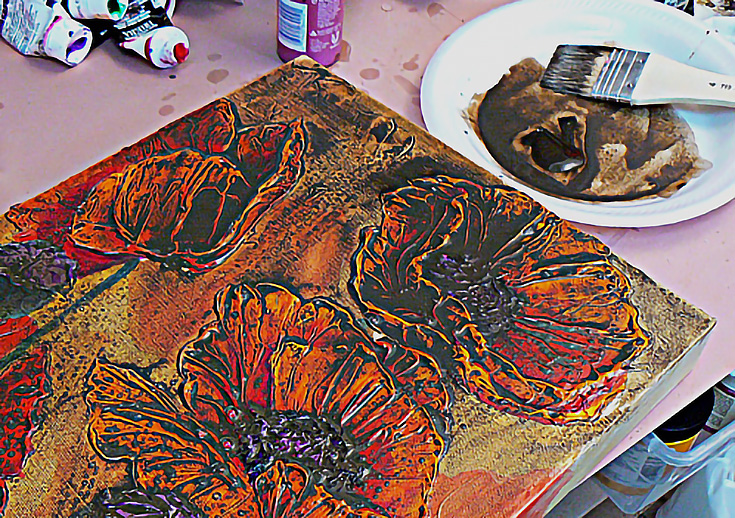
It’s amazing how a simple glazing technique over thick, acrylic medium can really make those flowers pop off the canvas. And after a final touch-up to emphasize the edges of the petals, this painting was ready for its protective varnishing.
The finished textured painting
Here’s the final piece—you can see there’s more to it than the other photos showed!
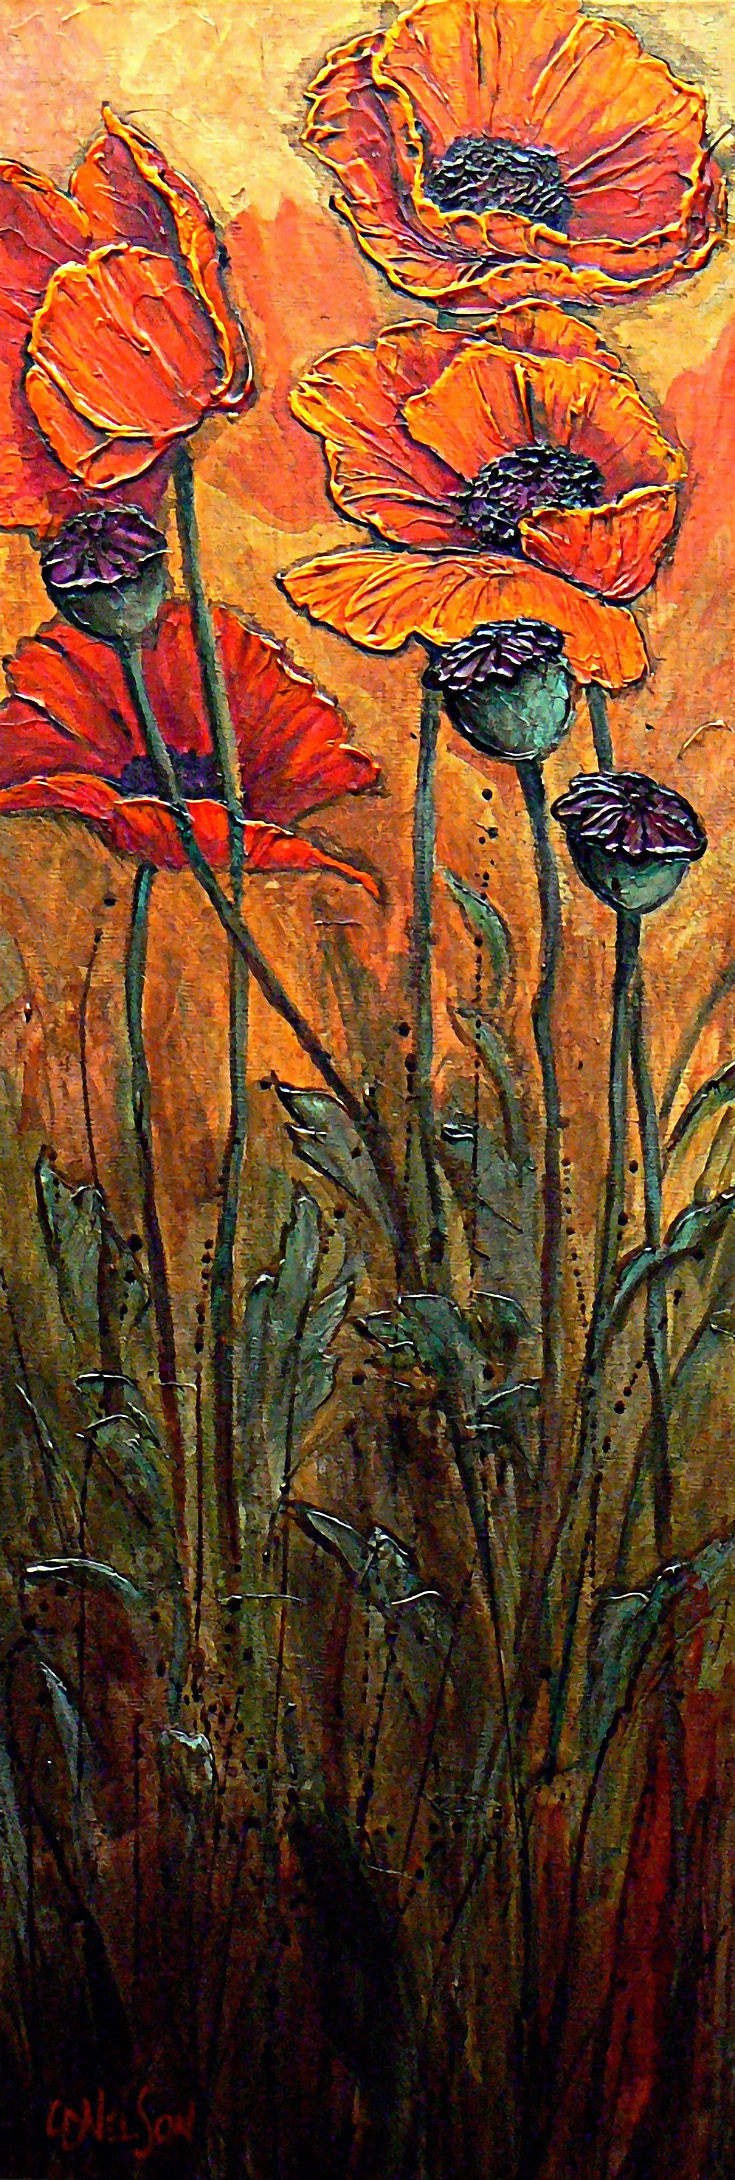
Remember, no matter what subject matter you like to paint, it’s very easy to add texture and drama to your art using this three-step process.
To find out more about Carol’s highly textural paintings, visit her painting blog or website at CarolNelsonFineArt.com.
This post may contain affiliate links.