I recently wrote an article describing how to get started selling art, no matter what kind of art you create. Today, however, I want to narrow my focus, and talk about how to sell drawings.
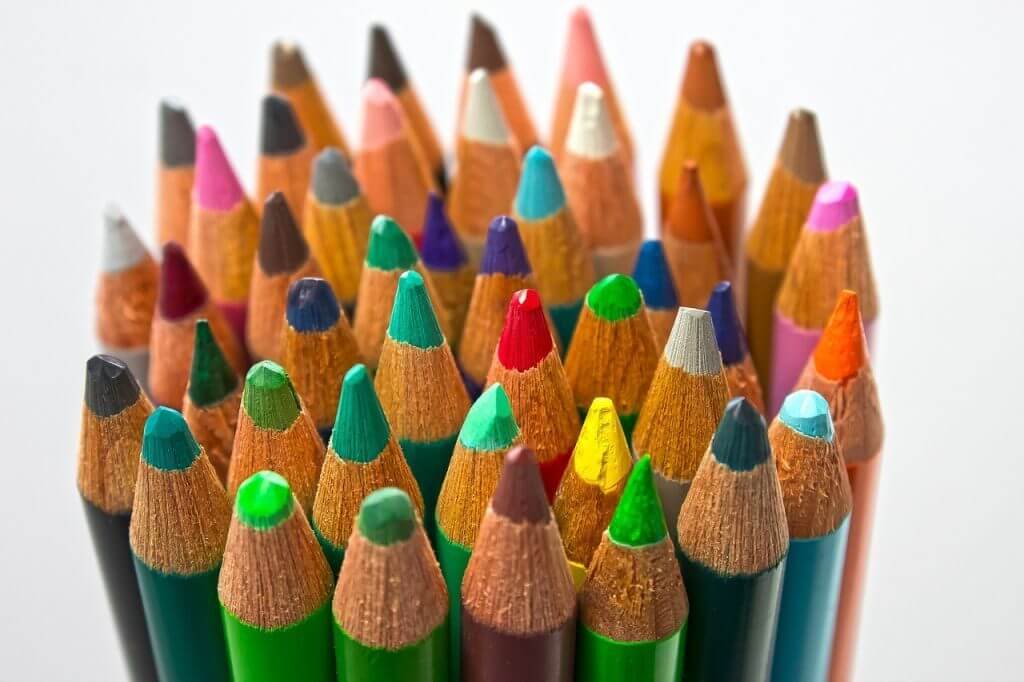
My expertise is in colored pencils, specifically, but these techniques will help you sell any type of two-dimensional drawing on paper. That includes charcoal, graphite, colored pencils, even ink.
Why does this type of art merit a separate discussion?
Simply because many artists find it more difficult to sell drawings than other forms of art. Put an oil painting and a colored pencil drawing side-by-side—even if both subjects are rendered equally well, many artists will find it easier to sell the oil painting than the drawing.
So to help you start selling your drawings more successfully, today I’m going to address three main areas:
• Creating professional-quality work
• Pricing your drawings
• Promoting & marketing
How to create professional-quality drawings
You should only expect to sell your drawings if you create well-rendered, professional-looking artwork. Nothing hurts sales more than pieces that don’t look finished, or that look amateurish. Here are a few tips to help:
1. Don’t start selling too soon
It’s so easy to start selling on the internet that many artists rush into sales too soon. Actually, it’s not that difficult to do offline, either. I know. I’ve done it.
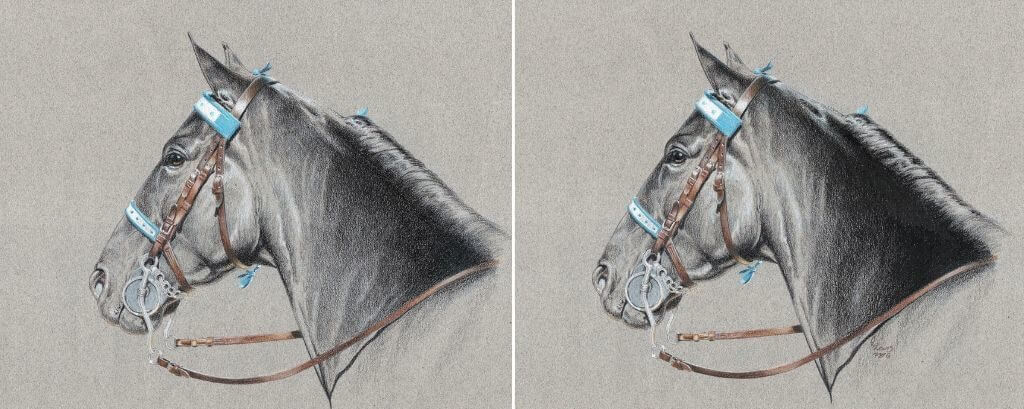
The two drawings below show my skill level in 1999 (left) and 2013. Yes, I did sell drawings from those early years, including the one shown here, but I really wish I had waited a little longer to start selling.

Give yourself time to learn what a medium is capable of (and what you’re capable of!) before you start selling. You also want to give yourself time to discover whether or not you can create a consistent body of work.
How long is long enough? That differs artist to artist, but a good rule of thumb is to have at least half a dozen or more quality drawings finished before you start selling.
2. Use the best drawing materials you can afford
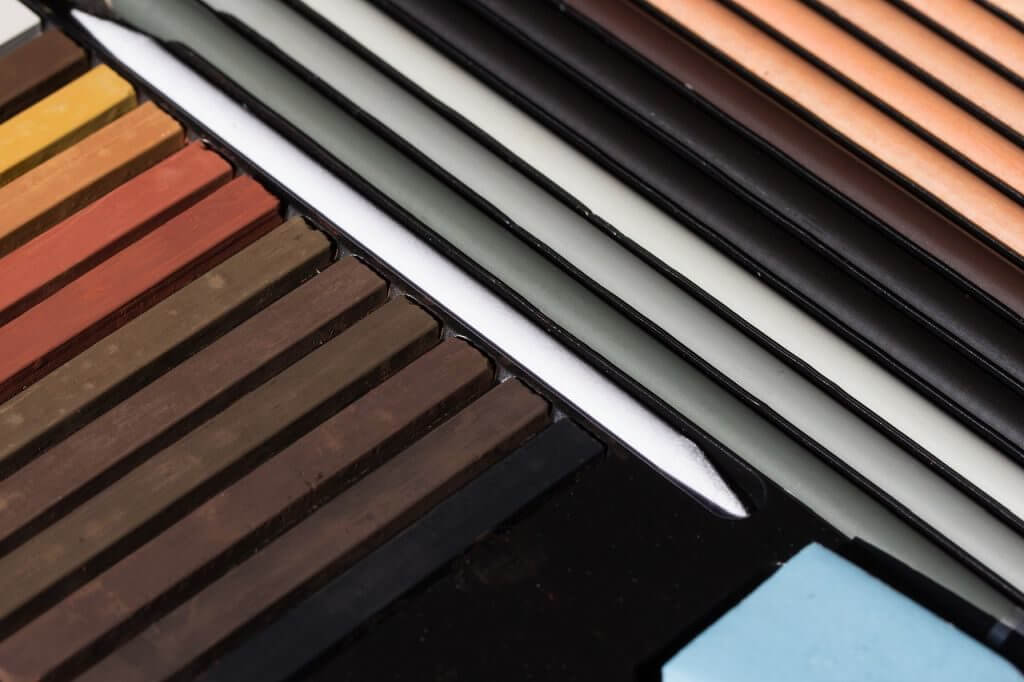
There really is a difference in the results between low-quality and high-quality supplies. It’s especially important to use archival drawing paper that does not yellow or get brittle with age. Your paper should also have a quality feel. The same applies to your drawing tools. Charcoal, graphite, colored pencil, conte, or other drawing tools should always be the best you can afford.
3. Start with the end in mind
Before you start a drawing, take a little time to envision the finished artwork. Think about how you want it to look, and how you plan to achieve that result. The size of the drawing is important, so is the orientation. Think about proportions, too. Would a panorama format make a better landscape than a more square format? What about a circle or oval shape?
Some artists do thumbnail sketches to work out basic composition. Some use photo editors to plan composition.
Whatever method you use, your goal should be creating a piece that’s not only beautifully rendered, but unique in other ways, as well. Those details will not only make your work stand out and be more marketable, but they’ll also make creating it more fun.
4. Take your time on every drawing
Don’t rush through a project. Instead, pay attention to your strokes, shading, and detailing. Every stroke should contribute to the overall progress of the piece. If you find yourself getting lazy or careless, stop! Take a break. You will not regret it!
Then, when you think a drawing is finished, give it one more hour. . . or even one more day. Even if your drawing looked pretty good before that extra time, you may still be surprised at how much better it looks after you’ve put in the extra time.
5. Sell only your best drawings
When you get ready to sell, sell only your best work. That ensures you build a good reputation among buyers and potential buyers. When you list your artwork online, use good, clear images and provide all the necessary details (size, medium, paper type, etc) so buyers know exactly what you’re selling.
How to price your drawings
Once you have a body of work to sell, you need to decide how much to charge for it. There is no easy way to calculate prices. Nor is there a “silver bullet” method that works for every artist.
However. . . often the best way to price your art is to simply look at the work being sold by other artists.
Begin with artists who use the same materials you use and are producing artwork that’s similar in size, format, and subject. You don’t need an exact match; you’re just looking for a starting point.
Established artists will be able to charge more than artists new to the market, so look at artists who are relatively new to selling as well as those who have been around a while. Jot down the highest prices you see and the lowest. You’ll probably want to start toward the low end of the scale when you begin selling. If your work starts “flying off the shelves” then you can afford to increase prices.
Once you have a ballpark idea for prices, you will want a consistent way to calculate prices on individual pieces. The two easiest pricing methods are by the square inch and by the unified inch. Here’s how each of those pricing methods work. . .
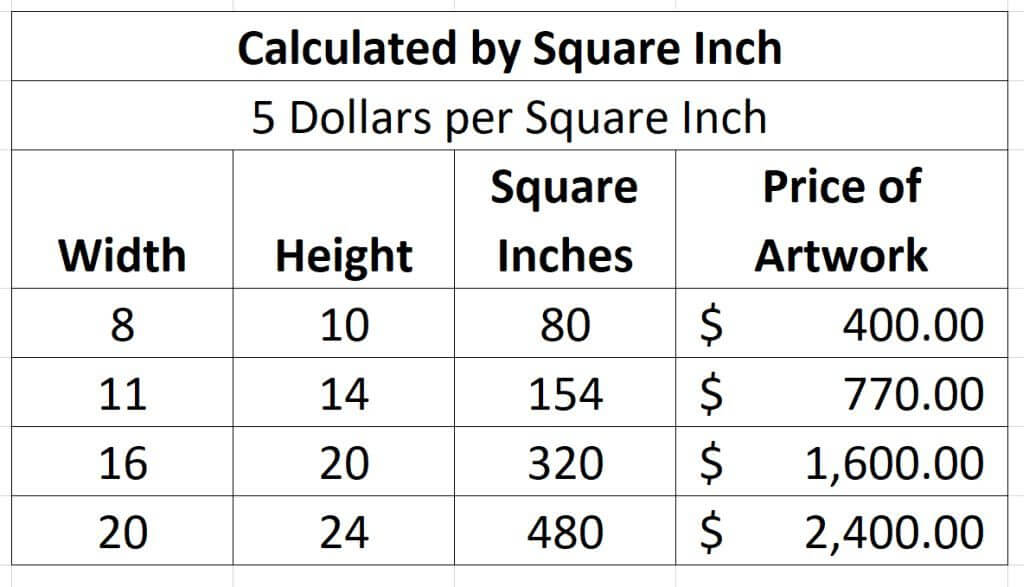
Pricing by the square inch:
When you set prices by the square inch, you first determine the total area of your drawing by multiplying its length by its width. Then multiply the area by a dollar amount of your choice. If you decide to charge $5 per square inch, the price for an 8×10 drawing would be $400 (8 x 10 = 80; 80 x 5 = 400.)
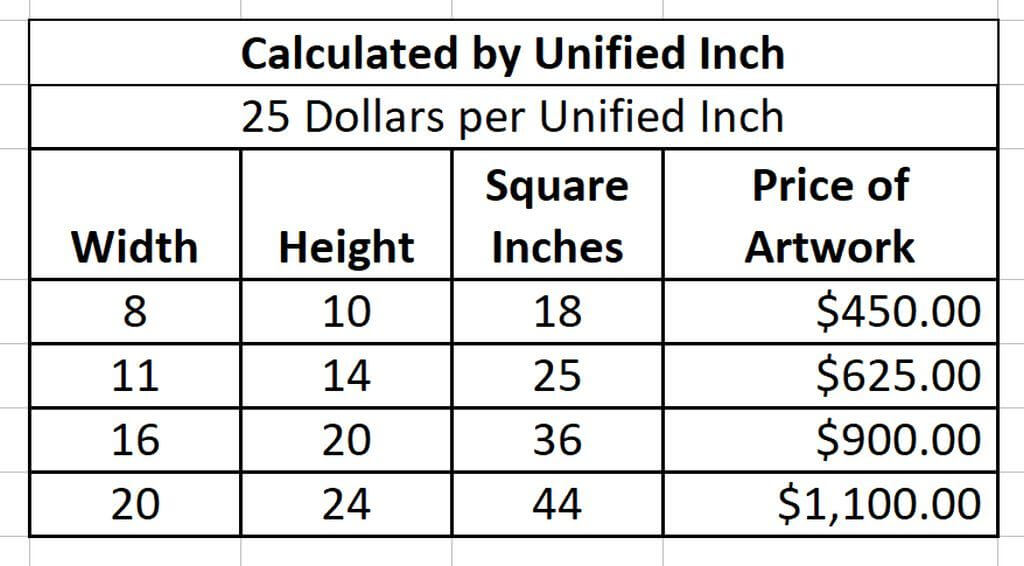
Pricing by the unified inch method:
The unified inch method is similar, but instead of multiplying, you simply add the length to the width. Then, multiply that “unified” number by your chosen cost per inch. In this case I’ve chosen $25 per unified inch.
Using the same 8×10 artwork example above, you’d have 18 unified inches, and the price would be $450 (8 + 10 = 18; 18 x 25 = 450.)
As you can see, you have to charge more per unified inch to get a reasonable price. Notice, however, that the larger your artwork gets, the more the price varies between the two methods. The amount of time you spend on those larger artworks may determine which pricing method makes the most sense for you.
There are other ways to calculate prices, too—try as many as you like, if that’s what it takes to find one that works for you. The key is to figure this out before you start selling, so you aren’t changing methods in mid-stream.
How to promote & market your drawings
When it comes to selling drawings, many of the ideas listed in my quick-start guide to selling art still apply. However, here are some of the more popular ways to market drawings in particular:
1. Accept commissioned work
Probably the most consistent way to sell drawings is by doing commission work. Human and animal portraits, property portraits (houses, cars, or other property that means something special to a client) and custom designed work of any other type fits into this category.
Fans of all mediums can be potentially interested in custom-designed drawings, so even if you don’t want to become a commission artist exclusively, it’s always worth your time and effort to give clients the opportunity to pay you to create something special for them.
2. Post your drawings on Instagram
Art (and especially drawings) are extremely popular on this social media network. People love to see multiple in-progress photos of drawings, or even sped-up videos that show an artist creating a scene from start to finish. Best of all, you can gain brand-new fans and admirers just by adding the appropriate hashtags to your post.
If you’re completely new to Instagram and aren’t sure how to use it, check out this simple Instagram guide for artists.
3. Encourage word-of-mouth referrals
A satisfied client provides your best marketing, so do everything you can to make your existing buyers happy. Visitors to their home or office see your work and the truly happy client is only too happy to talk about the artwork and the artist—you!
Word-of-mouth marketing works with all forms of art, but it’s especially helpful for selling drawings, because your happy client has already made the choice to purchase a drawing and they love it.
In a way, your client’s recommendation is like a pre-screening process. Potential buyers see the work on paper and get a good idea of the quality and appearance or your work. They know up front whether that’s the type of art they want. By the time they contact you, they’ve often already made up their minds to buy something from you. All you need to do is answer questions and work out the details.
4. Promote your drawings on your own website
Having a website is a must if you want to sell drawings. The reason a website is so important is that it gives you a place to send customers and clients to see your work, learn a little bit about you, and learn about your working methods. Put only your best work on your website, make sure your images accurately show crisp color and contrast, and are professionally presented.
A website is also a great way to give potential buyers a fast and easy way to contact you, since most website templates now include a contact page. There are plenty of services that offer basic templates which you can customize—just do a search online for “Artist Websites” or try EmptyEasel’s Simple Artist Websites if you’d rather not have to build your own.
5. Join drawing groups & societies
Another excellent way to market your work is by finding and joining groups, societies, and associations dedicated to your medium. The Colored Pencil Society of America is the go-to group for colored pencils. The Pencil Art Society welcomes artists working in graphite, colored pencil, charcoal, water soluble pencils, and conte.
While not all such groups or associations allow members to sell work through the group, most of them do offer a wealth of resources, and/or host annual exhibitions for members. Links to artist websites are also included in the membership roster, so anyone looking for a specific type of art can access dozens of artists by visiting associations such as these.
6. Rent a booth at trade shows
Don’t forget one of my favorite, outside-the-box marketing avenues: selling drawings at trade shows. Your only limitations when it comes to doing trade shows and other specialty events is your imagination. Look for shows that cater to a segment of your audience or maybe even are similar to a segment of your audience.
For example, I do a lot of landscape art in colored pencil. Trade and specialty shows I would consider are home and garden shows, home improvement shows, outdoor shows, and travel or tourist shows.
Ultimately, selling your drawings is much the same as selling any other type of art. . . you’re only limited by your ingenuity, courage, and dedication to promoting your work. Good luck!
This post may contain affiliate links.