In my last tutorial we explored painting sunflowers in the Chinese Brush painting style. This time we will be painting Magnolia blossoms on a branch.
Required Chinese brush painting supplies
For this painting you will need a medium-size mixed-hair brush, often called a “flow” or “combination” brush. The inner part is made from stiff bristles which help the brush retain a nice point. The outer part is made from softer hairs which allow it to hold more water and paint.
I am painting on mulberry paper also called shuen paper. Mulberry paper comes in a variety of colors and textures so try out different kinds to see which one(s) you like. You might want to do a few practice paintings on newspaper to get familiar with the brushstrokes as well.
Other supplies we are using include watercolor paints (I am using Permanent Rose, Dioxazine Violet, and Sap Green), black sumi-e ink, and white gouache. You will also need:
• A container of water
• A watercolor palette or old plate for mixing paints
• Some paper towels for blotting excess water from the brush
• A piece of felt or heavy cloth to put under your paper so that it doesn’t stick to the table as you paint
NOTE: You will be painting with your paper flat on the table on front of you; you will not need an easel or any kind of special drawing surface.
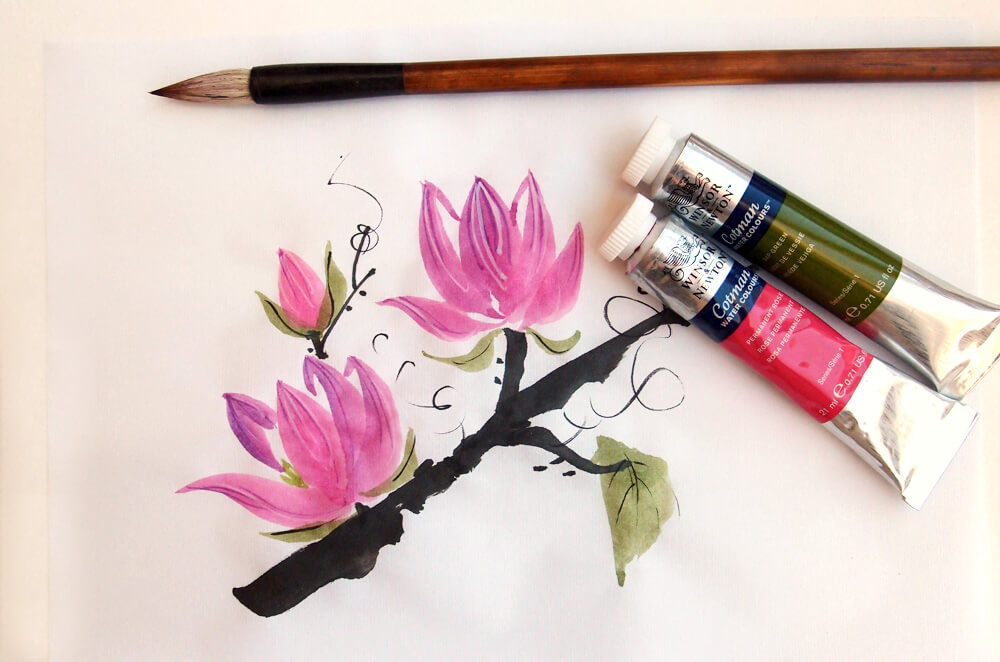
Supplies for this project: combination brush, mulberry paper, watercolor paint, and ink (not pictured)
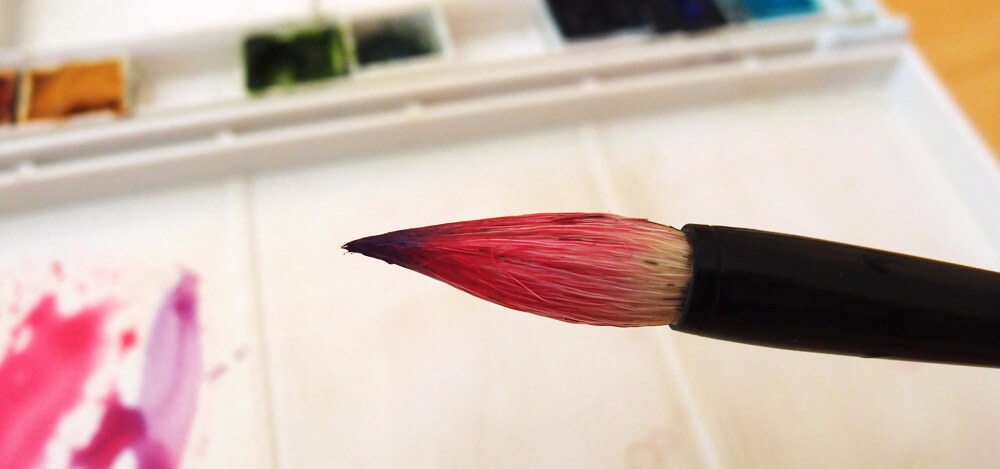
1. Load your brush with pigment
Wet your brush with clean water, dip it into your rose paint, and roll the brush on the palette to distribute the paint into the brush. Then dip the tip of the brush into the violet paint to coat just the brush tip.
2. Paint the shape of the Magnolia blossoms
Starting with the central petal, press the brush onto the paper and pull it towards you releasing the pressure on the brush to taper the stroke. Place a second stroke next to the first to widen the petal.
Building from this center petal, add more petals by repeating the step above. Vary the length and thickness of some of the petals as well as the angle to give your blossom a pleasing shape.
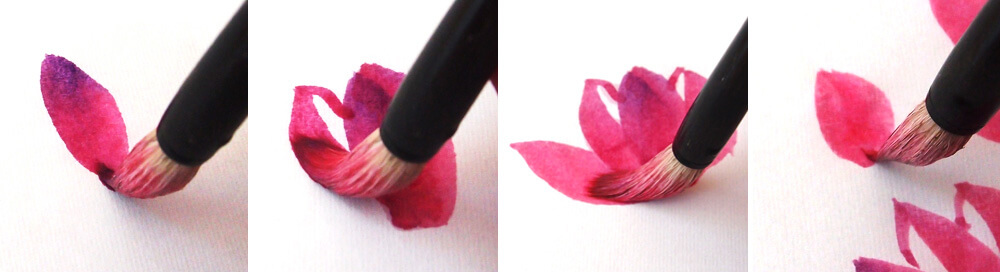
Repeat the steps above to add a second blossom, or place two small strokes next to each other to form a bud.
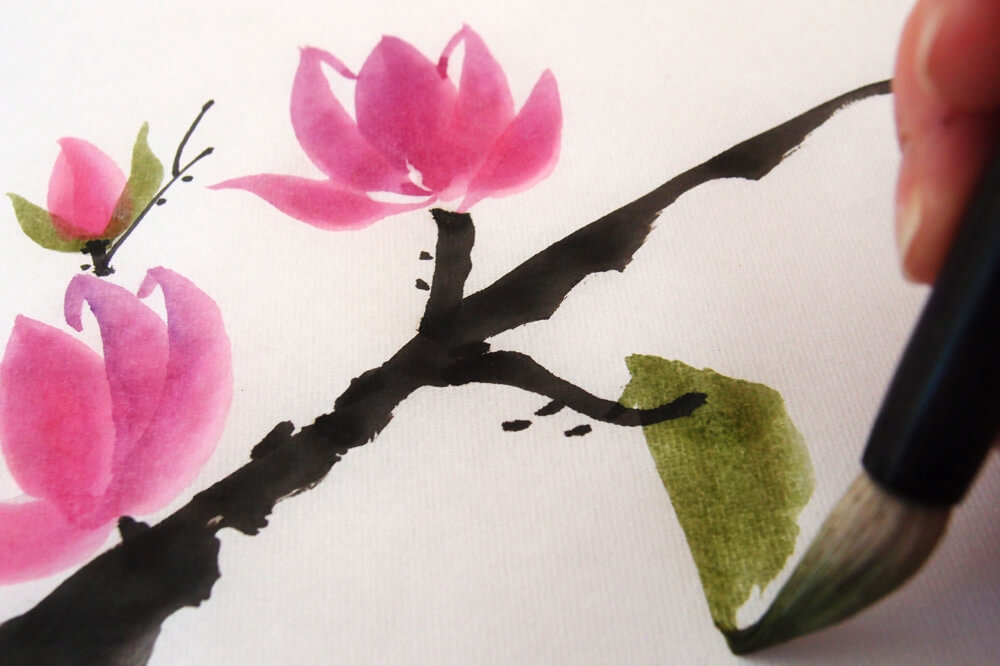
3. Paint the Magnolia branch
Clean your brush, dip it into your ink, and roll the brush on the palette to distribute the ink into the brush. Dip the tip of the brush into the ink to coat the brush tip. Lightly press your brush onto a paper towel to remove some of the excess water.
Press the brush onto the paper and push it away from you to form the branch. If you move the brush quickly it will skip along the paper and give your branch texture. If you are painting more than one blossom like I am remember to include additional branches for those blossoms.
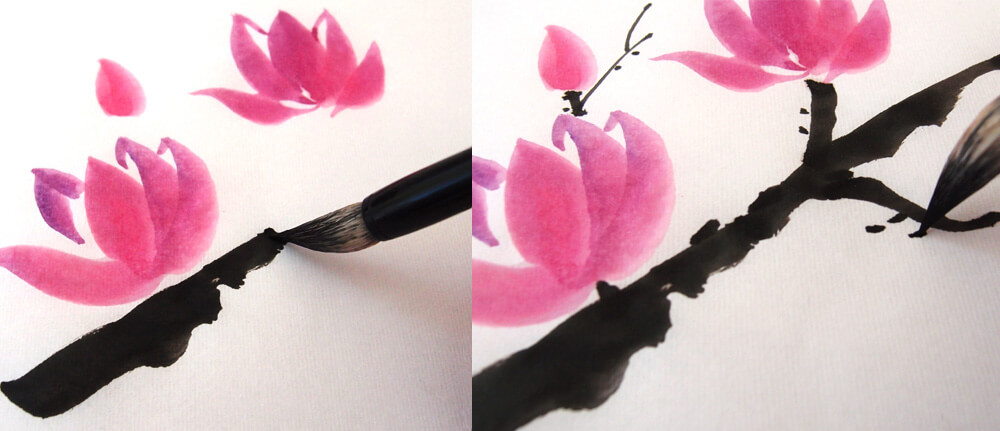
You can also add dots of ink along the branch for more texture and visual interest.
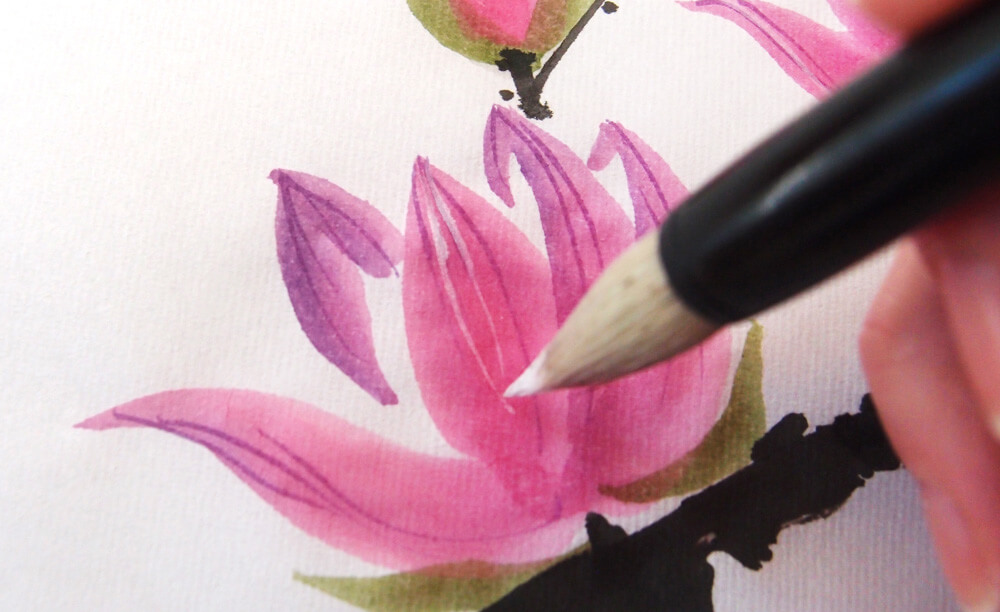
4. Finish by adding various details
Clean your brush and load it with green paint mixed with a little ink.
For large leaves, press the brush firmly onto the paper so that you are using the full length of the brush. Make two strokes next to each other if you would like a larger leaf. For smaller leaves, like the ones that wrap around the bud, place small strokes using the same method you used for the petals.
Load your brush with violet and dab it onto a paper towel to remove excess water. You want your brush to be fairly dry for this step. Draw parallel lines on the petals using just the brush tip. Repeat this step with white gouache.
Although not found on magnolia branches, I like the look of curling vines in my botanical paintings. To make them, load your brush with ink, and then holding the very top of the brush make curving lines in a few places. It helps to hold the very end of your brush so that you don’t apply as much pressure while making those irregular loops.
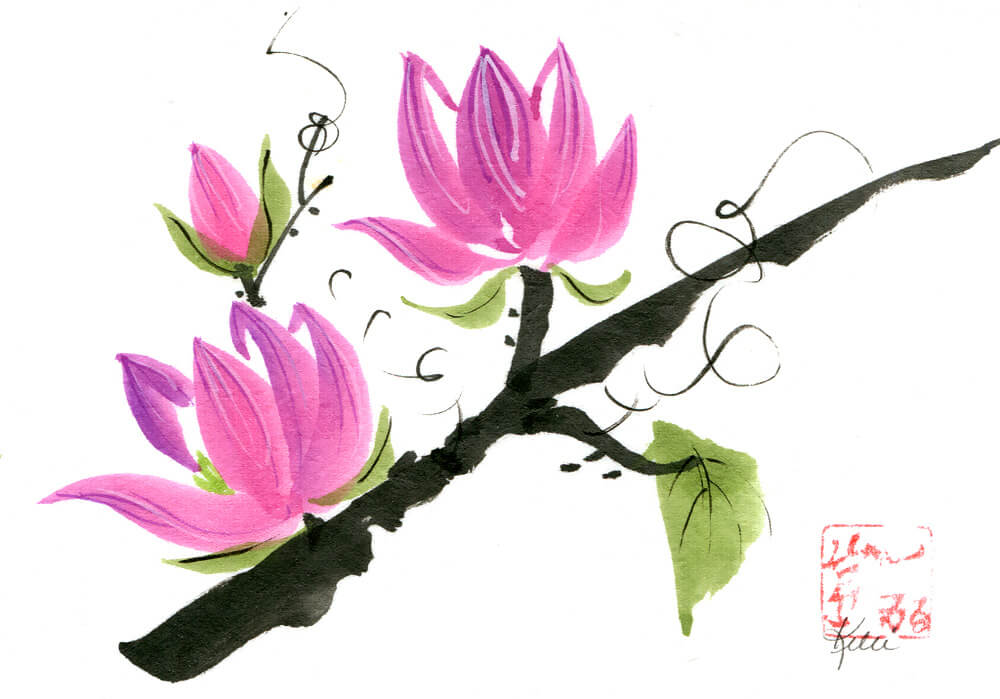
Add veins to the leaves with ink, sign your painting, and enjoy it!
Special thanks to Kelli McNichols for sharing this sunflower brush painting tutorial! To learn more about Kelli or her art classes, please visit her website.
This post may contain affiliate links.