Chris is an energetic artist, and an expert in InDesign from his days as a graphic designer. As a thank-you for his help with one of my bookmaking projects, I offered to do his portrait. I took this picture of him against a white backdrop in my studio.

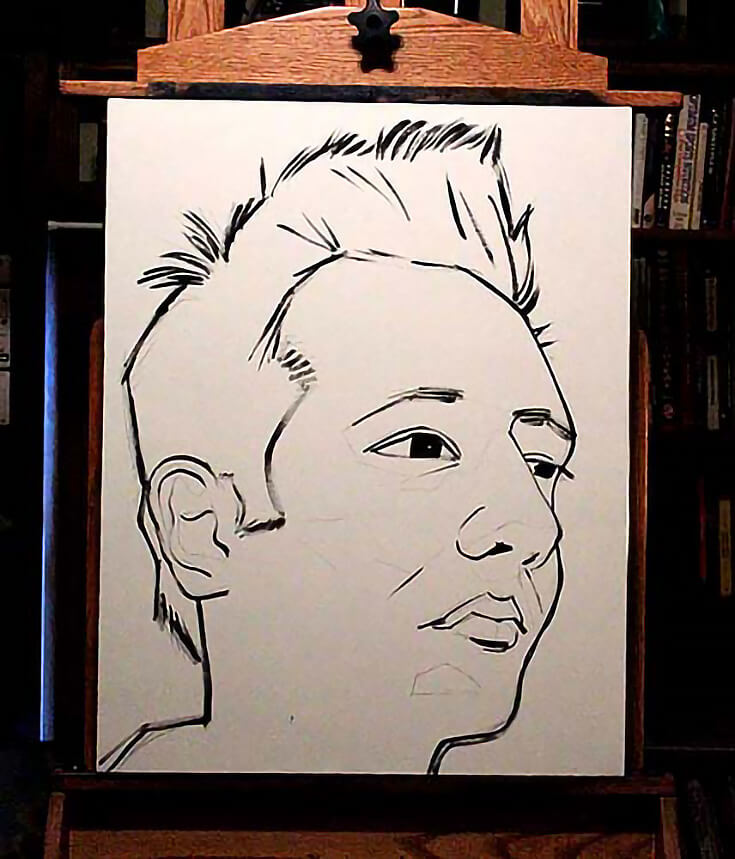
Choosing a fair sized canvas, I began by drawing his features first with a charcoal pencil, then over that in a black acrylic line.
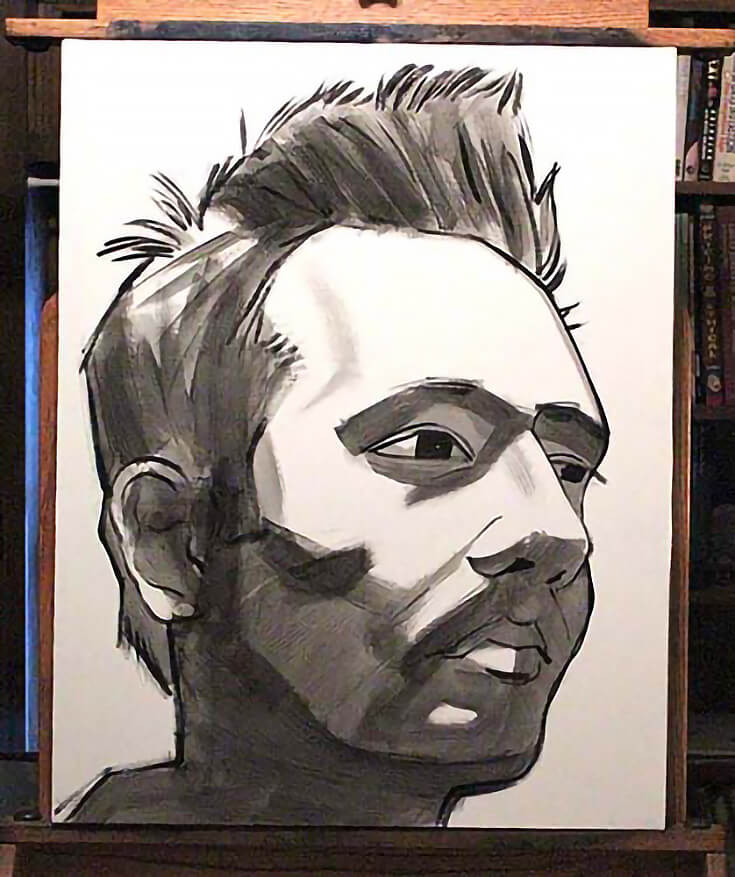
Because acrylics dry almost immediately, I went in with a mass of grayish transparent shadowing and tones that will form a basis for the painting. For most of this demonstration, the medium used to make the acrylic paint transparent is Liquitex Matte Medium.
I gave the grey areas time to dry (a hand-held hairdryer on medium heat speeds the process) and taped-off a thick vertical area I intended to paint bright blue using 2″ wide white artist’s masking tape.
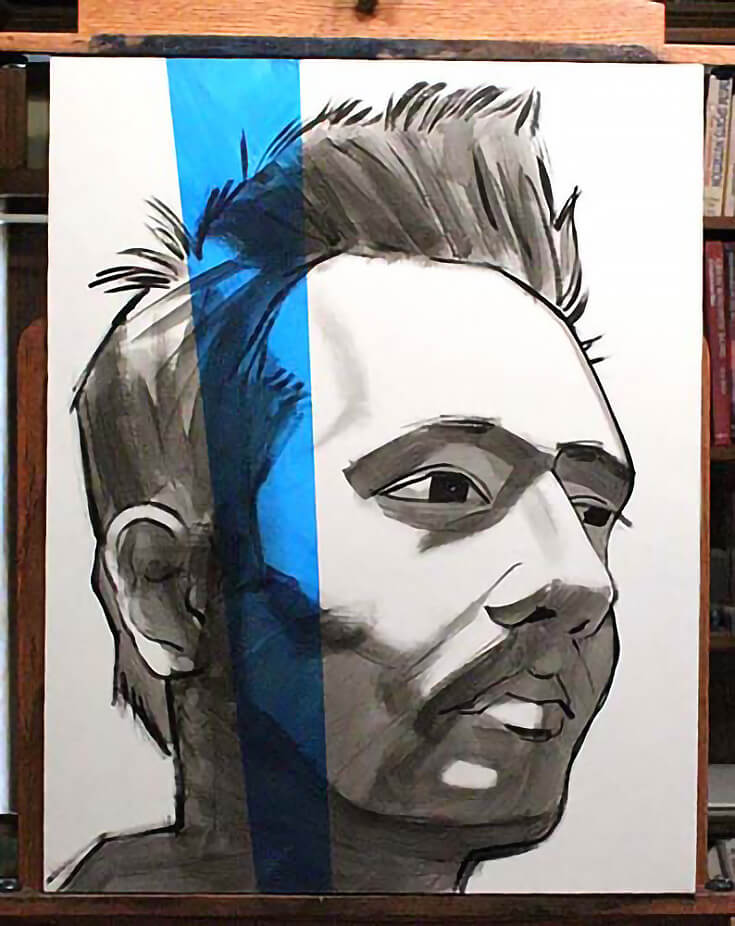
Pro tip: paint over the to-be-painted edges of your tape with matte medium first before adding any color, and let it dry. It will keep the color from “creeping” under the tape and ruining the crispness of the edging.
When the blue streak completely dried, I did the same process with the red and yellow colors, making sure the color edges touched, but didn’t overlap.
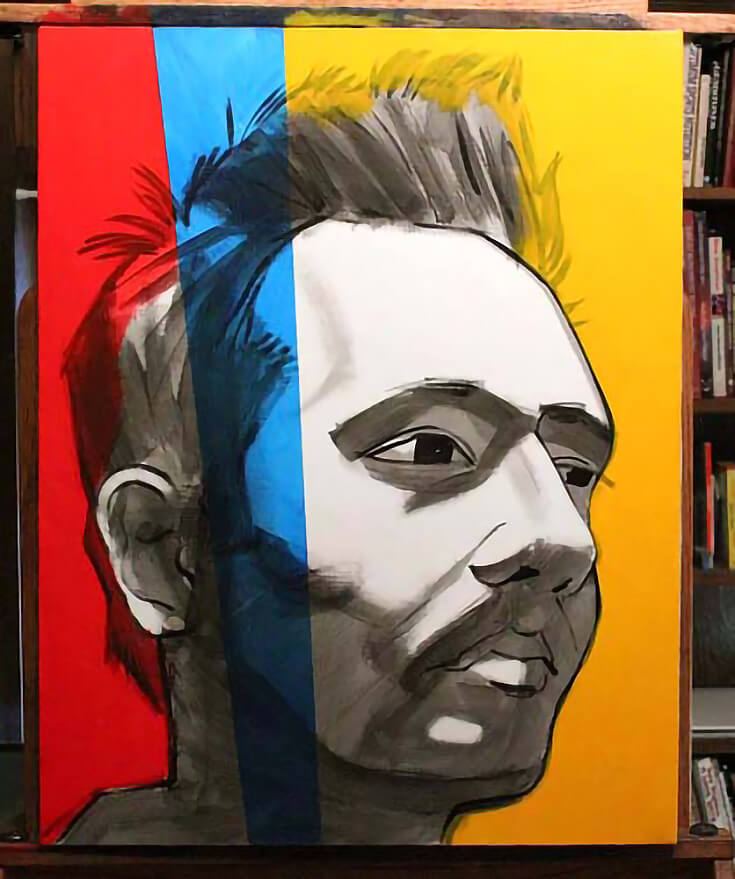
All the background colors used in this demo are Golden Fluid Acrylics thinned with the matte medium mentioned earlier. I really like the Golden line of products for many reasons.
With the background done, it was time to paint-in the basic flesh tones and deeper shadows with a more opaque paint. Note that the background, especially the blue streak, will show through in the final portrait.
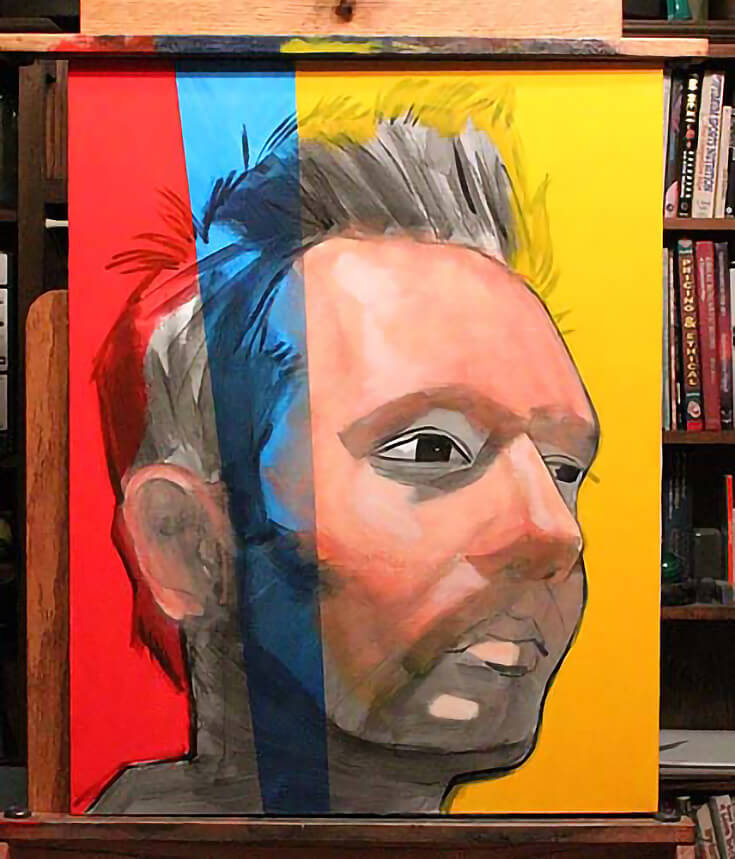
Going back in and reinforcing the shadows and darker portions of the face started adding “volume” to the portrait. Note that there is no attempt to be slick and fancy. In my opinion, acrylics—because they dry so fast—lend themselves to a more “impressionistic” look than do easily-blendable oil paints. I have long given up trying to paint with acrylics like I do in oils.

Lastly I added the final touches. Finishing the ear, lips, hair, eyes, adding more natural and opaque skin tones, plus softening the edges of the nose brings this portrait to completion. The paints used here are both Liquitex and Golden Acrylics out of tubes.
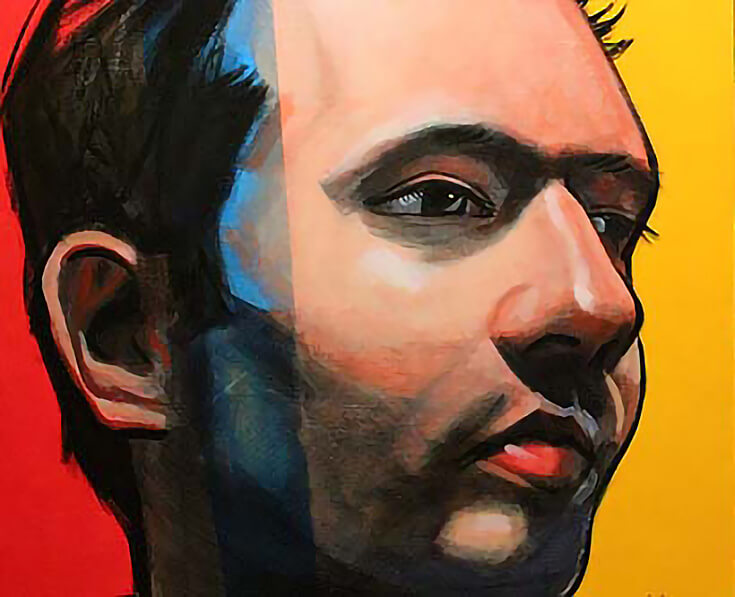
Here is a slightly closer view so you can see how the background colors come through portions of the face.
Painting this way is fun, because a somewhat incomplete execution can still look finished!
Special thanks to Lyman Dally for sharing his process for this acrylic portrait painting! To see more of Lyman’s paintings in this style, please visit his Instagram page.
This post may contain affiliate links.