Even advanced artists make mistakes, or misjudge things during the drawing process. It’s not only a fact of life; it’s part of the artistic process.
And if I’ve learned anything in over 50 years of making art, it’s that my own art projects go off track more often than I care to admit. But you know what? Such mistakes don’t mean a project is doomed! Quite the opposite in fact.
Mistakes of all types and sizes are an open door to acquiring a new skill if you know how to respond. But how do you put a derailed project back on track?
Here’s what I do:
This is the photo reference for my most recent “derailment.”
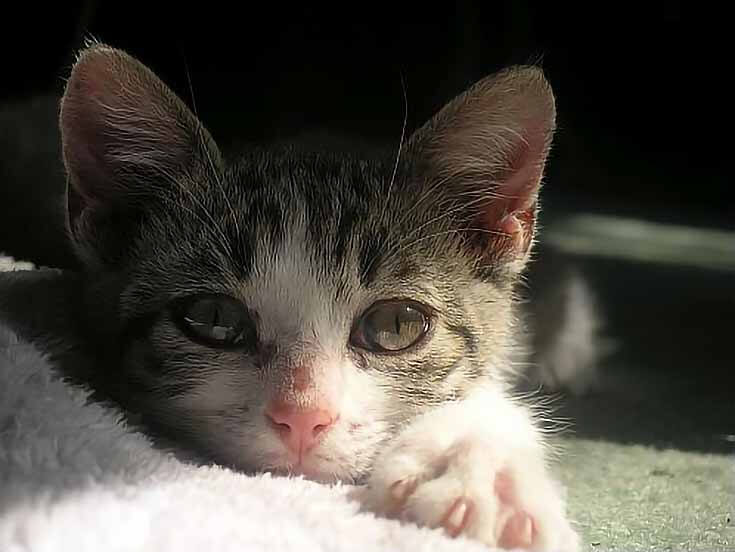
My original intent was to duplicate the reference photo as accurately as possible in every way. As things turned out, that wasn’t the best option for the composition, and my idea began to break down about midway through the project.
I was originally drawing the cat’s haunches because they seemed like an important part of the composition. But the more I developed the rest of the portrait, the more of a distraction that blurred shape became.
It was clear I needed to make some changes or the project was in jeopardy.
Step 1: Do NOT panic or despair
My first inclination at the discovery of any problem is to despair to the point of wanting to start over, no matter how far along the drawing is. If that describes you, then the first step in getting a project back on track is to stop working, step back, and catch your breath.
The worst thing you can do is something that makes matters worse. So put down your brushed or pencils, and walk away from the piece for a little while.
Step 2: Put on your art critic hat
After you’ve taken off your artist’s hat, put on your art critic hat and review the drawing with a fresh eye.
There’s no need to look for every problem with the derailed piece. That’s the sure track to abandoning the piece. You don’t want to abandon it (at least I hope you don’t!) you want to find ways to correct the mistake.
So look at the way the art piece has gone off track, then look for creative ways to either correct that problem, conceal it, or incorporate it into the piece.
Step 3: Put technology to use in problem solving
For this step, I always use a photo editor.
Photograph or scan your piece, then open it in your favorite photo editor. I use either IrfanView or GIMP (both of which are free to download) but you can use any photo editing software for the steps I’m about to describe.
Save your original image so you can use it over and over if needed. Then begin trying each of the options you’ve considered on the digital image. Save each one with a new name so you can review them later.
NOTE: These do not need to be perfect; they only need to be good enough to give you an idea of how the work will look if you make the changes you’re considering.
How it worked for me:
I knew I had three clear options for resolving the problems with my cat drawing.
1. Finish the drawing as planned
2. Cover the haunches with the surrounding background colors
3. Make all of the background dark or black
I couldn’t decide which option was best and didn’t want to wait for the right answer before continuing to draw. So I scanned the image and opened IrfanView.
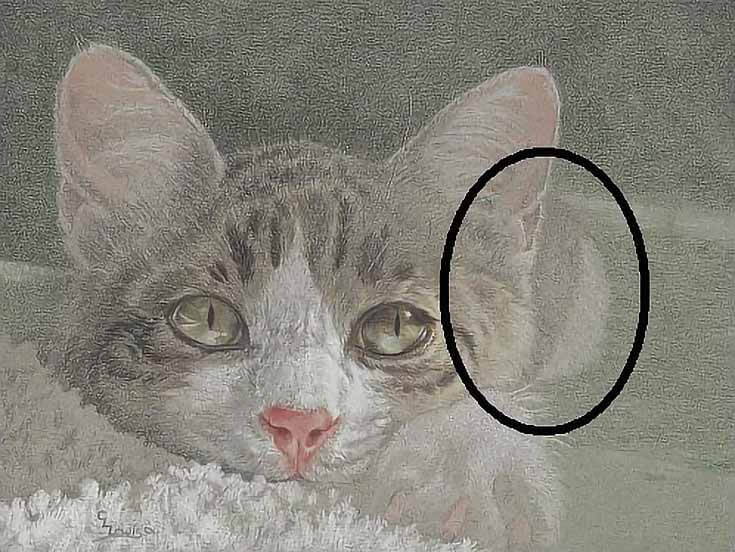
The first option (finishing the drawing as is) didn’t require editing, so I started on the second option. I copied the existing background over the problem area to see how well that looked. It was definitely better, but not quite what I was looking for.
For the second option, I opened my reference photo in GIMP, copied the cat and fluffy rug to a new layer, then replaced the original layer with solid black. This result was better and closer to what I had originally envisioned for this portrait.
But as so often happens, it suggested yet a third idea.

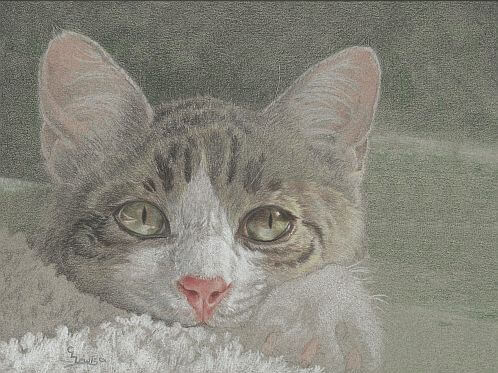
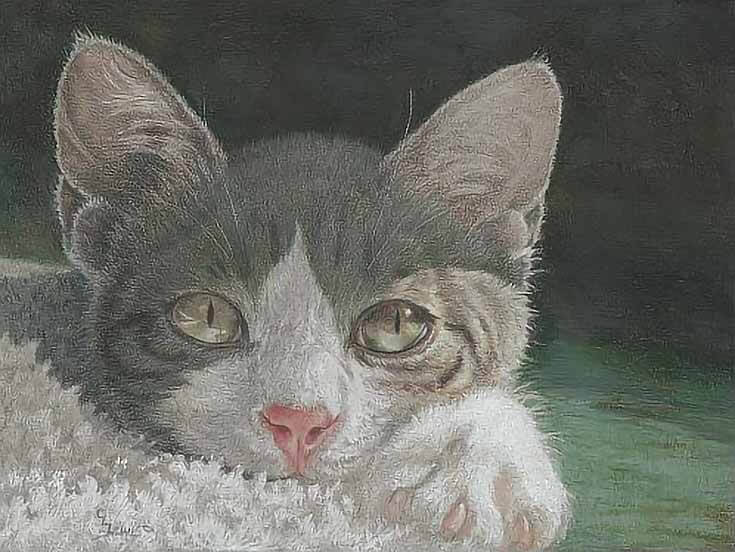
I saved the image again and altered the background to test the new idea. The dark background with a soft gradient below is the result:
I knew at once this was the right solution.
Step 4: Give your idea time to solidify
Unless one of your new ideas excites you immediately, give them all a little time to come together. I like to review each of the ideas periodically, eliminating those I don’t like each time I do a review, and gradually reaching the best solution.
In the case of the cat drawing, the third idea was clearly the best, so I went right to work making the changes.
Step 5: Implement your fix
Get back to your easel and put the best solution into practice.
Here’s my cat drawing with the new background. The result is, I think, very pleasing. I know it rescued the derailed drawing and kept me from starting over from scratch.
The more often you can find workable solutions to “derailed” drawings, the better artist you’ll become. You’ll also start to see how to avoid problems right from the beginning. . . and that, my friend, will make you a happier artist as well!
This post may contain affiliate links.