If you’re like me, you have at least a couple paintings lying around somewhere that will never be finished. They started out with a grand and glorious idea, but went astray somewhere. Or maybe you started them over on a different panel, and are left with the old, used panel.
You hate to throw the panels away because you paid good money for them, but there’s no hope for that abandoned painting, and you just aren’t sure it’s safe to paint something new over it. By now it’s probably tucked away in some corner of the studio or closet, gathering cobwebs.
Well, today I’m going to demonstrate how I refresh a used panel for a new painting—that’s right, they’re NOT a lost cause! So get those half-painted panels out, and dust them off. It’s time to breathe new life into them!
NOTE: The panel I’m using for this demonstration is a 16×20 Baltic birch panel. You can use the method I’m about to describe on any rigid support, except canvas panels. It’s also not advisable for use on stretched canvas.
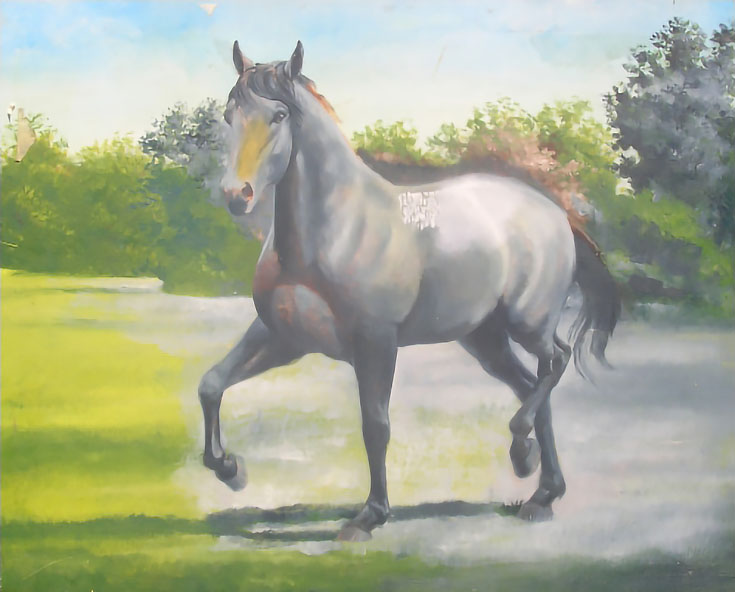
Let’s look at my used panel
My panel was originally prepped with a minimum of three coats of acrylic gesso. I started the painting with an umber layer, followed by a dead layer. I got to the first color layers before giving it up as a bad job!
Whenever I reclaim a panel like this, the goal is not to get all the way back down to the gesso or the original surface (though that would be nice). All I really need to do is remove enough paint so that the surface is smooth and consistent.
There are a couple of ways to do this: the easy way and my way. Whichever way you choose, keep in mind that there will potentially be a lot of dust and paint shavings. Work in an area that’s well ventilated, and always wear a mask over your nose and mouth. (I usually do this time of thing outside, but if you’re inside, a vacuum cleaner with a filter is invaluable at getting all the fine particles.)
All right, let’s get started!
The easy way: power sand it
The easy way is to use a power sander. Lay the panel flat on a stable surface. Work carefully and with light pressure over the entire surface. It’s best to remove the paint a little at a time, so the surface stays smooth and even. Wipe the dust off after each pass and check the surface to make sure you’re not sanding unevenly.
This is the quickest and easiest way to remove old paint. It’s also possible to get an almost-like-new-surface on the panel if you wish. It can then be treated like a new panel and prepped however you usually prep new panels.
My way (scraping it by hand)
If you don’t have a power sander, the first step is to scrape the panel with a single edge razor blade. They work wonders on a painting whether you’re removing large or small areas of work. Be careful with them, though—you don’t want to remove your skin along with the paint.
I use razor blades unaltered, but you can round the corners if you like. This will make it less likely that you’ll gouge or scratch the surface you’re working on.
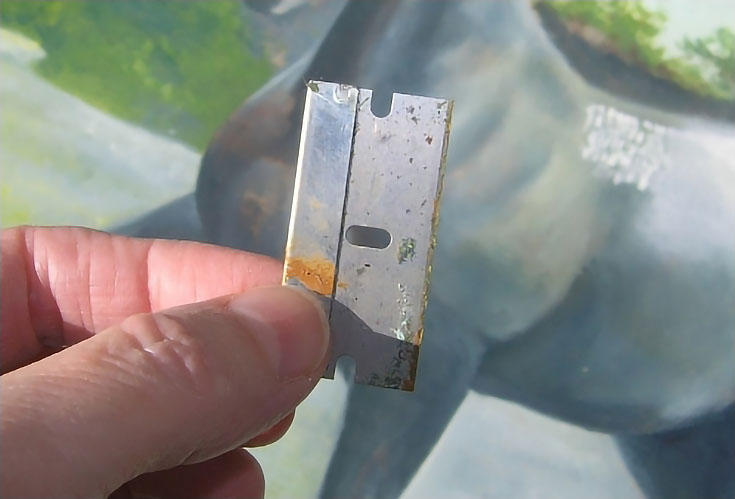
Hold the blade with the cutting edge flat against the panel and at between a 90-degree and 45-degree angle. Pull the blade across the surface with medium pressure (normal handwriting pressure) or a little heavier. Work over the areas where the paint is the thickest, but don’t ignore the other areas.
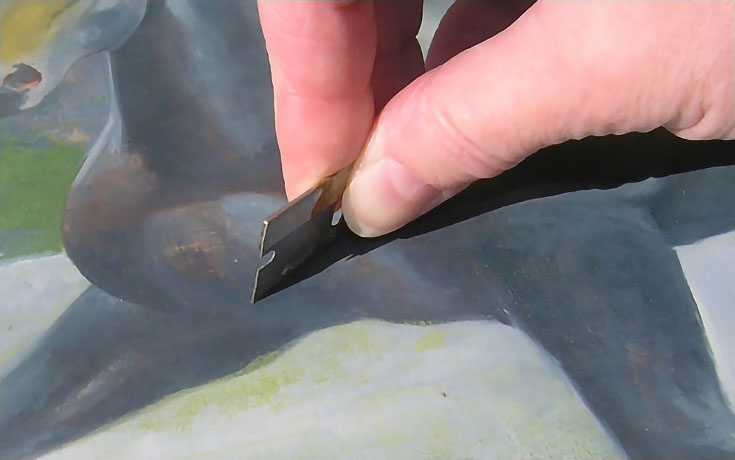
Work in several directions, too. Side to side across the painting. Up and down. Diagonal. The result will not be an eggshell smooth surface, but it will produce the smoothest surface possible.
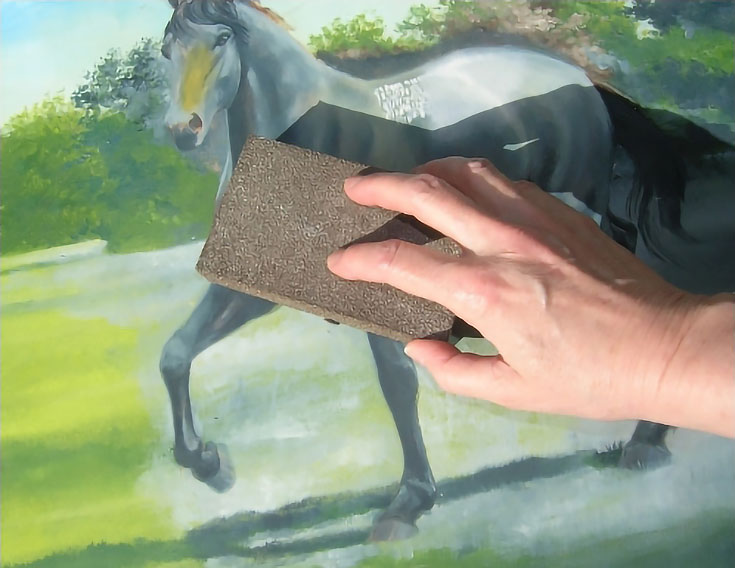
Next, sand the surface with a medium grit sandpaper. I used to use sheets of sand paper, then a few months ago I was in the hardware store and found sanding blocks. What a great invention! They come in several grits and some have different grits on each side. The one I’m using here is actually a wedge shape for getting into corners, but it works great for sanding used painting panels, too!
Work in alternating directions, turning the panel frequently so the sanding is as even as possible. I often use a circular stroke to eliminate any lines that might remain of previous brush strokes or from other sources.
Start with a medium grit (300 or 400) and medium pressure or a little heavier. Again, remove paint little by little.
If you want a really smooth surface, finish the process with a finer grit and circular strokes. Once the panel is completely scraped and completely sanded, wipe it off with a clean rag or paper towel. Make sure to dispose of these properly, as well as the shavings and dust.
This is my panel after one round of sanding:
There wasn’t a lot of heavy paint on it, so it was easy to get down to the gesso in spots, and to the umber layer in others. The rest of the surface is smooth enough that I may not need to sand it again.
As already mentioned, my goal is not to remove every bit of paint. What I’m looking for is an overall even surface, with just the right amount of texture. You may prefer a different type of surface, however, and long as you don’t damage the support itself, it’s safe to remove as much of the paint and prep work as you like.
NOTE: If your final painting will have thicker, impasto-style paint, you could get by with a more lightly sanded panel. If you’re doing detail work, you’ll probably want as smooth a surface as possible.
Removing an unfinished painting from a used panel is only the first step in the process. The next step is to prep the panel so your painting will be as stable and archival as if it was painted on a brand new surface.
Click the link above to see how it’s done!
This post may contain affiliate links.