How’s winter in your world, fellow artists? This is often a slower time of year and a good time to inspect supplies—think of it as a day of new discoveries.
(To resolve my own studio chaos years ago, I made a goal and set aside every January to first test, and then reorder, toss or donate markers.)
Join me if you have “just a few” lettering markers—or maybe more—and want to be better organized. You’ll find the benefits include wasting less paper, more confidence in creating, and a less stressful studio.
Two ways to organize your markers
My favorite method for storing my bullet marker pens is by the color of paper they’ll be used on (either dark or light). It saves a tremendous amount of time when you’re addressing an envelope, for example, to know that you have already personally approved your tool choices.
Of course, another method is to store markers according to brand. Since I generally use several bullet markers for envelopes and journaling, I weighed the pros and cons and decided for these, it was better to categorize by color instead of brand.
Testing your markers on dark & light paper
I tested each pen—tedious but important—on scraps of black and white paper to compare how it looked on both colors. Surprisingly, red was a poor choice on black, although many purples (especially metallic) looked wonderful! And of course, the neons worked for both papers.
I also tossed those few that failed the test. They simply didn’t write anymore and had kept quiet about their status. And if I had made “a bad purchase,” my guilt was lessened by donating them to churches or community.
Below, you’ll see what worked on black paper. I’m always surprised when MOST of my markers work better on black! At left are neons, which are good for both papers; golds; many iridescent colors; and of course, white and metallic (except red).
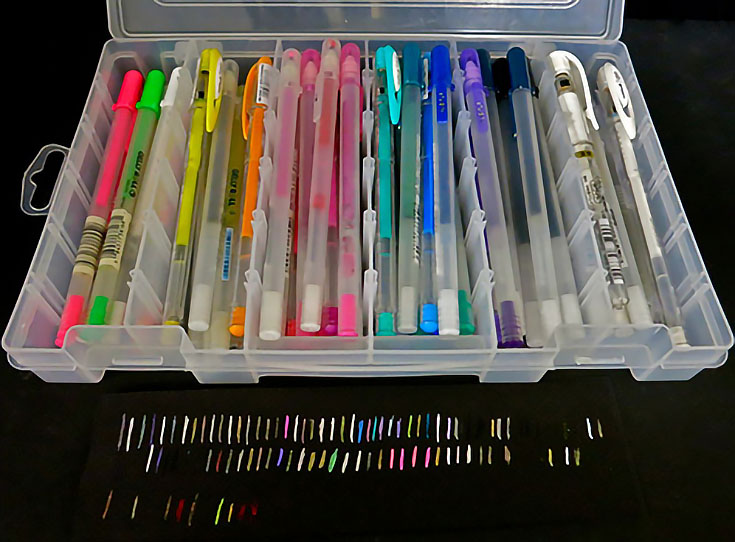
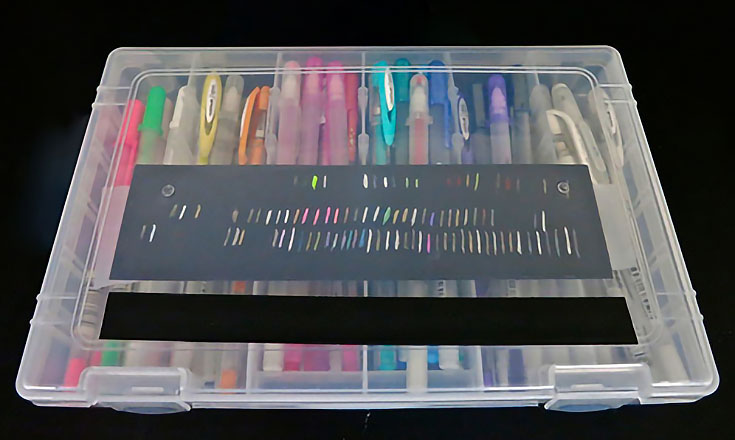
The gaps on my test sheet were from pens that were assigned to white paper. Below is how the completed case looked.
Next, you’ll see which of my markers worked best on white paper—most of the reds, blues and greens, as well as some whites to layer over other colors, etc.

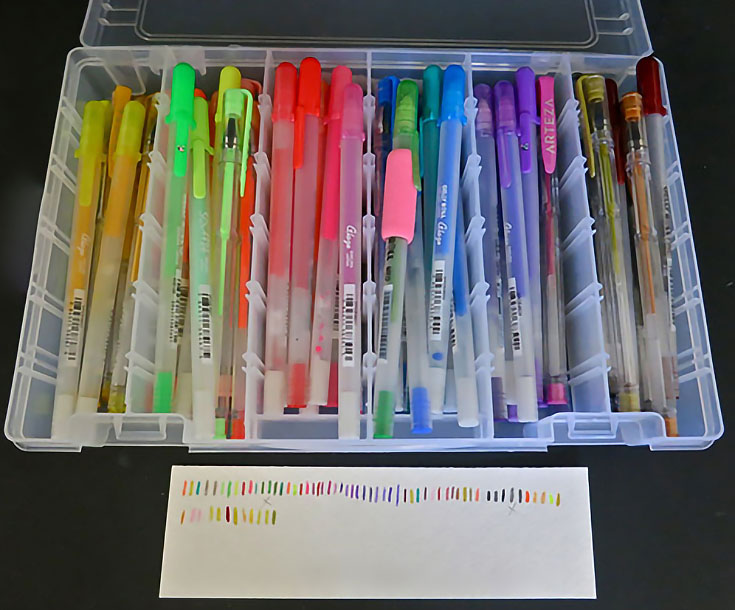
You’ll notice I further divided my “white paper” pens into 2 cases: one for sparkle and metallic colors, the other for brights, etc.
Choosing a storage container for your markers
I’m often asked where to find storage cases. I got these a long time ago at a sewing supply site online. The cases are made for skeins of thread, but the size works well for most bullet (but not brush) markers.
When considering storage cases, you might also measure the interior dimension of where those cases will be stacked to make sure they will fit. As luck would have it, my chest’s drawers are a smidge too short to fit two cases—oh well.
And for a final tip: as with all art supplies, store them within reach of where you work whenever possible.
Happy organizing!
Want more organizing tips? Visit my Facebook page any time this February!
This post may contain affiliate links.