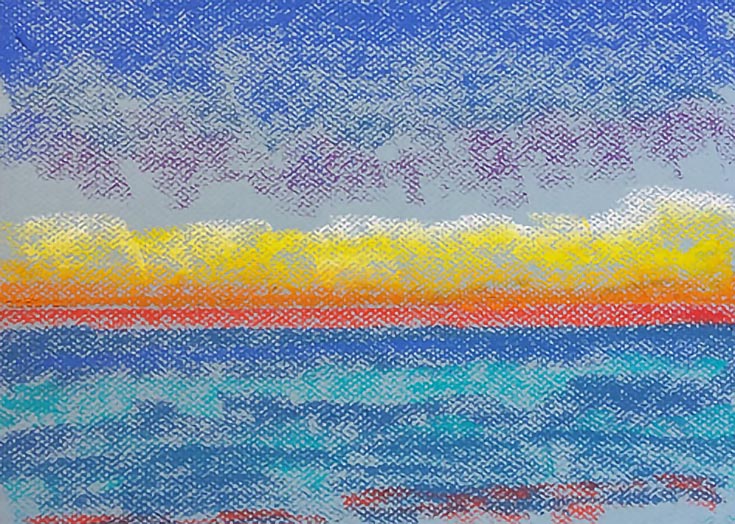
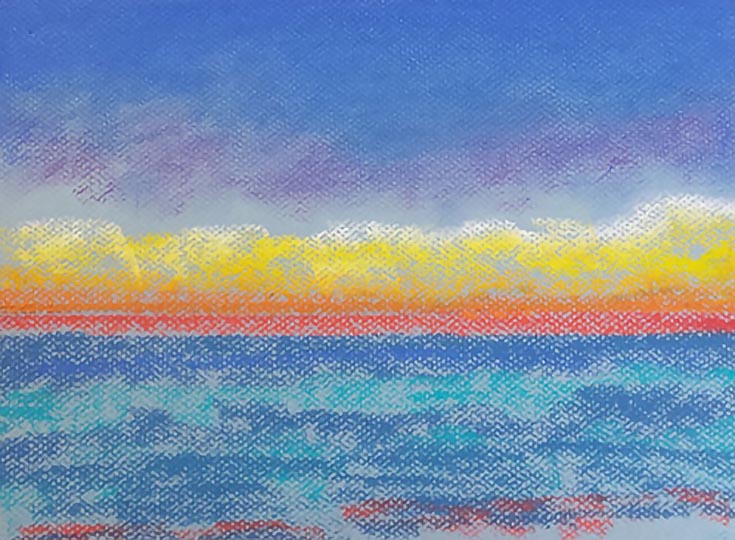
One of the beautiful characteristics of soft pastels is the way they can be manipulated to create soft, smeared effects when painting. Today I’ll be sharing my own step-by-step method of using soft pastels, with an emphasis on smudging.
NOTE: “Smearing” is also commonly known as “smudging” in pastel terminology.
Step 1: Block in your basic painting
Before you begin your painting, make sure you’re using a surface suitable for dry pastel. I like to use paper made especially for pastels (in this case, I used Canson Mi-Teintes drawing paper). Once you’ve selected your surface, make sure it’s secured tightly to your desk, easel, or board, as it’s going to get quite a workout throughout the course of your painting.
Like any paint medium, pastels can turn to “mud” if you’re not strategic about blending colors. With that in mind, I like to block in lights, darks, and a few of the deeper colors separately, and then work over the top of each of them more carefully.
It’s okay to apply colors together if you’re planning to blend them immediately, however. For example, in the sky and ocean in this piece, I did lay in some purple over blue, and green-blue over blue. For brilliant color, such as the red, I prefer to keep it separated until it’s time to smear.
Step 2: Smear away!
I find the smearing stage to be the most enjoyable. You can use your hands (preferably with gloves on) or a smudging tool such as a tortillon. Some people even use brushes!
I personally do best with my hands, because I like the direct contact with the pastel. If you’re using your hands, gloves are recommended for a couple of reasons. First, using your hands will expose the pastel and paper to some of the naturally occurring oils from your skin. And second, exposing your skin to some of the pigments in the different colors of pastels can pose health risks.
NOTE: Personally I am very bad about using gloves, but I’m trying to at least use them for the bulk of my smearing work.
A few technical tips:
• As you smear, work in sections, starting with the darkest colors. For this piece, I pulled the blues into the other dark parts of the painting first.
• Make sure you clean your fingers or blending tool if you’re moving to a new area of the painting and you don’t want to mix colors (for example, I didn’t want any of the blue to get into the bright sunset, so I made sure there wasn’t any in the red and yellow areas by using clean gloves).
• Like painting, smearing is an intuitive practice. Smear your pastels using directional strokes, just as you would when painting with a brush. You’re still painting; it’s just a more nuanced method of manipulating the pastel than direct application of the medium.
• I like to smear the whole first layer of the painting, so it has a consistent look. You can stop any time you’re satisfied with how much smearing you’ve done; just make sure the entire composition looks consistent. In the next stage, you’ll likely be going back and applying new layers of pastel to define objects in your composition, so don’t worry if it seems like you’re smearing a lot!
• After you’re done smearing, it’s time to apply a workable fixative—remember though, once the fixative is sprayed on, you won’t be able to smear the layer of pastel underneath it anymore.
NOTE: Before you spray your fixative, you may want to remove some of the excess pastel dust. Remember to tap your board gently and shake your dust into a trash bin, rather than blowing it—you don’t want pastel dust in your lungs if you can help it!
Step 3: Complete your painting
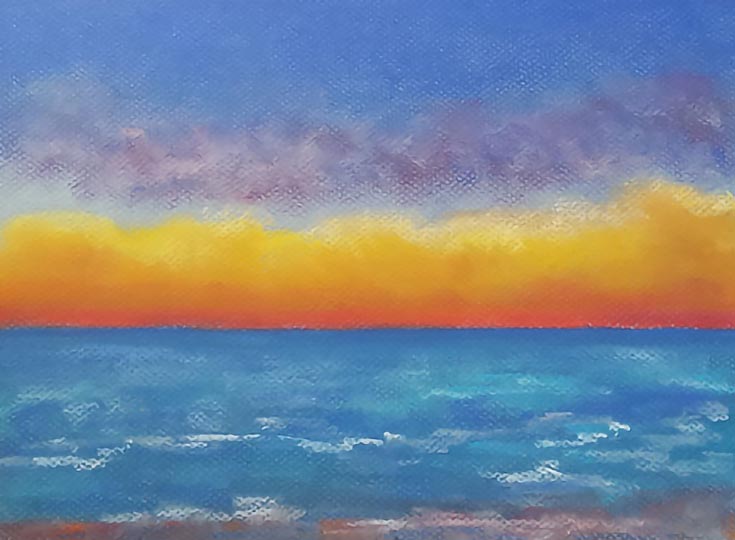
With the bulk of the smearing done, you can work in your next layer of pastel for detailed strokes, hard edges, brighter lights and darker darks.
From this point on, smearing should be done selectively to blend the areas you wish to soften. Use a light touch, and remember that too much smearing and blending can dull the more colorful parts of your work.
The exception of course would be if you’re looking to overhaul an area of the painting (or the entire thing). In that case, just smear away the pastels you’ve blended to “knock back” your painting, after which you can spray a layer of fixative and start over.
The more layers you add, the less control you may have over the colors, so tread carefully. Here’s my finished 9″ x 12″ pastel painting titled “Horizon” with a few final touches of smearing and detail:
If you’re new to pastel (or just new to smearing it), try a simple subject and play around with the effects of smearing. It can get messy, but as you get into the flow, you’ll get comfortable with smearing intuitively, and just might find that it can be one of the most liberating ways to work with soft pastels!
This post may contain affiliate links.
