If you paint on canvas—either in acrylics, oils, or watercolor—you’ve probably noticed that your unframed paintings look much better from the front than they do from the side. Anytime you catch a glimpse of those raw canvas edges, they look startlingly white against the painted front.
Worse yet, during the painting process, bits of the colors that you used on your painting get on the sides and create a “design” element that is jarring against your carefully planned and executed front.
In the past, what the sides looked like didn’t matter as much because everyone assumed that a finished painting was a framed painting. Framing your paintings is still great, but being forced to find frames that fit and really complement your work adds a layer of complication and expense.
Today there are several options that can save us time and money, and allow our unframed works to feel more finished and professional.
Here are 5 ways to finish unframed paintings
1. The quickest way
Probably the fastest, easiest method to make your paintings’ sides look more finished is to use black duct tape (called Gaffer’s tape in Ireland & England) to cover your canvas’ sides.
Ideally, you’d do this before you start painting, but you can use this technique on a finished painting whose sides you left white. There is a downside, however. Black duct tape isn’t acid-free—which upsets some collectors, and museum folk—but it may still be a good choice for quicker studies, or for works you’re planning on showing in your home or more casual settings.
There are several things to keep in mind if you do plan to use black duct tape:
- You don’t have to use one continuous piece of tape, but the fewer seams you have, the better.
- Your tape should be somewhat wider than the side of your canvas so you can wrap the tape over the canvas’ back edge. However, don’t overlap the canvas’ face—or the tape will interfere with your painting’s look. (And if you later choose to remove the tape, it’ll leave a jarring white place on the front of the painting itself).
- Finally, to ensure the tape looks its best, use a hospital fold on the corners (like you do when you are stretching a canvas) and make sure to press the tape down firmly. Also, be diligent in cleaning off any stray paint on the tape as you paint.
2. The cheapest way
The cheapest way to finish your paintings’ sides is to paint them black, ideally before starting your painting.
There are three things to remember if you choose this option:
- Acrylic paint is best for this, no matter what medium you’re using to create your work (acrylic, oils, or watercolor.) It dries quickly and cleans off easily. However, if your canvas is stapled on the side, you should first gesso the sides to cover the staples and prevent rust problems later.
- Avoid letting black paint get on the front of your canvas. If it does, wipe it off immediately to prevent a ridge line from showing through your paint. A rag is OK with oils and acrylics, but if you’re using watercolors on canvas, use a Mr. Clean Magic Sponge on the wet paint to ensure that all residue of the acrylic paint is removed from the front of the canvas.
- Diligently clean off any stray paint that mars your black sides. Dry paint is harder to clean off, but if that happens, sand the dry paint and carefully touch up the marred area with your black acrylic paint.
3. The most interesting way
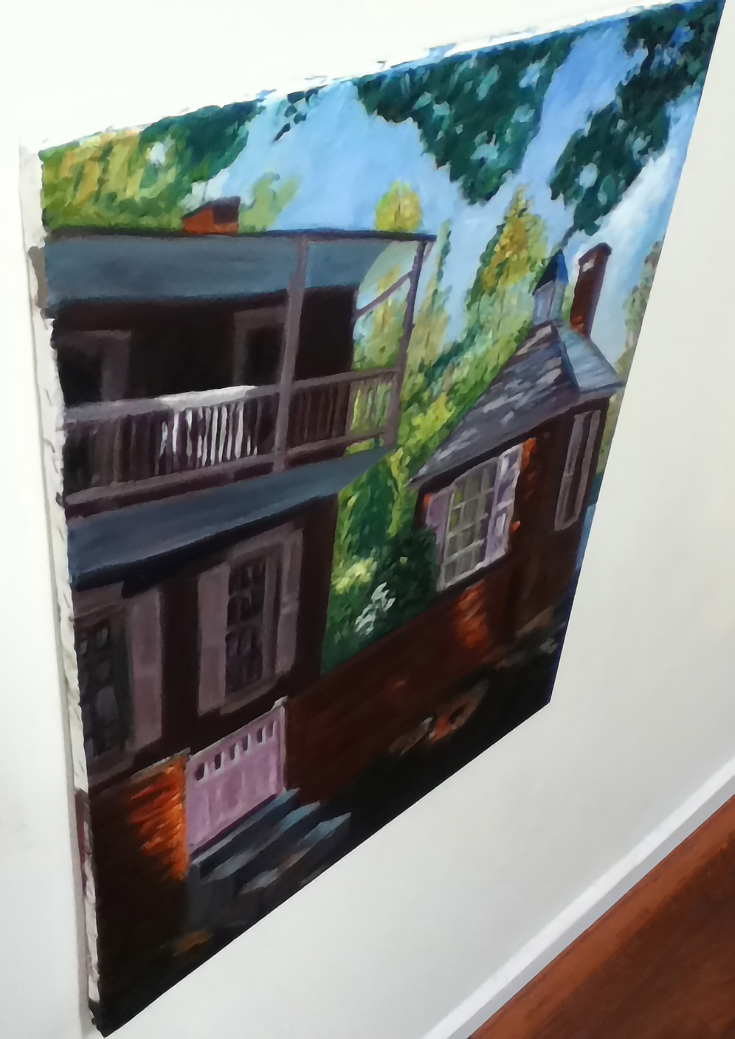
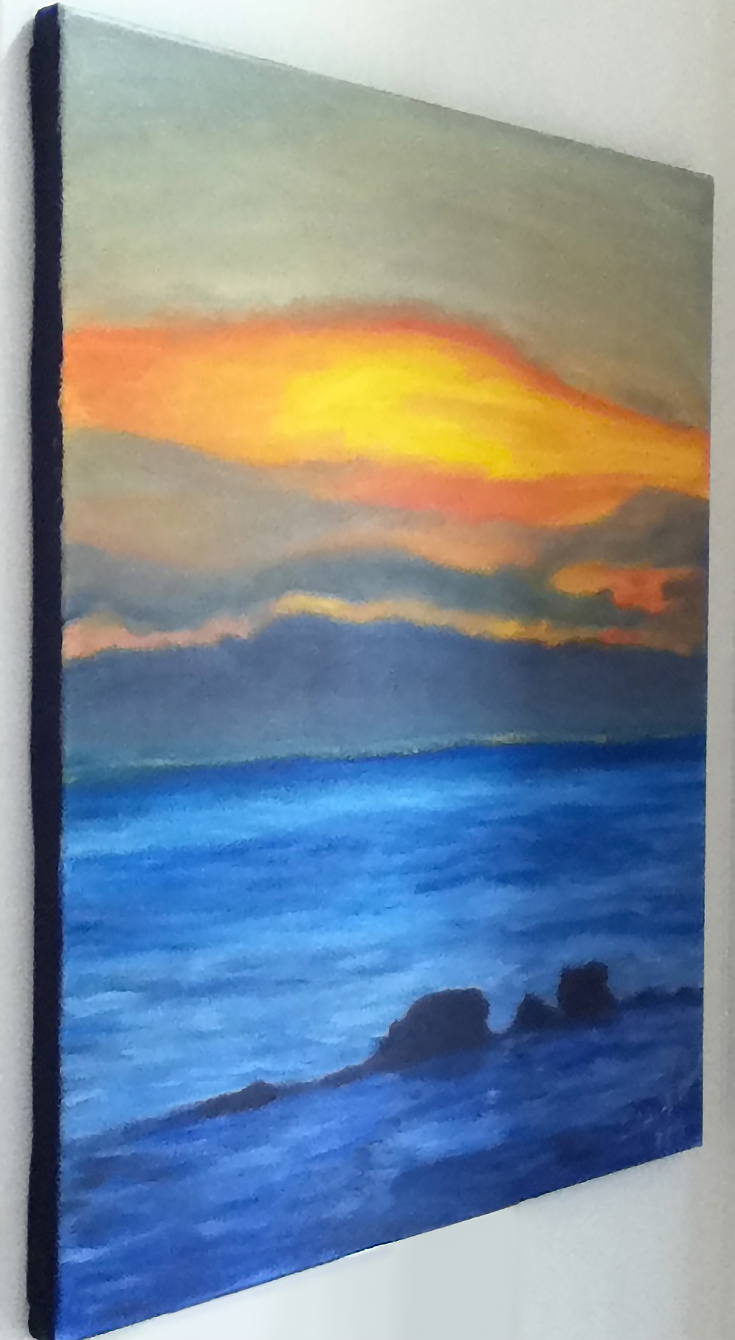
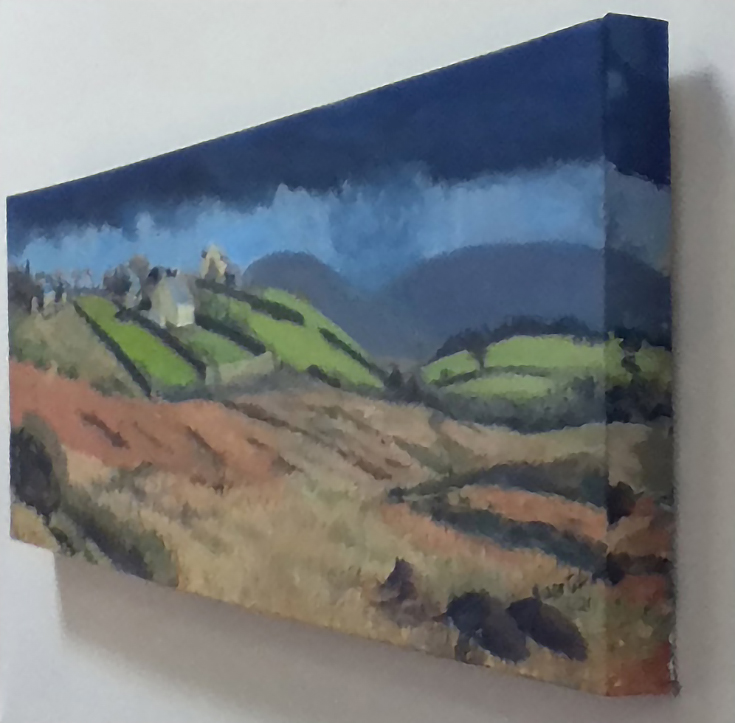
In my opinion, the most artistically interesting way to finish your painting’s edges is to continue painting your subject matter onto the canvas sides (best done on deep, gallery-stretched canvases without staples showing on the sides.)
Here are three tips you’ll want to know when using this technique:
- Don’t forget the bottom. It’s tricky to do this because your canvas sits on the bottom edge, so you might want to wait until the top is dried enough to safely flip the painting onto its top edge so you can work on the bottom edge.
- Use a “sketchier” painting style on the sides. The sides aren’t the star of your work, so viewers aren’t concentrating on them. Thus, you just need to have enough detail for your viewers’ eyes to “fill in” what they expect to see as they scan from the front to the sides.
- You can choose to paint the sides of a narrow-depth canvas, but it won’t look as good as deeper, gallery-wrap canvases will. And as mentioned earlier, if the sides have staples showing, you will need to gesso the sides to prevent rust problems later.
4. Always use hanging hardware and bumpers
If you won’t be framing your painting, then you really must add the hanging hardware directly to the canvas so your buyers can display it right away.
The top bar of your canvas isn’t designed to carry the weight of your painting over the long haul, so I recommend placing the hangers on the side bars (about a hand’s length down from the top.)
And why should you place bumpers on the bottom edges of your work? Because they do a great job of helping your paintings stay straight on the wall.
5. And if you’re using a shadow-box frame. . .
I still recommend finishing your painting’s sides in some way. Yes, the reveal won’t allow the viewers to see much of the edge, but seeing just that little bit of the finished edges will still create a more professional, finished look.
To read more articles by Tracy Feldman, please visit her art blog.
This post may contain affiliate links.