Beyond just taking great photos of your art, it’s also important to understand the basics of preparing and uploading your images to your art blog. This will help with everything from load time and bandwidth usage to search engine optimization and user accessibility.
Here are 6 tips that will help you prepare your images for the web:
1. File size matters
The file size of an image is determined by the number of pixels in that image. The larger the file size of your image, the longer it will take to download, the more storage space you need on your web hosting account, and the more bandwidth you use.
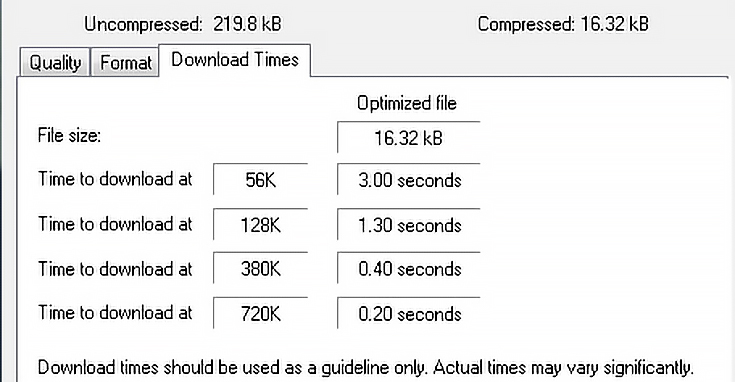
The problem with optimizing your image ONLY for speed is that you lose quality, clarity, and crispness, as shown below:

An easy way to find the right amount of optimization is to use a program designed to handle the task, like this image optimizer at DynamicDrive.com. You can also use the “Save for Web” tool in Adobe Photoshop (or similar image editing programs).
2. Image size matters
If your image is too large, it will force people with smaller monitor screens to scroll left and right to view the image. However, if your image is too small, it will be difficult for your readers to appreciate your art.
When determining what size to upload, take into account the width of your blog post area and don’t go wider than that. I’d recommend sticking with a width of 300 to 500 pixels, and a height of never more than 500 pixels.
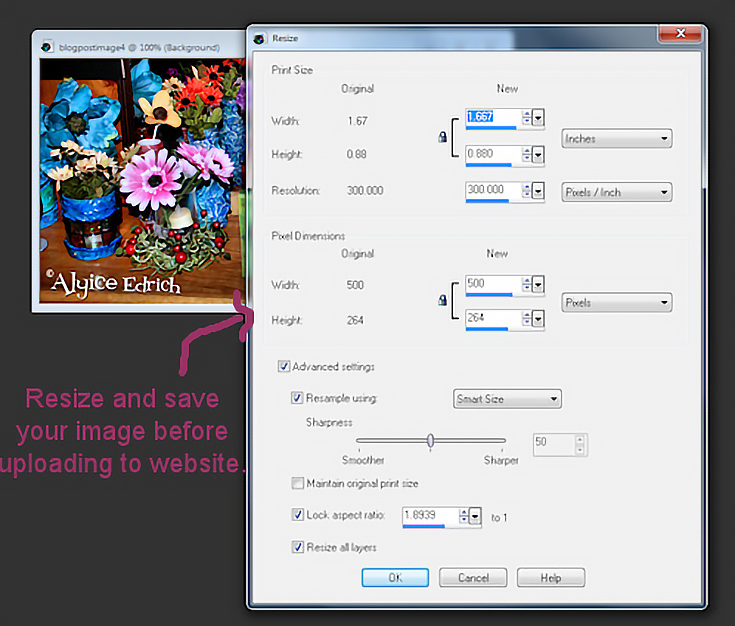
Most importantly, do not upload a large image and then just make it display smaller by simply altering the image’s HTML code. It doesn’t help with bandwidth usage, and it can distort your image.
3. Quantity matters
The more images you place on a single web page, the longer it takes for that page to load, and the more likely you are to lose visitors.
Avoid image stuffing by keeping your images to a minimum; say no more than five images per page. If you’re teaching a tutorial and need more images; however, make sure you optimize and resize those images before uploading.
4. Attributes matter
After resizing your image properly in a photo editing program, it’s a good idea to include those width and height attributes in the HTML code on your blog as well.
This will help your website to load faster by allowing the surrounding information on the page to load while the images are being downloaded.
Depending on how you upload your images, this may be done for you automatically. . . but look for a way to specify the width and height, just in case. I do it by placing a checkmark in a “specify size” box.
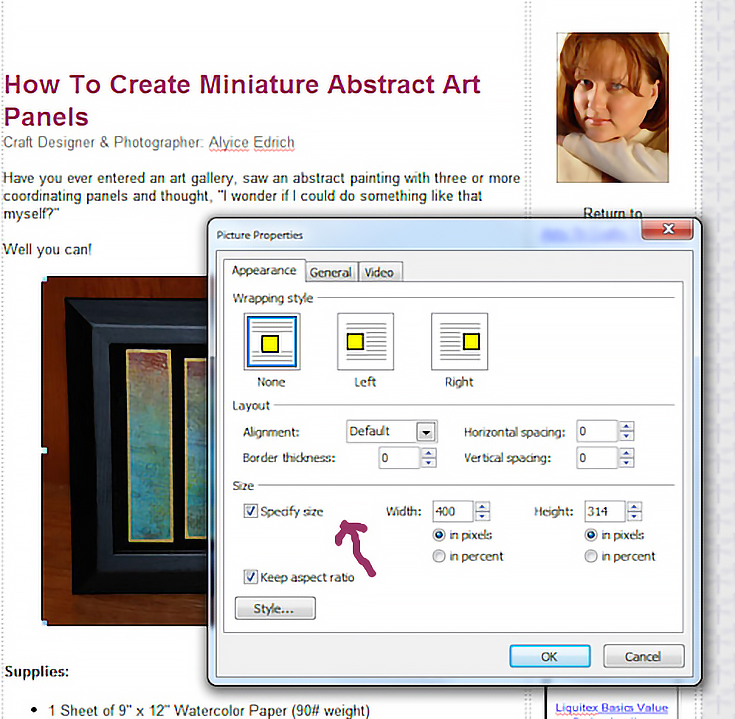
If you’re working directly with HTML code, you can also manually write the width and height into the image tag, like this:
<img src=”../art-panels.jpg” width=”400″ height=”314″>
5. Descriptions matter
Including a description of the image helps Internet searches find your site, it gives visitors additional information about the image, and it tells visitors what the image is about should there be an issue displaying the image.
Again, depending on how you upload your images, you may be given an option to add a written description. In my case, I have a section marked “alternative representations” which allows me to describe the image.
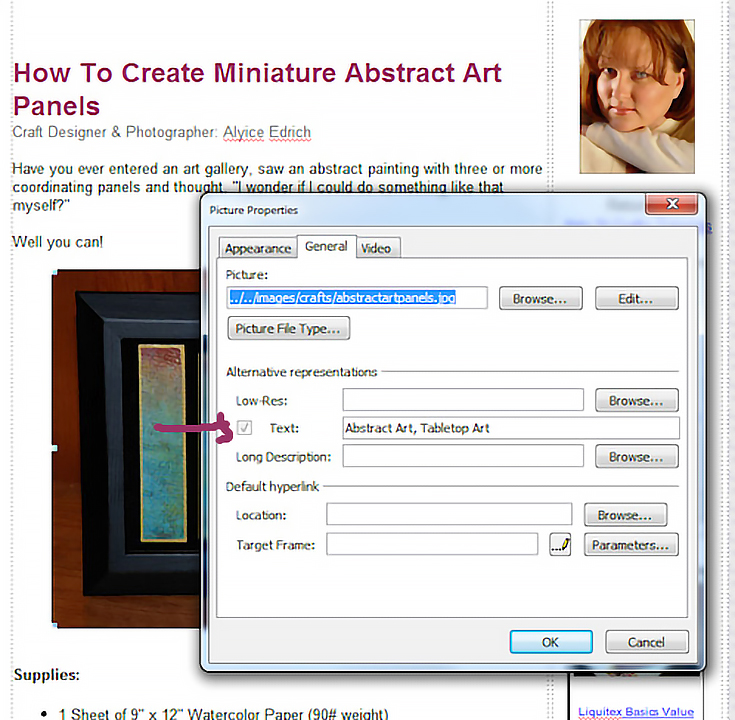
You can also manually type in the “alt” description by adding it to your image code:
<img src=”../art-panels.jpg” width=”400″ height=”314″ alt=”Abstract Tabletop Art”>
6. File names matter
Naming your image files something meaningful not only makes it easier for you to find those images later, but it also boosts your chances of that image being found in the search engines.
The key to a good file name is to use one or two descriptive words, and to avoid special characters (hyphens and underscores are OK, but don’t use the @ symbol, hashtag, dollar signs, etc). The goal is for someone to be able to look at that file name and know exactly what the image will be.
Even though you and I aren’t web designers, it doesn’t mean we can’t make our art look great on the web. All you have to do is follow these 6 tips and you’ll be ahead of the game in no time!
This post may contain affiliate links.