There are many styles, methods, and techniques for painting fur. But I’ve had a few people ask me how I paint fur, so I thought I’d share my way of doing it.
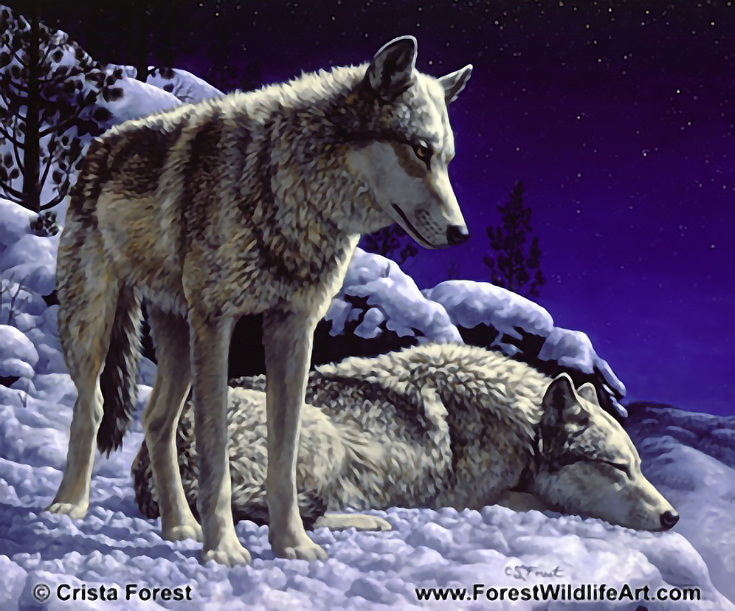
The first thing to realize is that there are a lot of different kinds of fur that will require different techniques and different brushes. Just in one painting, shown below, there is short smooth fur, long wispy fur, thick clumpy fur, etc.
The second thing to remember is that fur is visibly thick. So in most cases when painting fur you want to have at least 3 layers of color creating depth.
The darkest colors you see on an animal’s fur will usually be the deepest areas closest to the skin. So you’ll put that color down first. You’ll add more layers after that, ending with the lightest colors highlighting the tips of the fur.
You’ll also generally want to start with thicker brushes on the bottom layers and finish with thinner, finer brushes for the wispy hair tips.
Let’s take a look at a close-up detail of the painting above. In this detail, you can see broad areas of relatively smooth fur.
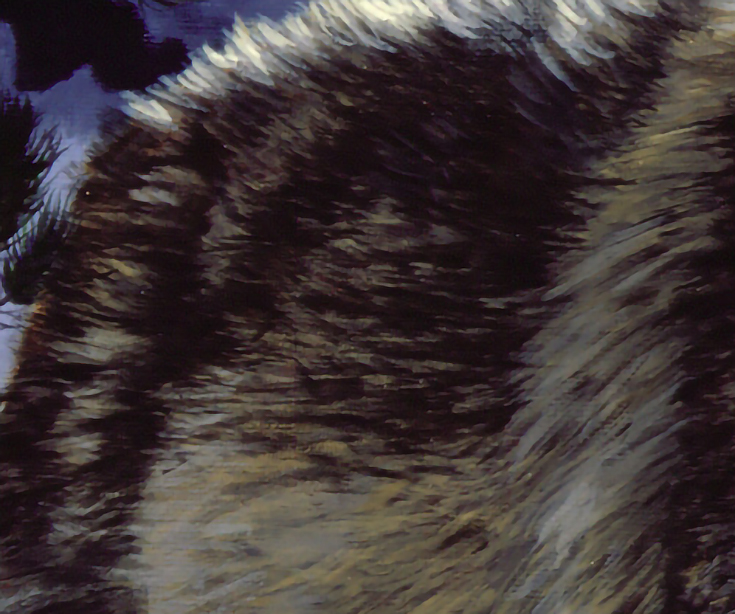
I used a fan brush to build up my layers. I started with a larger fan for the bottom layer and switched to a smaller fan on the next layer. (A filbert rake brush can also work, depending on the animal and its fur type.)
Try to vary your brush stroke length, stroke angle, and brush angle to keep it from looking too uniform. Wild animals don’t get their fur brushed so you want it to look a little scruffy. (Of course, if you’re doing a pet portrait of a prize show dog then this doesn’t apply. You’ll want your brush strokes to stay pretty uniform so your pooch looks well-groomed.)
Once the first two layers are down go back and add a few strokes here and there with a script liner to add a little more scruffiness, as well as the final highlights.
In this second detail (below) you’ll notice the fur is much more clumpy.
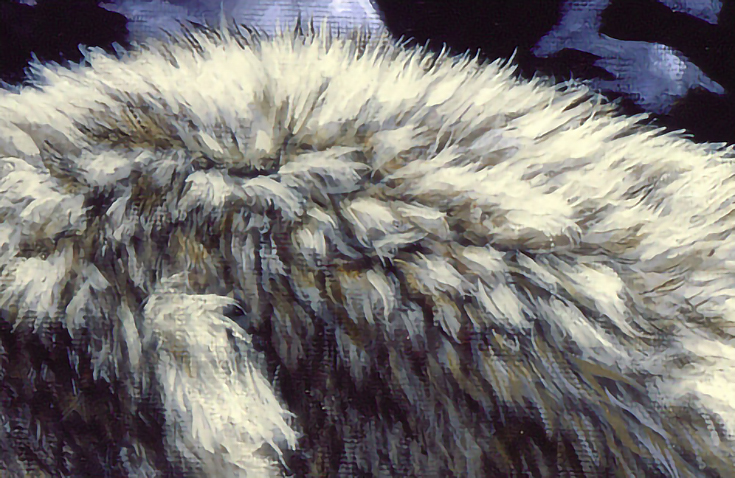
With fur like this, you’ll want to start with a medium round brush to block in the basic shape of the clumps. Again, start with darker colors on the lower layer.
Then use a smaller round to do the middle, lighter layer. Finally, go back and add some wispy fur tips with the script liner once again to the top, lightest layer. It’s that final, lightest layer that gives the fur it’s depth.
Always try to vary your stroke lengths and angles, even getting a few wiggly lines in there once in a while, to give it that “wild” ungroomed look.
As you can see, there’s nothing magic about the technique I use. . . it’s simply a system that has worked for me. Just remember to go from dark to light, larger brushes to thinner brushes, and keep your strokes varied.
Oh yes, and there’s one more thing you’ll need if you’re tackling a wild, furry animal—a lot of time and patience! :)
For more from Crista Forest, please visit forestwildlifeart.blogspot.com.
This post may contain affiliate links.