In my last blogging tutorial a few weeks ago I showed you how to use Blogger’s built-in Popular Posts gadget to create a list of your blog’s popular posts.
Today I am going to show you how to manually create your own “Top Posts” link list. The advantage is that you have more control over the actual posts that your readers will see.
You can choose your posts based upon:
• the number of page views within a certain time period
• the most comments
• the most inbound/trackback links
• category listings
Choosing a specific category listing, for example, is a great way to show off your most popular art pieces. . . while choosing the posts with the most comments will encourage your readers to feel comfortable leaving a comment of their own.
If you want to get a little creative, you could also use this feature to show off your top selling, or most recently sold, art pieces—provided, of course, that you created a post for those pieces in the past.
To find out which posts are most popular, you can use your own stats counter (like statcounter or google analytics) or you can simply choose to use Blogger’s built-in stats page.
Here’s how it all works:
Step 1. Log into your blog
Step 2. Review your blog post stats
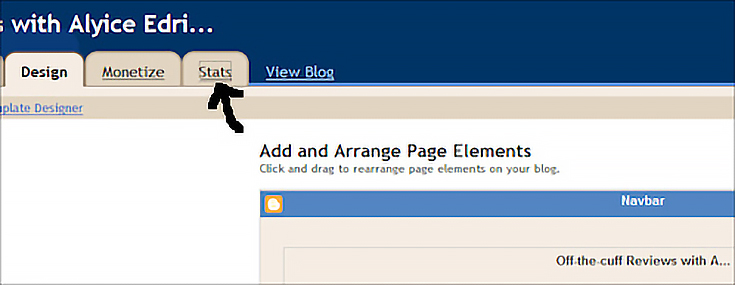
Once on your dashboard page, click on the “Stats” tab.
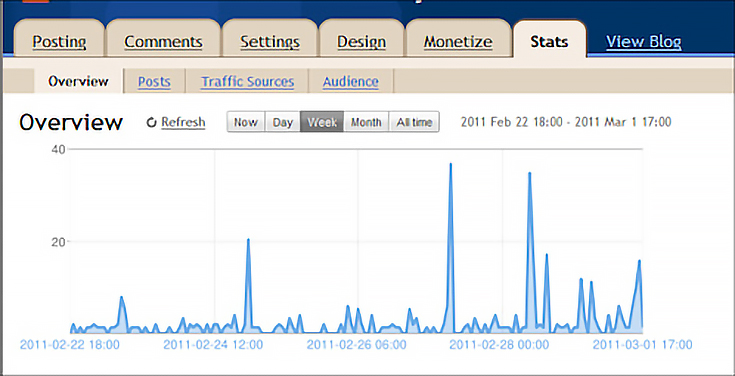
This will take you to the “Overview” page. Here you will be able to see your overall traffic, traffic sources, and your most popular blog posts based upon day, week, month, and all time.
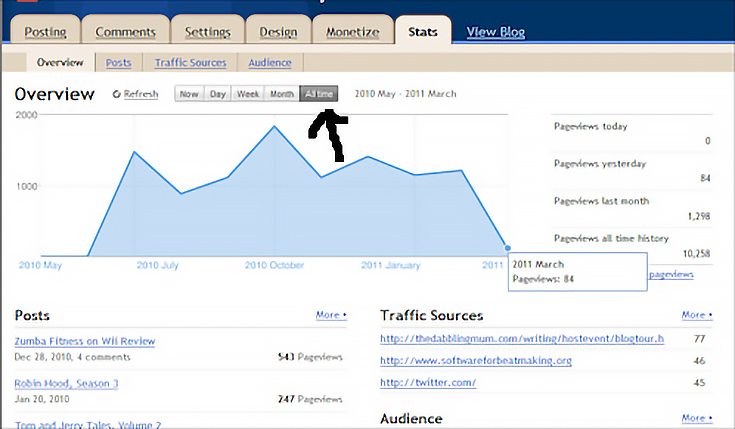
To choose which duration of posts you want to feature, simply click on the grey tabs. For the purpose of this tutorial, I am going to choose the “All time” tab.
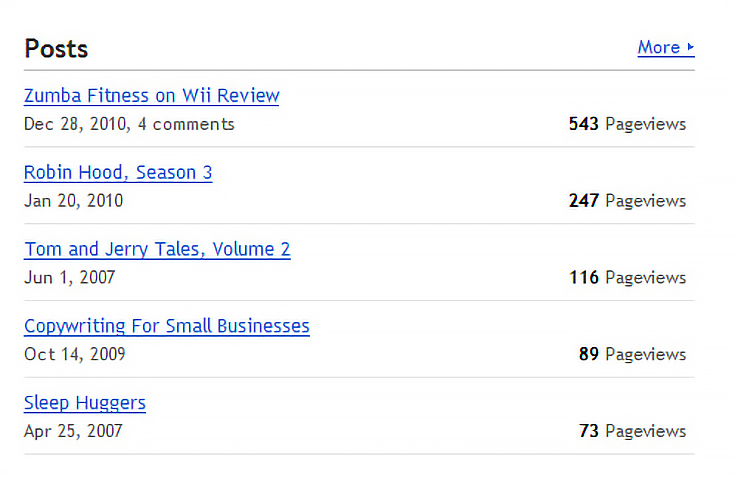
From this tab, I can see the top five “All time” posts (which differ greatly from the top five posts in the past week).
At this point, you will want to click on each of the posts and copy and paste the urls into another window because you’ll need them later.
Step 3. Go to your Dashboard
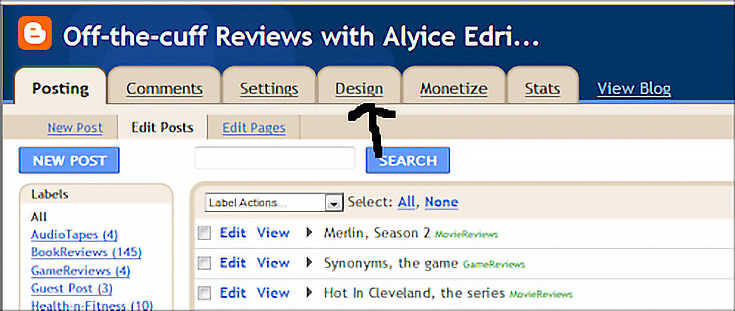
Once you’ve saved the urls, click on the “Design” tab.
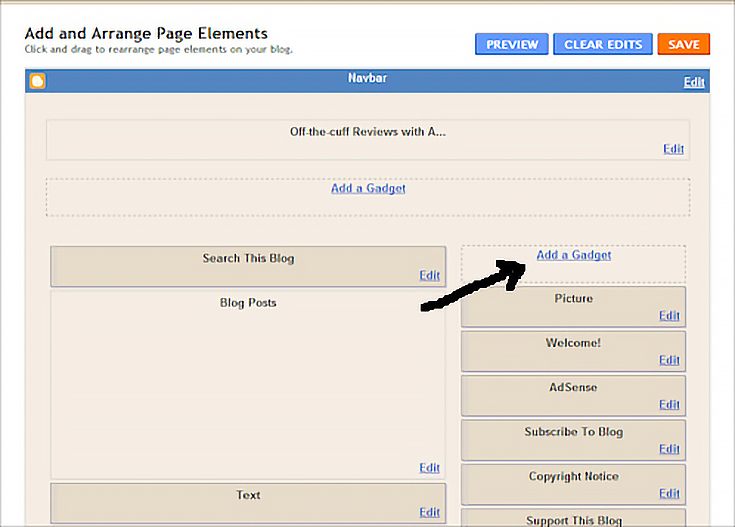
This will take you to the “Add and Arrange Page Elements” screen.
Step 4. Add your Popular Posts list
On this page you’ll want to click on the “Add A Gadget” box in the upper right side of your screen.
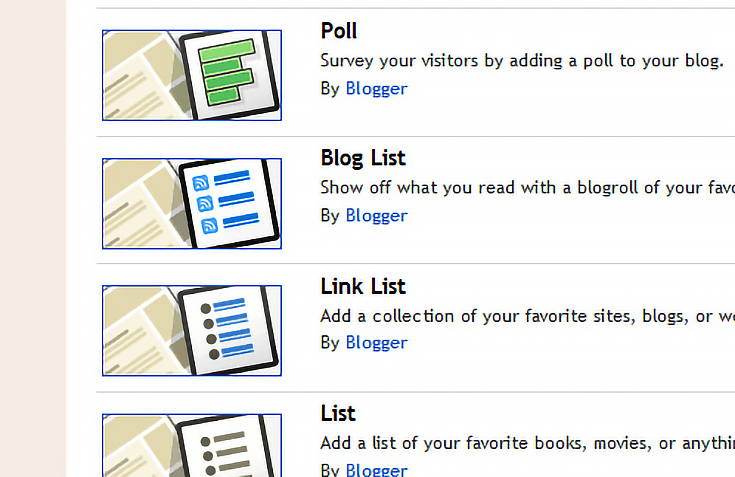
Once you click on the “Add A Gadget” box, a new screen will open up. On that screen, click the “Links List” box.
A new screen will appear with the following choices:
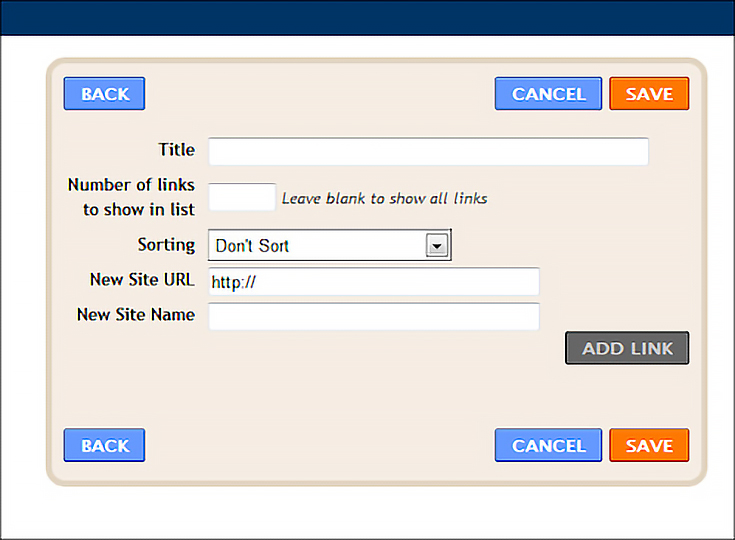
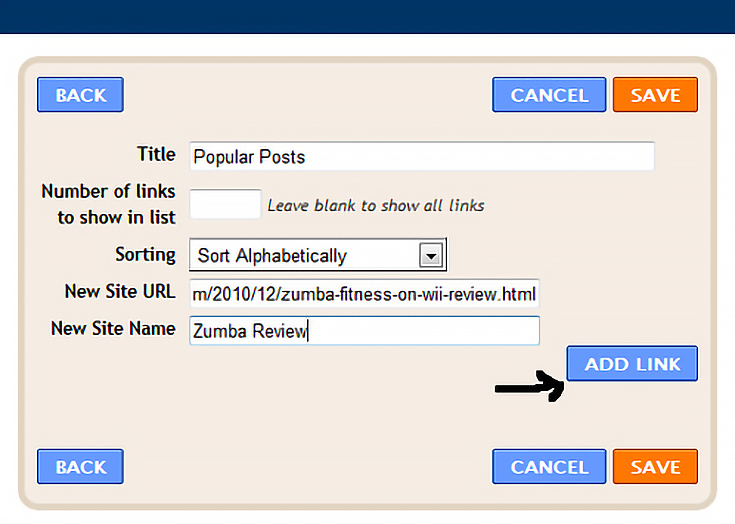
This is where you’ll insert your top post URLs along with the name of each post. You will also title this gadget, “Popular Posts.” Once you’ve inserted the proper information for the first link, click the “Add Link” button.
Continue adding your links in this manner until you’re finished. Once all your links have been added, click the orange “Save” button.
Step 5. Move the gadget
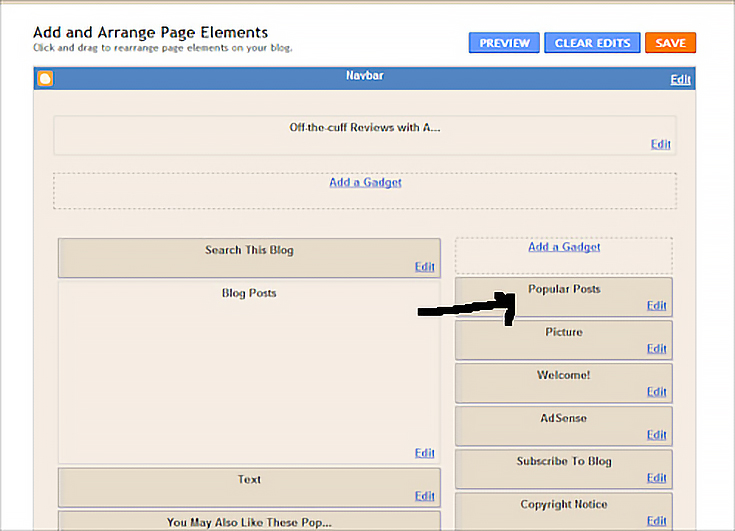
Now you will be back at the “Add and Arrange Page Elements” screen. You should see the “Popular Posts” box in the upper right corner, like this:
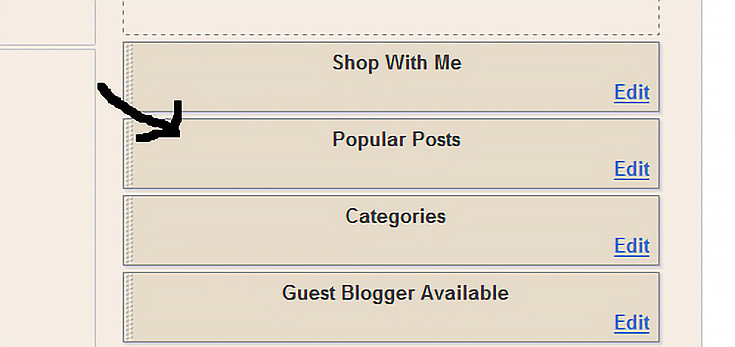
If you’d prefer that your top posts appear lower in the sidebar, simply right-click on the “Popular Posts” box, and, while holding the clicker down, drag that box down wherever you want it to be.
Once it’s in place, simply release the clicker.
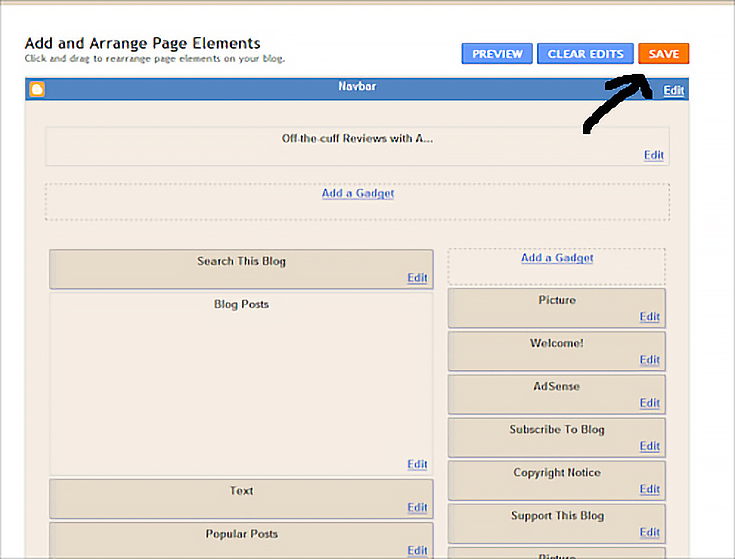
Now that your “Popular Posts” box is where you want it, click the orange, “Save” button at the top of the screen.
Step 6. See how it looks
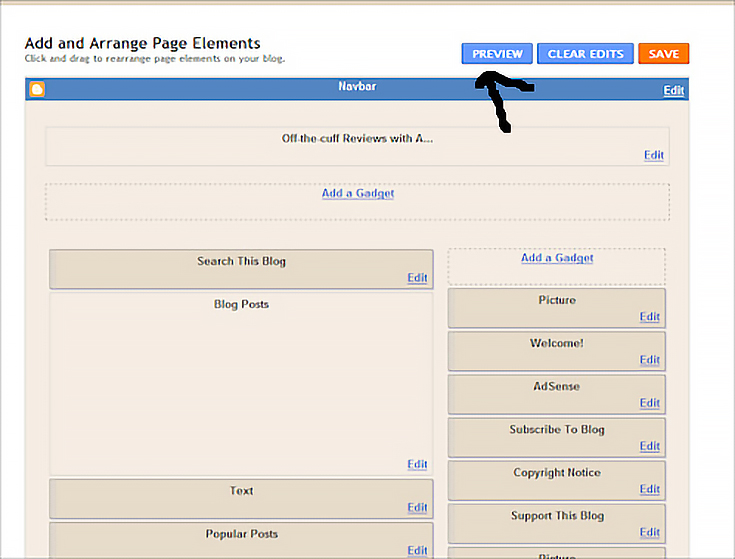
To make sure your changes took place, click on the blue “Preview” button, located to the left of the “Save” button.
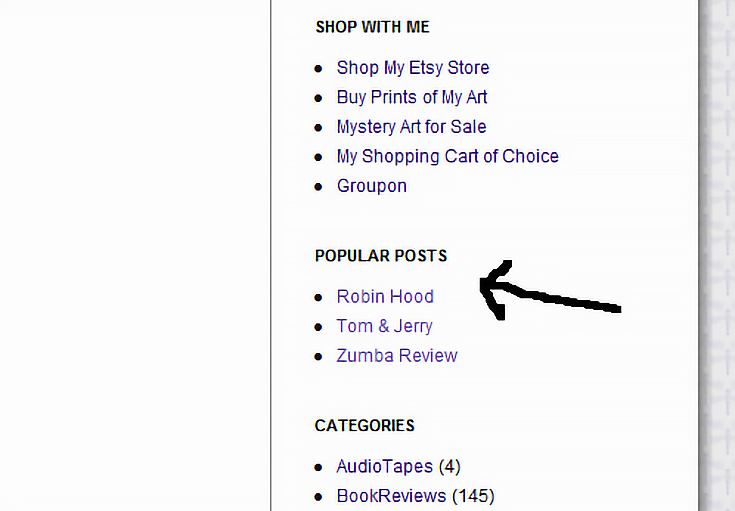
Depending the setting you chose, your links list should look something like this:
And there you have it. In just five simple steps, you’ve selected and displayed your blog’s most popular posts in your sidebar.
This post may contain affiliate links.

