When you need a high-res digital image of your artwork, you really only have two choices—either scan it yourself, or have it professionally photographed.
If you’re selling high quality prints, I’d recommend going to a pro; but depending on what you need the image for, scanning may work just fine.
With most artwork being larger than the average home scanner, you’ll probably need to scan your art several times (getting a different section each time) and then use Photoshop to “stitch” the whole thing back together again.
This tutorial will teach you how to do that. It’s pretty long, but it has enough pictures and information that I’m pretty sure even a beginner to Photoshop will be able to do this.
 The first thing you’ll do is open up your scanned files in Photoshop.
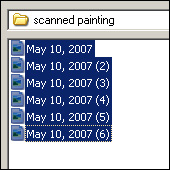
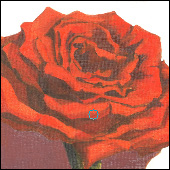
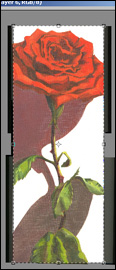
I’m assuming you’ve already scanned your artwork and have several files ready to piece together. I scanned one of my older paintings for this tutorial which is a rather strange size at about 10″ wide and 26″ tall.
This meant I had to scan six times on my scanner to get it all.
To open your files click on FILE in the menu bar, then OPEN (or ctrl + O). Find your scanned fragments and hold down shift, highlighting each file, before clicking the open button.
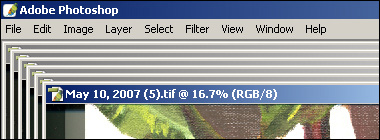
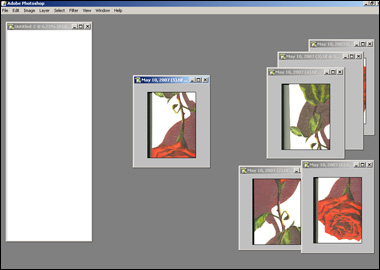
Of course they’ll be stacked on top of each other, so the first thing you’ll want to do is zoom out and make each of the six fragments small enough to see them all on the screen at once.
Press and hold ctrl + alt + space to make your zoom out tool appear (a magnifying glass with a minus in the center), then left-click. Each time you click, you’ll zoom farther out.
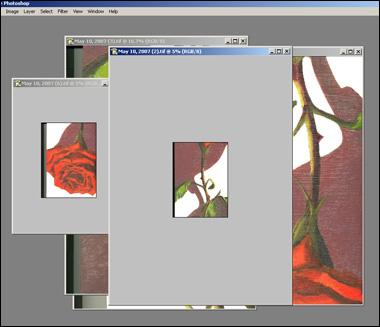
To zoom in, just press and hold ctrl + space and left-click. (Mac users will have to figure out which keys will work for them.)
Once you’ve zoomed out on all your fragments, feel free to resize each of the windows so there’s less gray border visible. Then move them off to the side—it’s time to open up a new, blank image document where you’ll re-assemble your artwork.
After clicking FILE, then NEW, (ctrl + N) this window will appear.
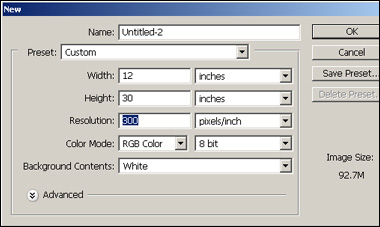
Choose the resolution that you scanned your artwork at—it should be at least 300 pixels per inch. Choose a width and height that’s big enough to hold all the fragments at once. I went with 12″ by 30″ although I later found out I needed a little more space.
Click the OK button and your new, blank image will appear.
As you can see, some of my fragments were upside down because of the way I scanned them. Before you assemble your fragments, you’ll probably need to rotate them all right-side up.
To do that, click on IMAGE in the menu bar, then ROTATE CANVAS, and then choose the amount you need.

The ROTATE CANVAS option is farther down than seen above, but to save space I erased some of the intermediate options. I chose the 180 degree rotation because my images were upside down. You might need 90 degrees instead.
After each of your fragments are right-side up, just drag and drop them into your new image file (left-click still).
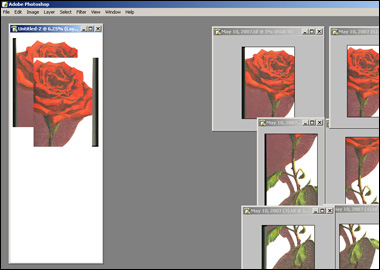
They’ll overlap each other, and that’s fine. Keep going until you’ve dropped them all inside the same document.
 They’ll look kind of like a collage when you’re done, as they do here.
This is the point where I decided to give myself a little more room to breathe, and resized that “canvas” to have a little more space with all those fragments.
If you find yourself in the same situation, click on IMAGE in the menu bar, and then CANVAS SIZE.
The window that pops up will allow you to add on to either the top or sides of the canvas without resizing or changing any of the images inside that document.
Next up you’ll have to align each fragment so that it fits together with the others. Since each fragment is “sitting” on separate layers, you’ll have to select a layer first.
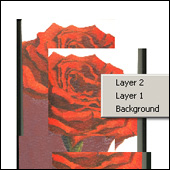 Right-click on any of the fragments and a layer box will pop up. Choose a layer, and then Left-click to grab and move that particular fragment.
You can see all of the layers in this image document by going to WINDOW in the menu bar, and clicking on LAYERS.
A new palette will pop up which should look like the image below.
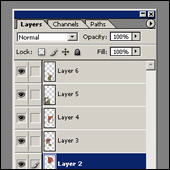 You’ll be able to see which layer you have selected currently, and can select different layers by clicking on them here.
You can also toggle each layer’s visibility off and on by clicking the eye next to each layer, or lock the layer in place by clicking on the empty box there.
Since the plan is to line each fragment up perfectly with the rest, you’ll want to change the Opacity of the layers so you can see the bottom and top layers at the same time.
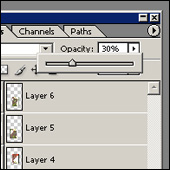 At the top of the layers palette you can adjust a slider making each layer partly transparent. You have to select each layer and set its opacity separately.
I set my opacity to 30%, but you can make it whatever you’d like. 50% would probably be a little easier on the eyes.
At this point you can head back over to your main canvas and start aligning the fragments. Zoom in (farther than you think you need to) to make sure you’re getting the edges exactly right.
When you get close enough, this part’s pretty easy.
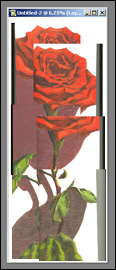
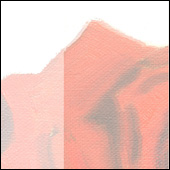
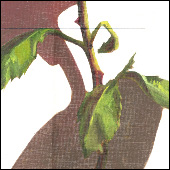
Do that with all the fragments, and you’ll end up with something like this—a perfectly aligned image, but one that has “scanner edges” showing up in the middle of it.
 That black line near the bottom, and the shadow line going vertical needs to be taken care of.
Here’s where you get to do a little Photoshop magic—and it’s not hard if you know what’s going on.
The key is that each fragment is overlapping another one.
 So while one fragment on top might have a defect from the scanner, the one underneath it won’t. All you have to do is erase away part of the top fragment.
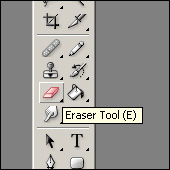
Before you start in with the Eraser Tool though, change a few of the settings to make your life a little bit easier.
After selecting the eraser, click on the brush button just underneath the menu bar. Make sure the size is large enough for your artwork. I made mine 200px, but see what looks right for you.
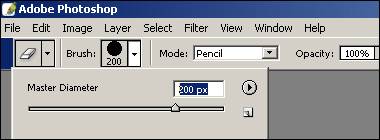
You’ll want the size of your eraser to be larger than the lines and shadows you’re erasing.
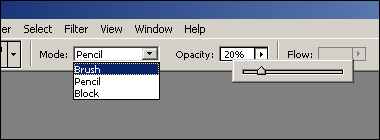
Next, make sure that Mode is set on Brush not pencil or block, and that Opacity is down around 20%.
With those settings, you can just brush the eraser tool over the shadow areas and lines, and they’ll slowly fade away.
 If they don’t vanish, you probably haven’t selected the correct fragment. You’re most likely erasing one that’s on the bottom which you can’t see.
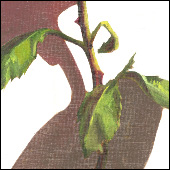
Notice the size of my eraser in the image to the left. Because these scans are so large, 200px looks pretty small.
But that’s about the right size ratio for this painting.
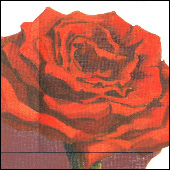
Keep erasing over the whole image until there’s no scanner edges showing. When you get to this point, you’re almost done.
The only thing left is to get rid of all your layers.
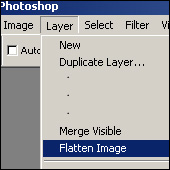 Click on LAYER in the menu bar, then FLATTEN IMAGE.
All of those fragments that you’ve been working on will meld into one single image. So be sure you’re done erasing.
Save your file as a .psd before flattening if you’re not sure.
After that just crop your artwork and you’re done.
 I’ve written another tutorial on color correcting artwork, which you might be interested in as well.
My final image turned out to be 9.75″ wide by 25.75 inches tall. If I’d have been a little more careful in the scanning process I probably could have gotten the full size, but it’s really not too big of a deal.
The resolution is 300 pixels per inch, which is good enough to print anywhere, although it makes for a pretty large file (64.5 mb).
Hopefully this tutorial was helpful, but if you have any questions about it, just ask.
This post may contain affiliate links.