Throughout each of the previous lessons in this series, I’ve showed the classical way of starting a portrait drawing, from building the shape of the head, to adding simple shadows, ears, eye sockets, etc.
Today, let’s continue where we left off, and add eyes and a nose to our portrait:
26. Shading the area above the upper eyelids
The area immediately below the eyebrows always has darker tones than those seen on the upper eyelids. So let’s start by building up tonal values for that area:
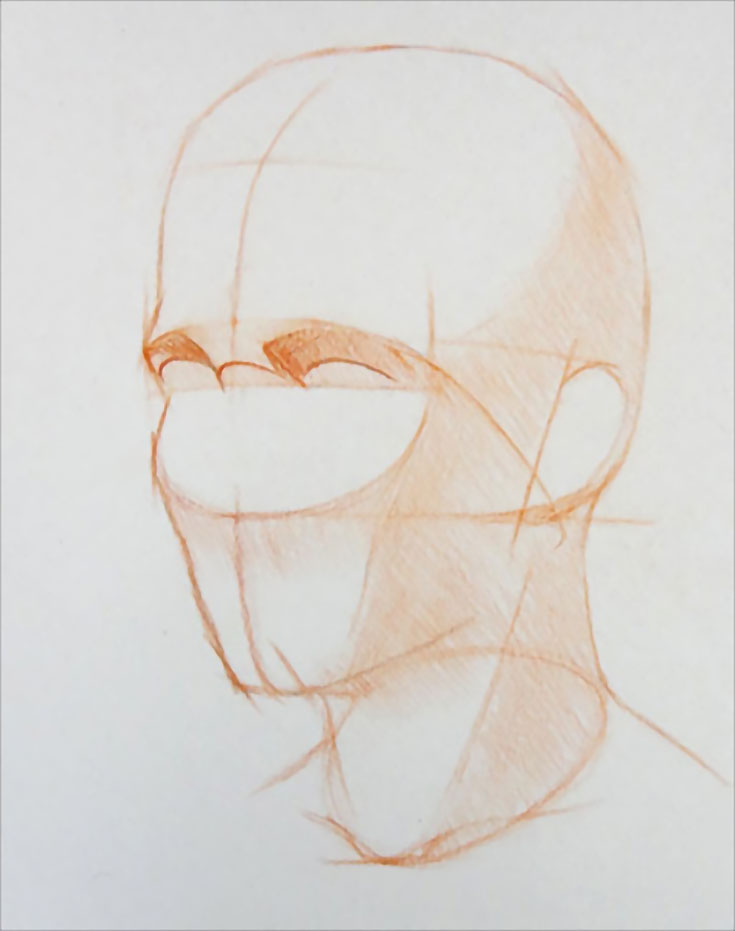
We will come back to darken these later on as well, so there’s no need to get too detailed or dark for now. It just always a good idea to remember to build up tones gradually as you go.
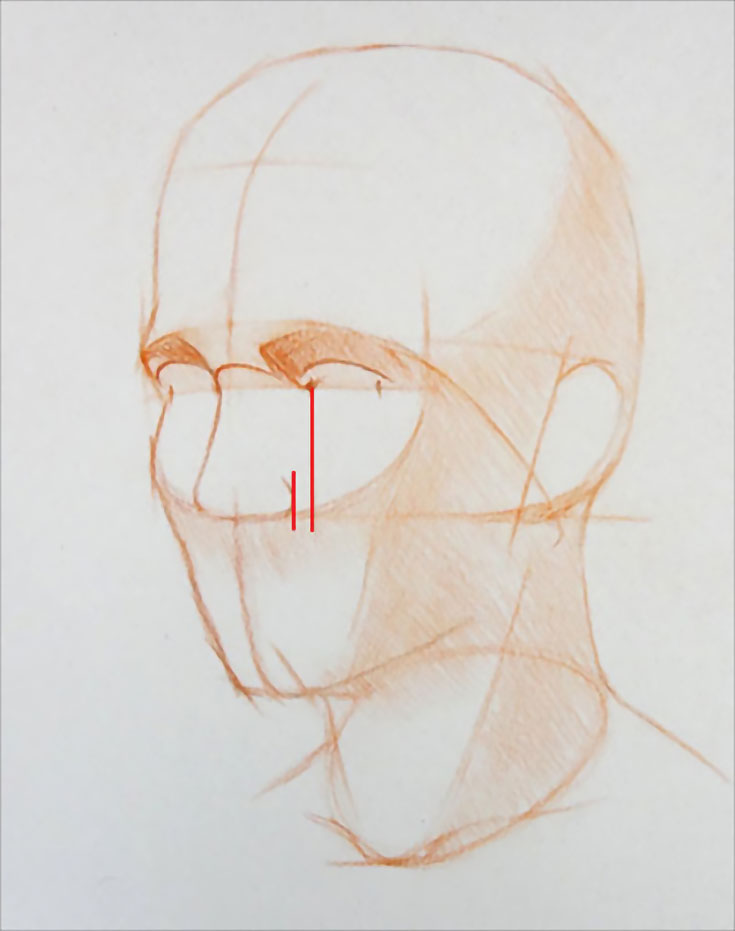
27. Marking the corners of the eyes
Depicting eyes with precision is a critical step in portrait drawing, and typically is not an easy task for beginners. Common problems are eyes that are too close to each other, or not symmetrical within the face.
To solve those issues, you’ll want to pinpoint the exact location of your model’s eyes. Use the following rules:
• The distance between well-positioned eyes is equal to the length of one eye.
• Both eyes must be on the same level, which is the horizontal line that divides the height of the head in half.
Of course, these two rules are easiest to use when drawing a portrait straight-on from the front! In our case, it is a bit more complicated because the head is turned three-quarters and, therefore, is seen in foreshortened perspective. The eye-line is also slightly curved when drawing in three-quarter view.
But keeping those rules in mind, let’s start by simply marking the model’s left eye corners. Check the distance from the central line of the face to the eye’s inner corner on your model. Make sure this corner is not too close to the nose in your drawing.
Once you’ve marked the inner corner of the eye on your paper, you can also mark the outside of the nostril on that side, which should be slightly closer to the central line of the face. I’ve done that below in red:
Next, check the length of that eye on your model and mark the outside corner of the eye in your drawing.
Repeat this step for model’s right eye. In the three-quarter view, the nose can overlap the inner corner of the far eye, so it’s a good idea to pretend as if the nose was transparent and draw the eye completely anyway. This will help you check for symmetry and placement as you go.
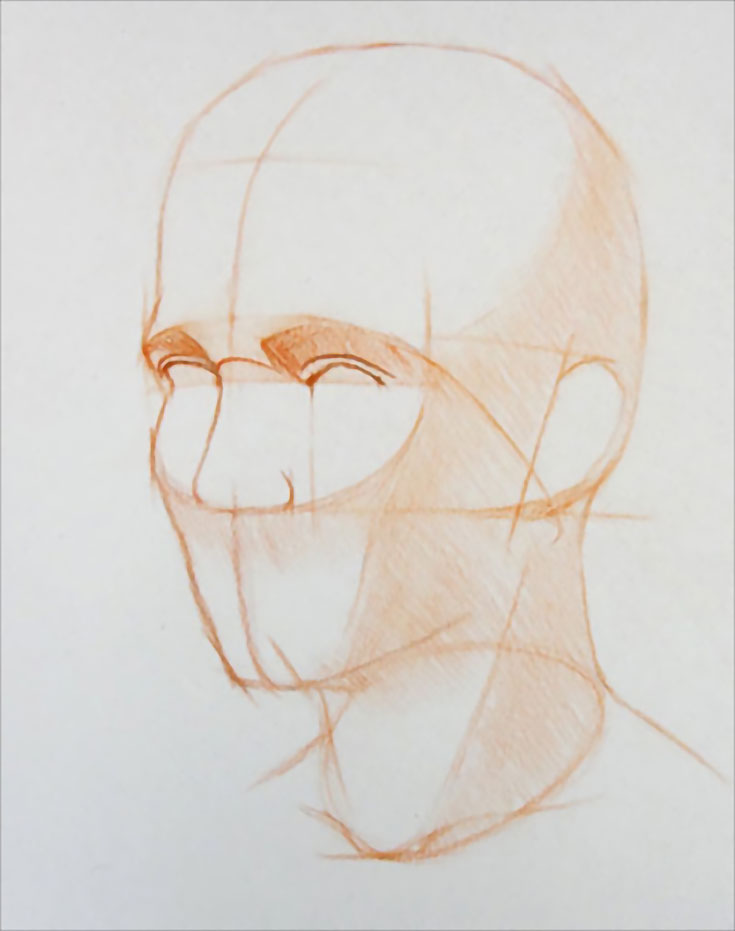
28. Depicting eyelids in three dimensions
With all four corners of the model’s eyes in place, it’s time to “build” the eyelids.
Note: I’m using the word “build” rather than “draw” because when we use constructive drawing principles, we are drawing what we know exists, instead of copying what we see. This is especially critical when portraying eyes.
We know that the eye is a ball about one inch in diameter, that the eyelids wrap around this ball. And despite the eyelid being a very thin muscle, it still has a certain thickness that must be depicted.
In addition, here is an important rule to remember when drawing eyelids – upper and lower eyelids are not symmetrical with each other. The upper eyelid’s top curve will be one-third of the distance from the eye’s inner corner, while the lower eyelid’s bottom curve will be one-third distance from the outer corner.
I’ve put in the top eyelids here, with the curves one-third the distance from the inner corner, as described:
Again, this rule is easier to follow when drawing a straight-on portrait. Nevertheless, this rule is still in place and should be remembered.
29. Drawing the iris and pupils
With the eyelids depicted accurately, we can place an iris of the eye. But be warned: another amateur mistake is placing the iris as a full circle between the upper and lower eyelids.
Instead, the upper part of the iris is usually partially covered by the upper eyelid, and there may be a small gap between the lower edge of the iris and the lower eyelid.

You should also remember that the eyeball is not pure white and often has darker tonal values than highlights of the forehead (for example). Another thing that adds to the darker tones of the eye is the thin shadow cast by the upper eyelid.
As for eyelashes, one dark curved line does the job – there’s no need to draw them individually (unless you’re drawing a mascara ad). This is especially important for male portraits.
NOTE: If you’d like to find out more information about drawing eyes, or watch video lessons taking you through each step, visit DrawingAcademy.com.
30. Placing the nose
The base of the nose is already marked, and should be roughly at the same level as the bottom edge of each ear. The width of the nose can be double-checked by comparing it to the distance between eyes.
As for the shape of the nose. . . each individual is unique. Shapes vary from person to person and capturing likeness depends on how accurately you “build” model’s nose contours and outlines, so observe your model closely.
I recommend first simplifying the nose by drawing straight lines to show its angles and proportions. Then, smooth those lines with softer corners.

Like the upper eyelid, the lower plane of the nose is always in shadow, so you can block it in with light shadow tones for now. We will work on adding darker values for more depth later.
Ready to move on? Click here to continue with Part 7 of this series!
Portrait drawing expert Vladimir London is a published author and founder of the Drawing Academy, an online class for learning traditional drawing techniques from home—make sure to click through for full tutorials, drawing tips, and more!
This post may contain affiliate links.