No matter what kind of painter you are, the first step in every painting should be preparing the painting surface.
Luckily, almost all commercial painting supports (whether stretched canvas, canvas mounted to panels, or panels) are ready-to-use. The only thing you really have to decide is whether the prepared surface should be oil based or acrylic based.
Comparing oil-based and acrylic-based surfaces
Both oil-primed and acrylic primed-supports can be used for oil painting, and they behave very much the same. The primary differences are in the feel of the canvas or panel, and in the cost. You’ll find that oil-priming produces a more silky feel, but is generally more expensive. Sometimes it’s harder to find all the sizes you want, too.
Acrylic primed canvases and canvas panels, on the other hand, are available in a wide range of standard sizes, and tend to be cheaper.
NOTE: You can use any medium—even watercolor—over acrylic priming. However, oil priming is good only for oil painting. Not sure how to choose your medium? Research oil vs. acrylic paint here.
What I’ve painted on:
When I began painting, I chose ready-to-use acrylic-primed stretched canvases. Over the years, I’ve also used ready-made acrylic-primed canvas panels, hand-stretched canvases made of oil-primed linen, and Masonite panels hand-prepared with either straight acrylic gesso or with a mix (50% acrylic gesso and 50% modeling paste).
Each type of support served its purpose perfectly well – the only difference I could see was in the smoothness of the surface and in the cost. After trying as many options as appealed to me, I finally settled on what I feel is the best blend of usefulness and cost: unprimed Masonite panels.
I highly recommend trying out as many options as you can, to see which one works best for you. There’s no substitute for a hands-on trial!
Preparing Masonite panels for painting
I use quarter inch Masonite panels, which I buy in 4ft by 8ft sheets at a local lumberyard. I have the panel cut into standard sizes at the lumberyard, a service that is often free or very low cost. A full sheet can be easily cut into four 24×48 sections or into a variety of other standard sizes with little or no waste.
NOTE: The size of your vehicle may determine where and how the panel is cut. You can definitely cut Masonite yourself, I simply can’t get a full sheet into my car!
Step 1: Lightly sand the surface
Masonite is manufactured with a protective surface that must be scuffed first. A light sanding is generally enough. Acrylic gesso sticks better to the resulting surface and I have no worries about losing a painting because the priming fails.
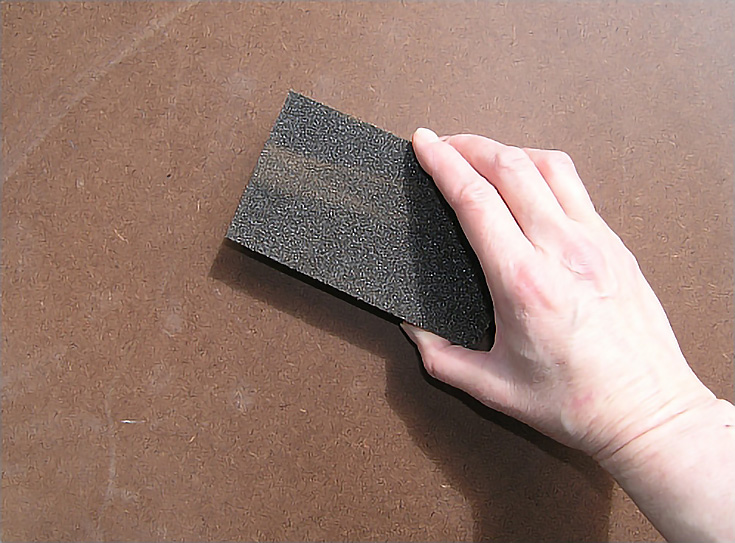
I use a sanding sponge to do the job (typically $5 to $10 at the nearest hardware store or lumberyard). My favorite sanding sponge has two sides, one medium and one coarse, but sanding sponges are also available in other grits.
Sand lightly several times – the key is to simply scuff the surface and avoid gouging any sections. I also suggest varying your strokes to cover every part of the surface.
In fact, I often start with the panel in a horizontal position and sand it once, then turn it to a vertical position for the next sanding, then sand it once on the diagonal. Any combination of strokes will work. The type or direction of strokes is not as important as making sure the surface is properly scuffed.
When you finish, the surface should no longer be shiny. It should also have an almost felt-like feel. You can spot sand any areas that are still shiny.
After the final sanding, use a soft, clean cloth to wipe off the residue.
Step 2: Apply acrylic gesso
When the surface is ready, I apply acrylic gesso (no water added). I pour a little gesso onto the panel, then use a foam brush to spread it around until the entire surface is covered. Rinse the foam brush immediately and let the panel dry (usually about 30 minutes). Go ahead and coat both sides and all four edges. Then do it again.
I put a minimum of three layers of gesso on each panel, changing the direction of brush strokes with each layer, as shown in the illustration below.
#1—length-wise
#2—width-wise
#3—diagonal
#4—opposite diagonal
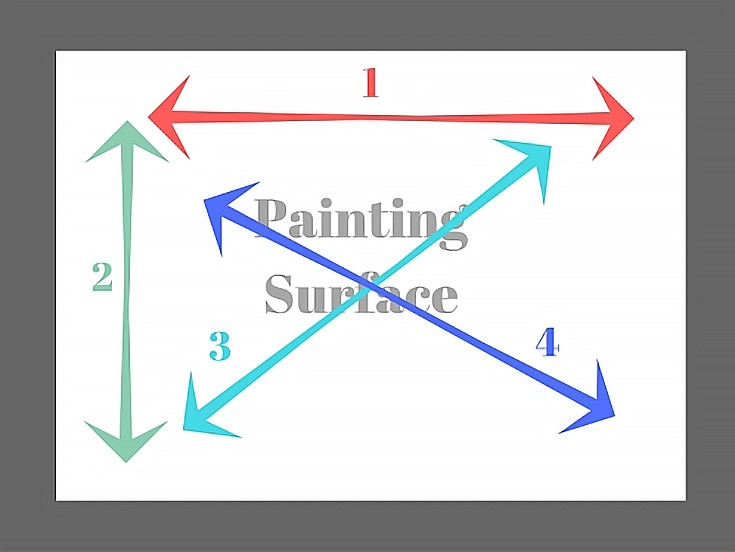
When I do (on occasion) additional layers, I continue to turn the panel so no two consecutive layers are applied in the same direction. The order doesn’t matter as much as making sure each layer is applied at a different angle.
If you want an eggshell-smooth painting surface, go ahead and sand lightly between every layer of gesso. If you’d like a little more texture, you can skip that step and simply sand after the last layer.
NOTE: A sanding sponge is excellent for sanding in-between coats, too. Just make sure you have a clean sponge (or one dedicated to sanding gesso) for this work. Use light to medium pressure and a circular stroke.
If you want to duplicate the look of canvas, use a bristle brush to apply gesso and don’t sand the brush strokes until after the final layer is dry.
And to keep your studio clean. . .
Always use a drop cloth when you’re priming panel or canvas. Acrylic gesso can be removed easily if you find it while it’s still wet, but removing dried on gesso is another matter.
It’s far better to prevent drops and drips just by using a drop cloth.
These days, even when I use commercially prepared supports, I always add one or two layers of gesso myself. If your style of painting involves a high degree of detail (for example, portraits) a smoother surface will more readily accept that detail.
Enjoy!
This post may contain affiliate links.