If you’re a colored pencil artist, you’re probably already familiar with the 5 basic pencil strokes—but today I’m going to be sharing a few “specialized” strokes I learned recently that may help you with your next colored pencil drawing, too!
Introducing three advanced pencil strokes:
Here’s the drawing I’ll be using to demonstrate these strokes. The initial sketch is only about half finished, but you can already see how the shapes are developing.
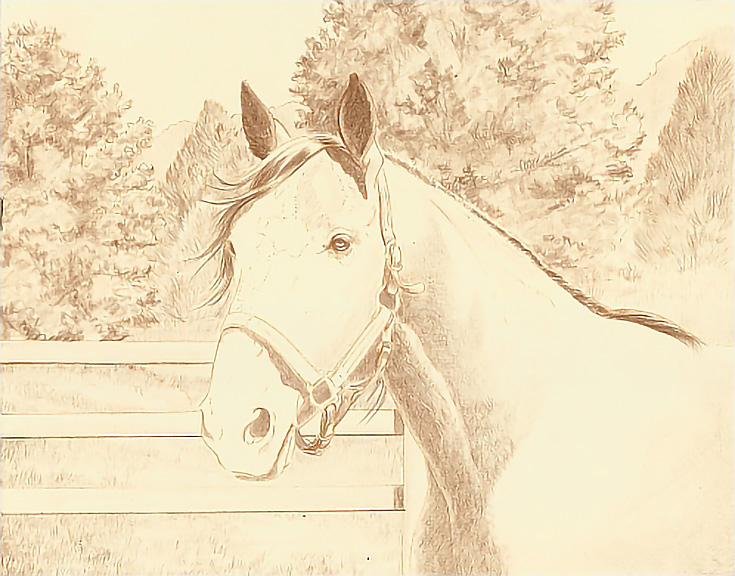
The variety of textures were all drawn with nothing more complicated than combining different types of strokes and multiple layers. Most of the strokes are pretty basic. . . directional and circular strokes, for example.
But as I worked on the more complicated trees shapes, I had one of those “ah-ha!” moments that opened the door to new ways of drawing.
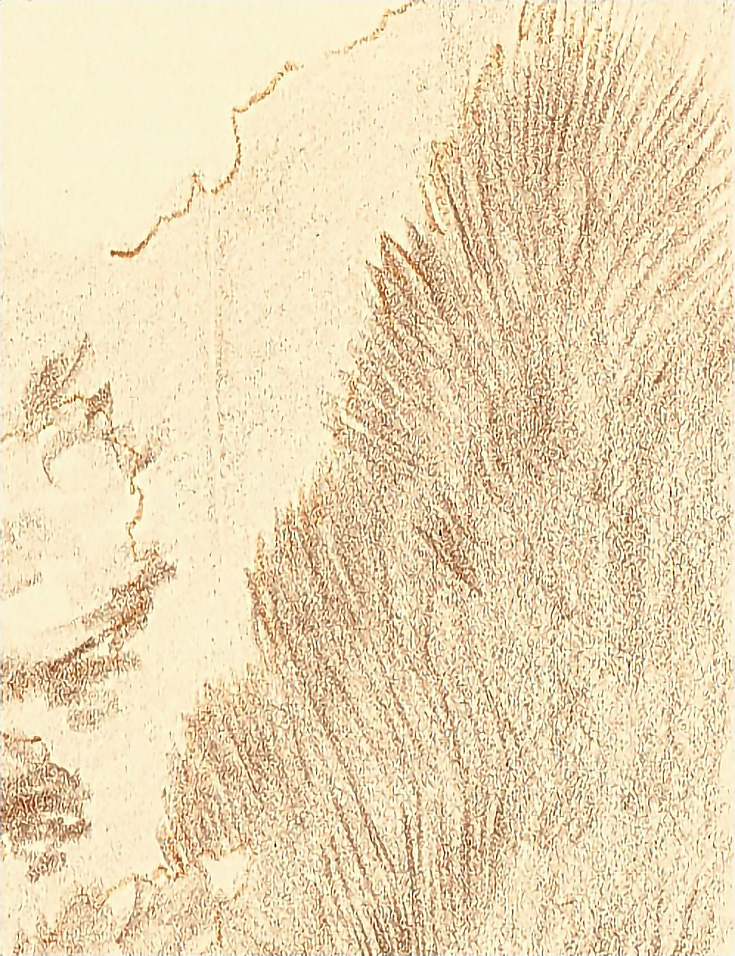
1. Pencil strokes for drawing hardwood trees
I’d already added a quick glaze using the side of the pencil to establish a base value for my tree. I didn’t fill every part of the shape because I want to preserve highlights, but I didn’t fuss over it, either. I’d also added a layer of squiggly strokes applied with the side of the pencil. My goal was to mimic the appearance of the tree, not every detail.
Then it was time to add shadows, and this is where I found myself using a new stroke.
The light source for this image is nearly full-on from the front. That means there is not a shaded side of the tree; the shadows are all on the interior. They show around and through the lighted canopy, and as you might expect, are quite complex. I could have spent hours drawing each shape!
Instead, I held my pencil nearly horizontal (as shown below) and used a back-and-forth stroke in a vertical pattern to add the shadows.
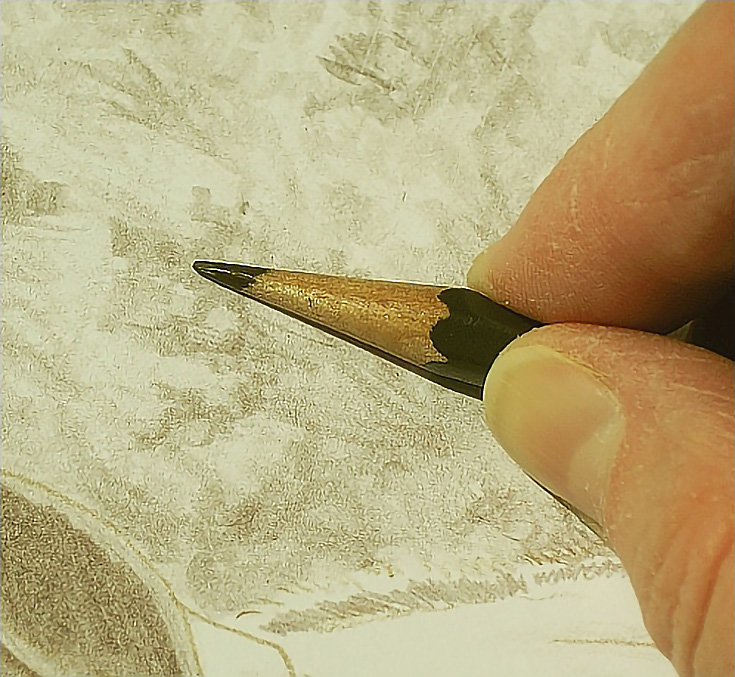
I rested the heel of my hand on the edge of the paper and moved my hand from side to side between strokes so that the strokes formed a fan shape. Bending or straightening my fingers in the process allowed me to overlap strokes and create random patterns of light and dark as well as organic looking shapes.
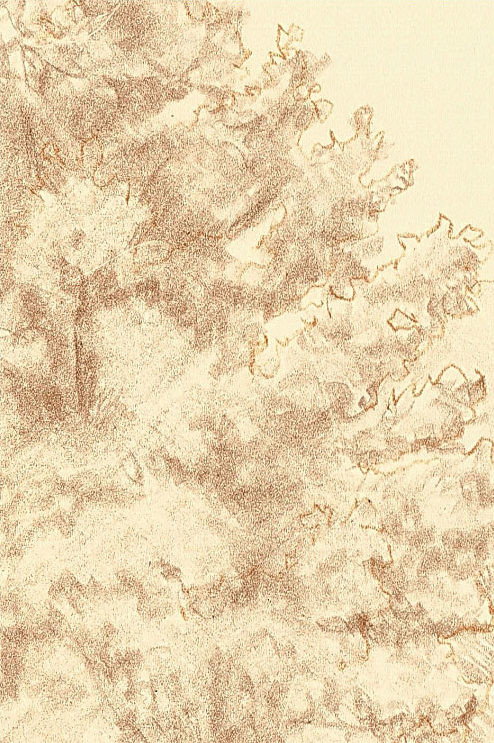
The result was a remarkable—and very pleasing—likeness of a hardwood tree lighted from the front.
2. Pencil strokes for drawing realistic grass
I used a more open version of that stroke above to draw grass shapes. I also didn’t turn my hand, but worked along the bottom of the drawing. Nor did I do multiple layers in every area. In fact, in some areas, I didn’t add any color.
You can see individual stroke patterns more clearly in this illustration, but it is the same basic pattern I used for the hardwood tree.
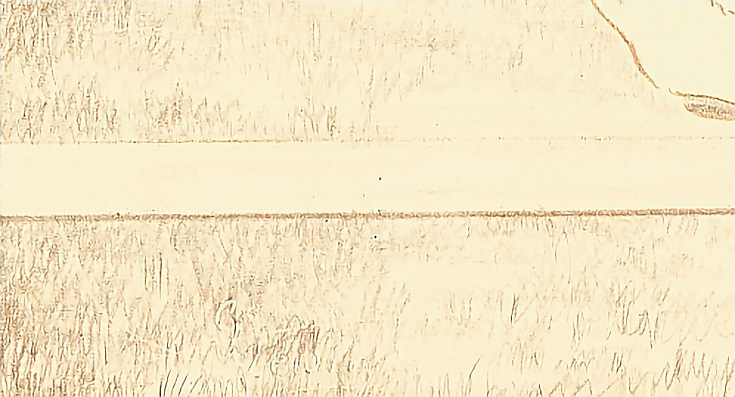
For the darker areas, I either placed the strokes closer together or went over the paper twice.
TIP: When working along an edge like the horizontal fence rail shown above, lay a straight edge on the paper and use it as a “bumper” to keep your strokes from entering that area. This speeds up the drawing process because you don’t have to worry about drawing “over the line.”
3. Pencil strokes for drawing pine trees
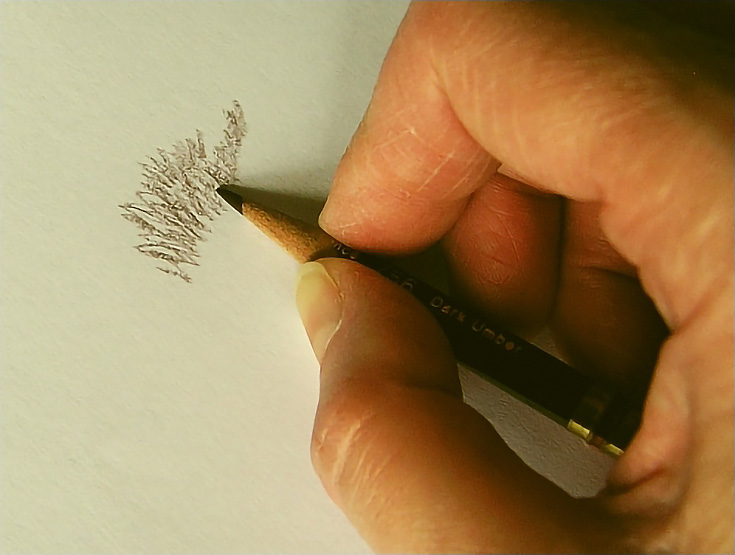
When I started drawing the pine trees, I first laid down a layer of color with light pressure and the side of the pencil, covering almost all of each tree.
Then I held the pencil in normal writing position and stroked around the edges of each tree with angling, vertical strokes. Whether I was drawing the outside edges or the edges of interior shapes, I stroked from the inside to the outside.
Although individual branches aren’t visible, I drew in a pattern similar to the way pine trees grow. These trees are far enough in the background, that a lot of detail is not necessary, but even if they were in the foreground—or were the subject of the drawing—you could develop detail with the same strokes simply by adding more layers and using smaller strokes.
Bonus! How to draw hair with single strokes
I’ve discussed drawing hair before, but it’s worth mentioning again. You can easily draw realistic hair with long, directional strokes, and that’s what I needed in this case as well.
Beginning between the ears of the horse, I stroked downward in the same way hair grows. I simply skipped areas for highlights at the top “curve” of each hair.
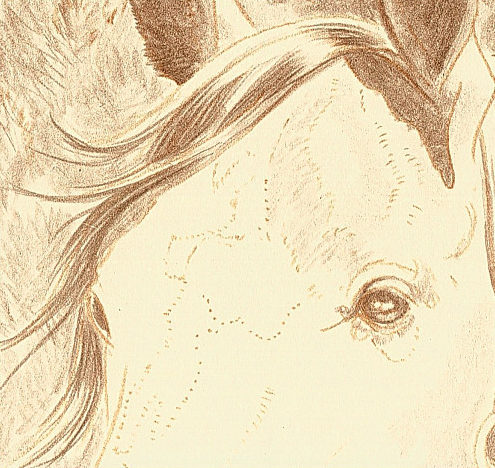
I’ll fill in more with some middle values later on, but even so, the hair already looks alive.
I’m not tracking time put into this project, but I’d guess I’ve spent between 45 and 90 minutes on the under drawing so far. Just by matching a few specific strokes to the proper areas, I’m letting the pencils do most of the work. I’ve already saved a significant amount of time, and I expect I’ll save a lot more as I finish this drawing.
Give these strokes a try in your own drawings, and see how your pencils can do more of the work for you, too. Enjoy!
This post may contain affiliate links.