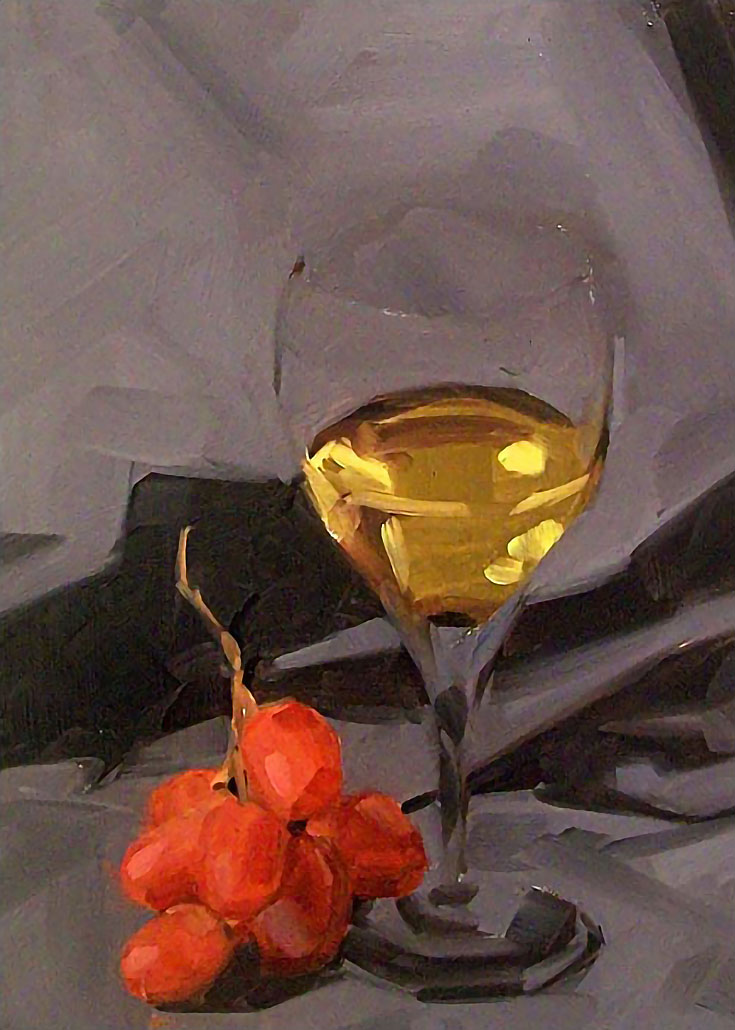
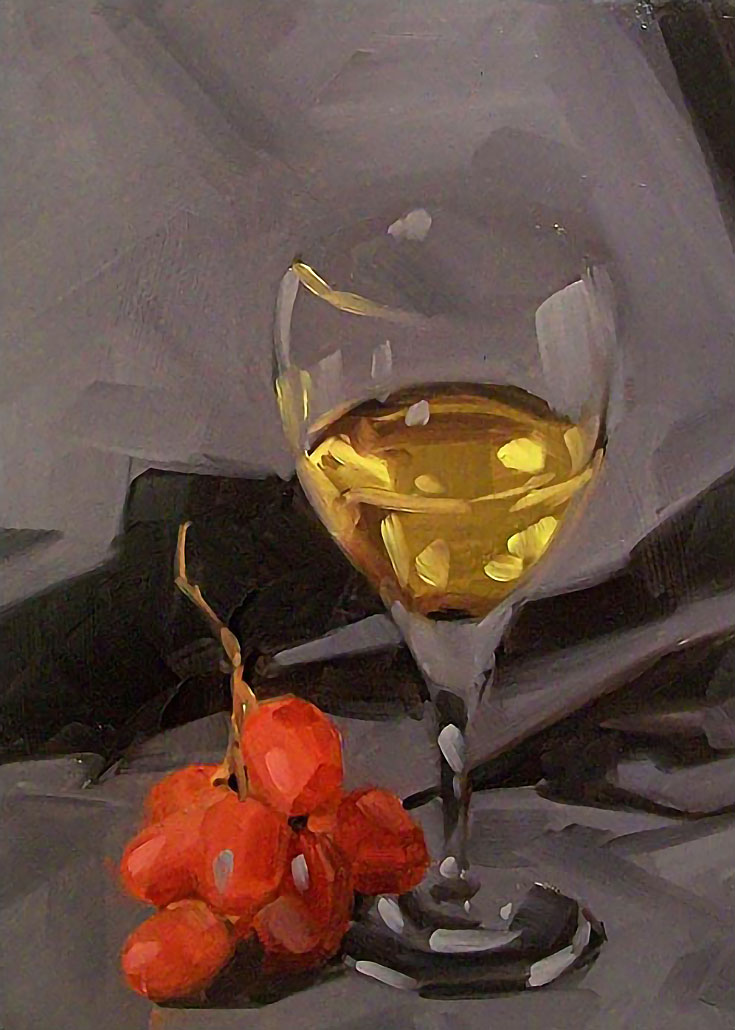
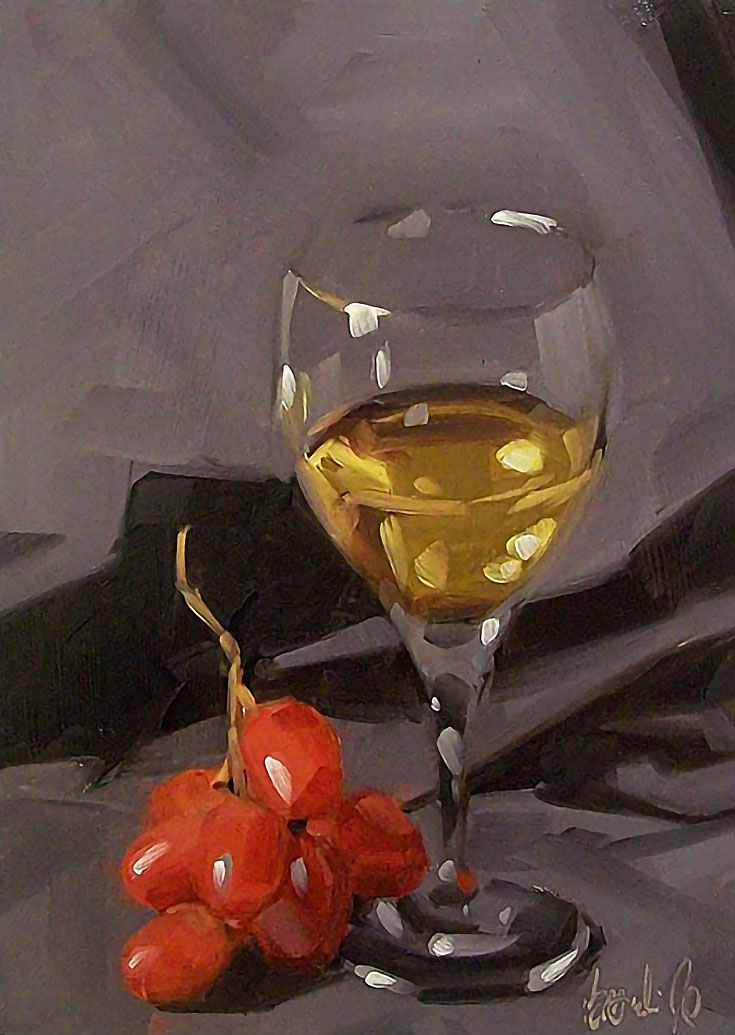
Painting glass realistically in oil paint so that it looks like glass—transparent, shiny, and thin—may seem like a complicated challenge, but it’s really not as difficult as you would think. The key is to keep it simple and avoid overworking the light reflections.
Here are the steps I take when painting a wine glass, or any other clear glass, in a still life painting:
1. Set up your still life with one light source
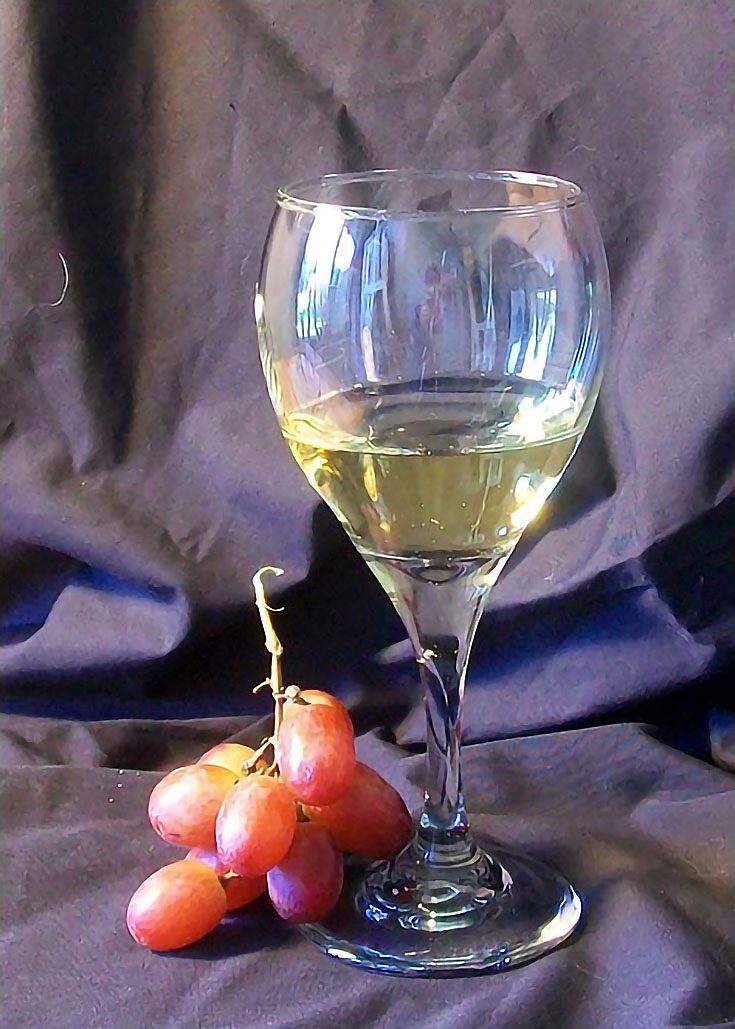
I created a simple still life scene with a wine glass, grapes and some fabric for this particular painting. You can see in the photo below that I used a spotlight from the left to illuminate the scene.
Whether you are working from a photo or the actual still life, you MUST have a single strong light source. I recommend placing your still life next to a window or bright lamp to give your setting some excellent lights and darks. This will also help create the intense highlights on the glass which really make it come to life.
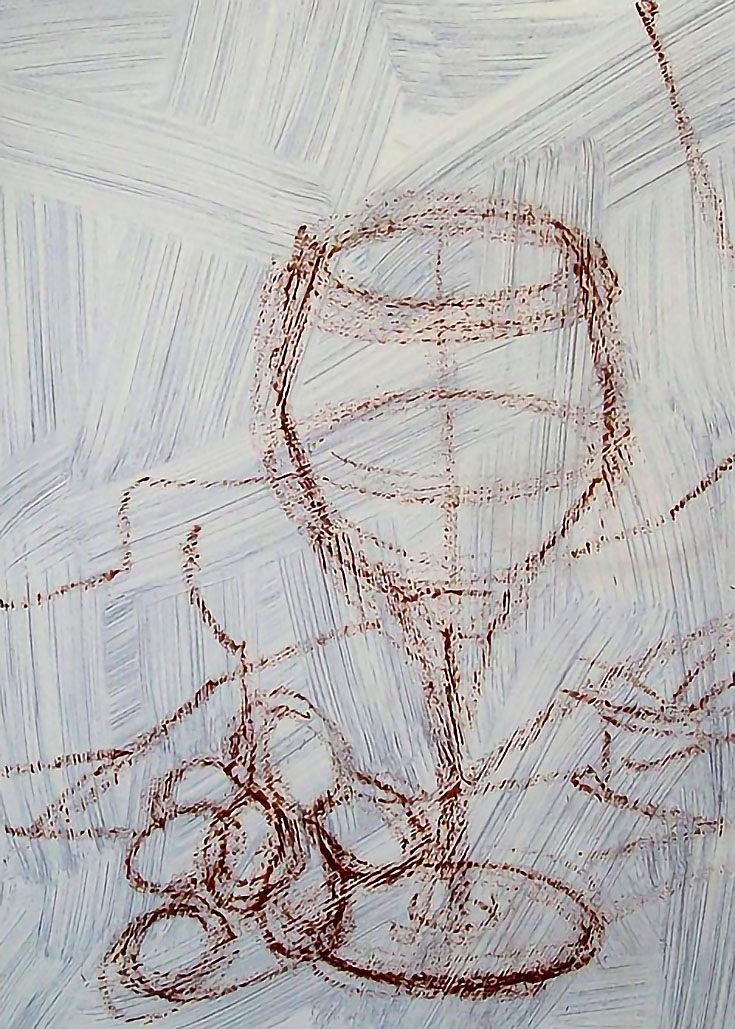
2. Sketch your subject onto your board or canvas
The first thing I always do is sketch the image onto my board. This ensures that your finished painting will have a planned-out and balanced composition.
Make sure to draw whatever is inside and behind the glass. Even if there is clear water in the glass, sketch it in. It doesn’t have to be too detailed, just get the general idea in there to work from.
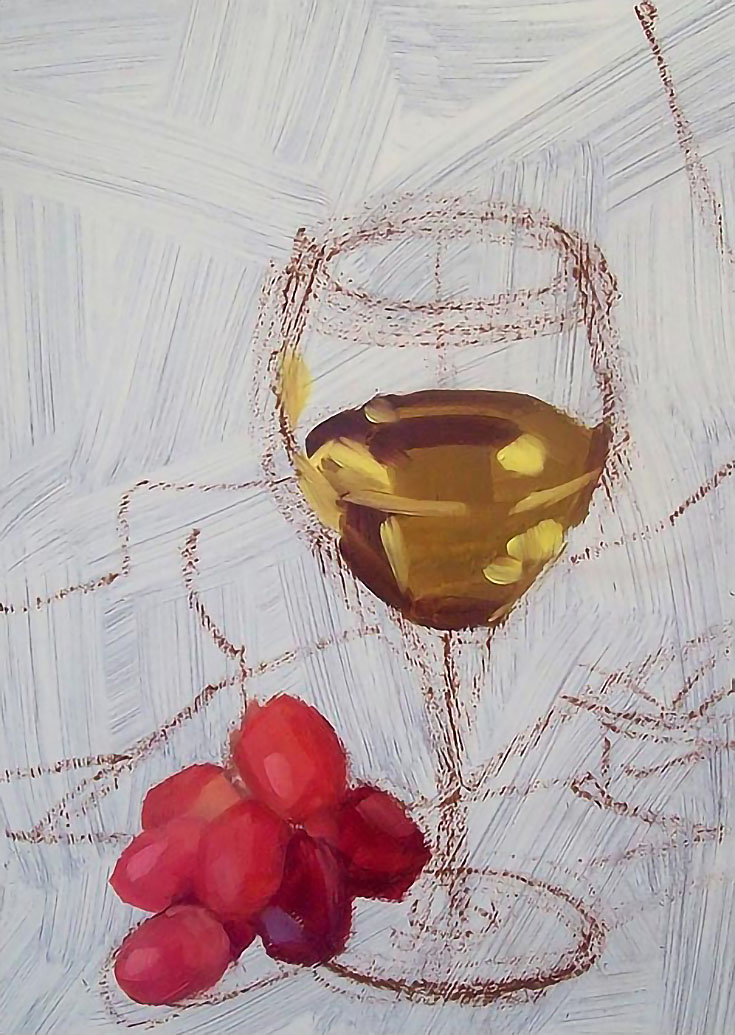
3. Paint whatever’s inside the glass
Next, I filled in the wine. Just block in the lights and darks at this stage; we will define and highlight in a later step.
I always paint what is inside the glass first so that I can layer the elements of the glass on top, making it look like the wine is actually inside the glass. I also painted in the darks and midtones of the grapes during this time.
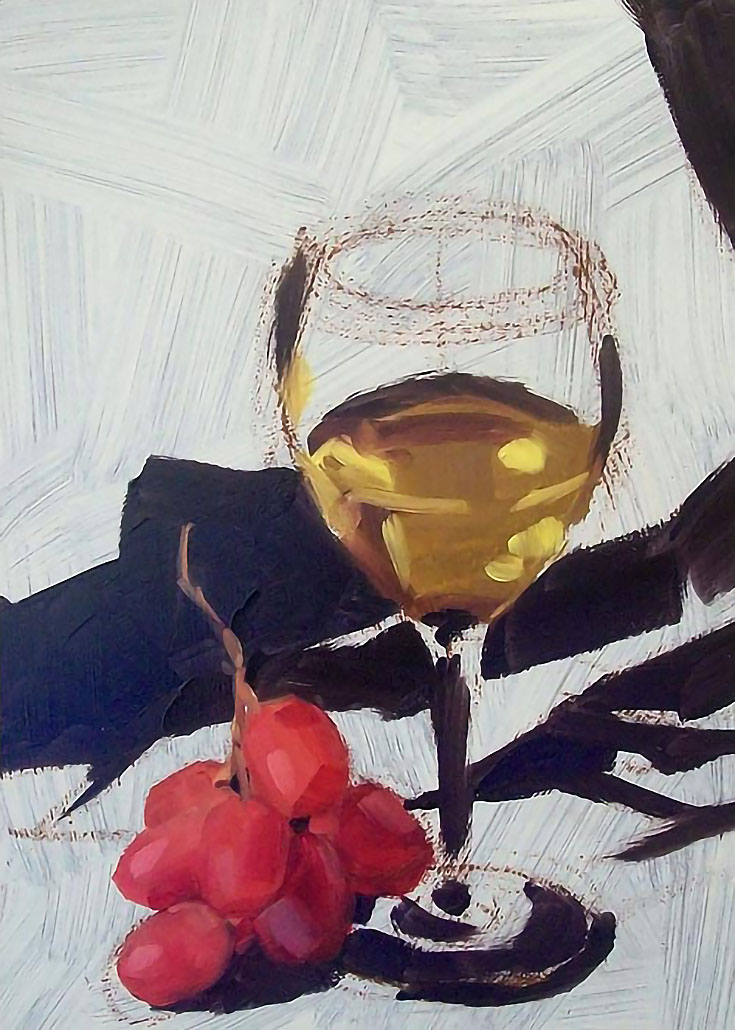
4. Block in darks and shadows
Next, I filled in the dark areas of the fabric and the shadows. You can already see the glass and the grapes come forward and feel more grounded.
I like to layer from dark to light with oil to make the shadow areas fall back and into the painting. Make sure to pay attention to the dark reflections in the glass as well. Why, you ask? Because the glass reflects everything around it, so all those colors are what actually make up the glass itself.
5. Fill in the midtones and background
I painted in the background color next. Make sure to fill in behind the glass. Leave some of your sketch lines of the glass exposed if you need them for reference or you can draw the lines back in if your glass gets a little lost.
You can still see my original lines a bit, but the glass has already taken shape.
6. Start adding light reflections
Next, I added some subtle light reflections. The hint of yellow on the rim and a few strokes of the lighter gray really start to define the glass and make it feel more round. I also defined the light in the wine during this time.
Try not to over-work this step. . . ideally you want the glass to look clear and not opaque. Remember, when painting, you don’t have to re-create EVERY reflection. Simplify down to a few of the major reflections. Squint a bit if you have to; that often helps.
7. Finish with just a FEW bright white highlights
This is where the magic happens. I took plain white and just touched the glass where the light was the brightest. As soon as you do this, the glass becomes a glass.
I also decided to add a few more darks in the stem of the glass, that little bit of red reflection from the grapes and the highlights on the grapes themselves. Again, don’t go overboard. Start by painting a few highlights, stand back and look at it, then decide if you need a few more or if it is finished.
Not as hard as you thought, right? Glass can be a beautiful and (fairly) easy element to add to any still life as long as you keep it simple and avoid overworking the reflections. Happy painting!
This post may contain affiliate links.
