After finishing a batch of paintings, I often find myself in a bit of limbo while thinking up my next inspiration. Usually I just end up playing around with my various art supplies. (If you’re like me, you have a veritable art store of supplies.)
Well, I love to mix up media, so today I thought I’d share my technique for mixing gouache and india ink. If you’ve never tried this particular combination, I hope you will. You can get some wonderful results with it.
Here’s how I go about it:
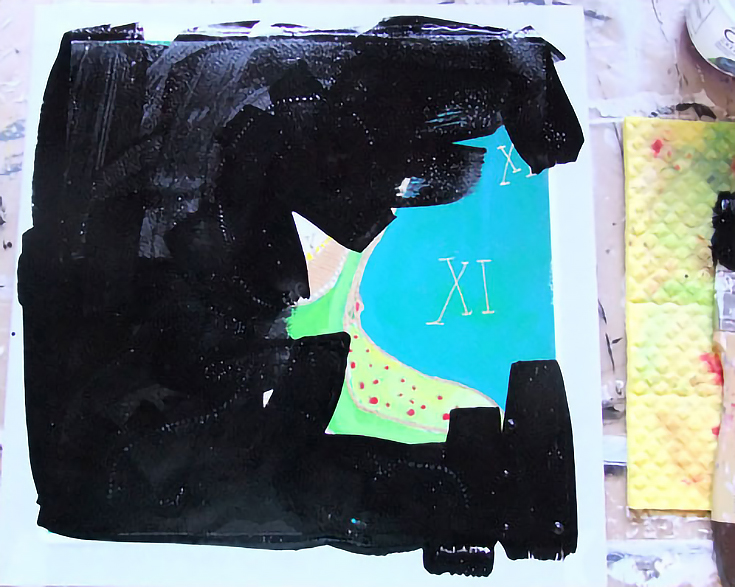
Step 1. The Painting
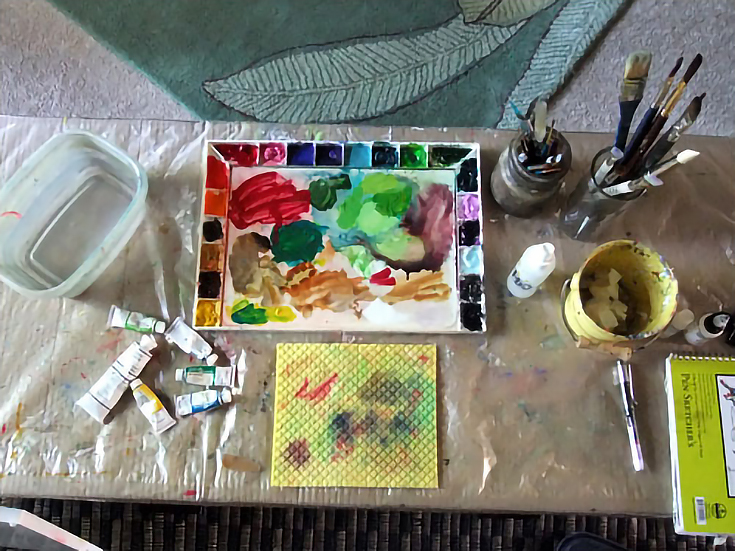
I spent the afternoon painting in gouache. I also used a gold metallic pen (Pilot Gold Marker, oil based) because I’ve noticed that it absorbs black ink really nicely.
I used layers and layers of gouache, since I kept adjusting the colors. It is important to have some pretty thick layers of paint before proceeding with the ink. I also went over my gold lines again at the end before letting it dry.
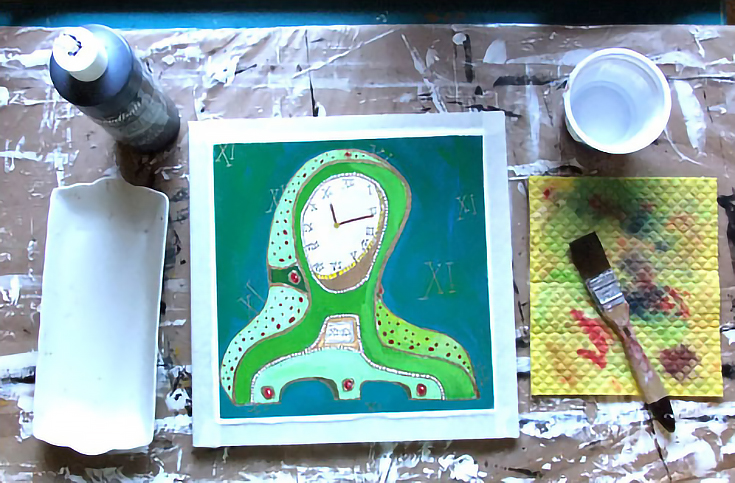
You don’t need a lot of supplies for this technique. . . I used a watercolor palette (with both opaque watercolor and gouache paints), white gouache, brushes, a Pilot Gold Marker, a water container, and a spray bottle of water to wet the paint. Everything went onto 140lb Arches cold press paper.
I set up my plastic-covered cardboard so I wouldn’t make a mess (india ink is messy, folks!) and placed a garage sale porcelain dish on the left to pour ink into.
At the right a sponge cloth and a very soft watercolor brush. Soft is important so that you don’t pick up layers of gouache when you layer the ink.
Remember, you need to paint in layers so you get thick coverage. Use white paint anywhere you want to preserve whites. Whatever you leave unpainted will be solid black after you add the india ink. (The india ink will also adhere nicely to wherever you use the gold metallic ink.)
Final tip: any details tend to get lost in this process, so keep it simple. Even my own painting was a bit too detailed, truth be told.
Once your painting is finished, wait until it is thoroughly dried. Let it sit overnight, even, before proceeding to the next step.
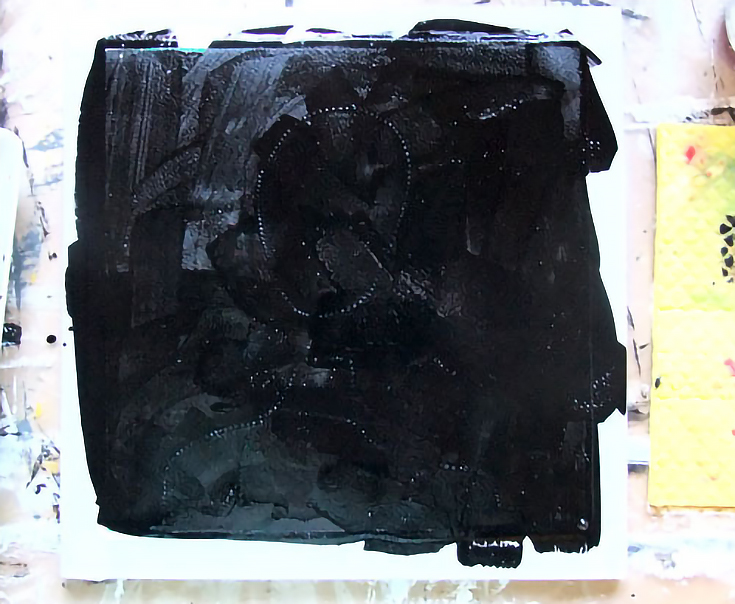
Step 2. The Cover-up
Pour out your india ink, more than you think you need. You can always pour it back into its container. I don’t add any water, but some folks do.
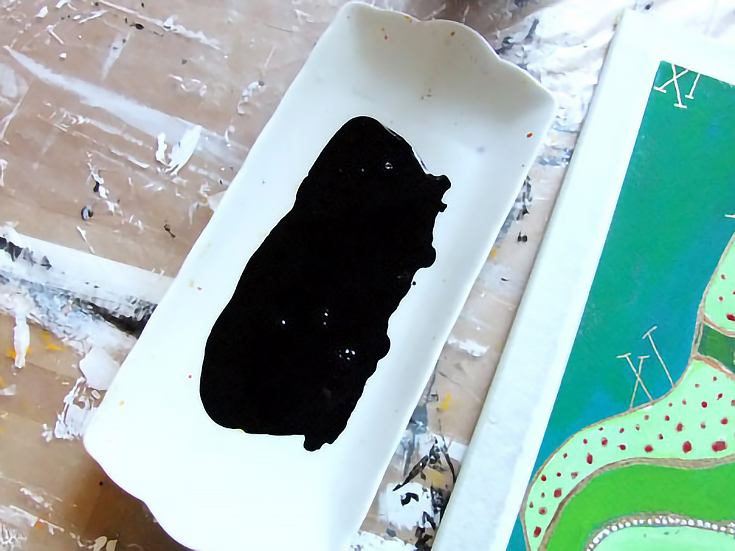
Honestly, it’s always a bit scary to cover some piece of art you’ve spent so much time on with blackest of blacks india ink, but. . . you’ve just got to take some risks in art. That’s what art-making is all about!
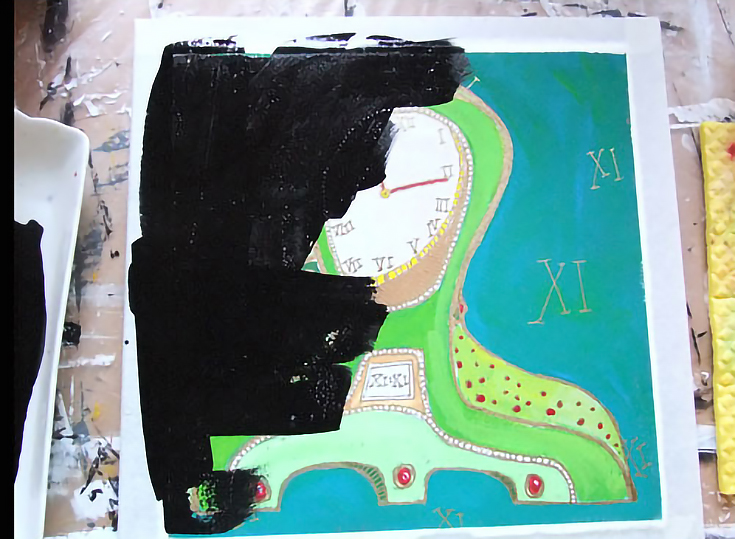
GOING. . .
GOING. . . Too late to turn back now. . .
GONE!
Now it’s the waiting game again. And I mean really wait. Wait an extra hour or two after you are SURE it is dry.
Step 3. The Reveal
Put your painting under water – just a gentle flow – then rub gently and consistently.
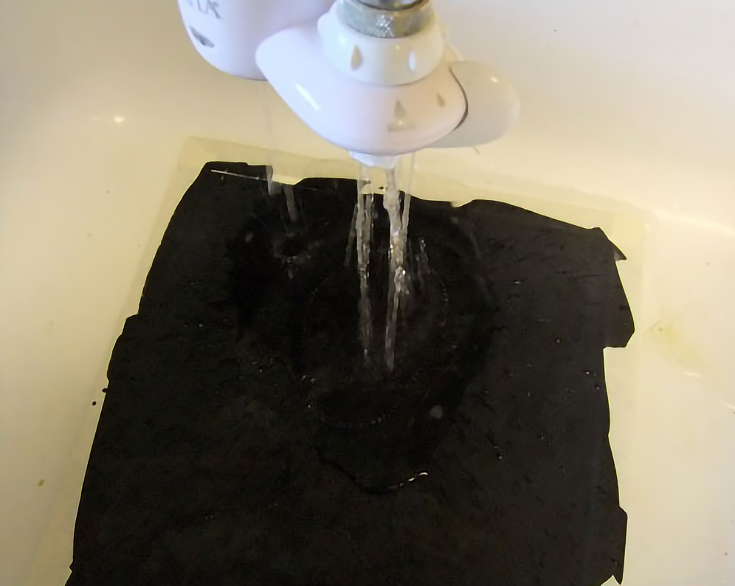
Always be sensitive to the paper (meaning, don’t rub holes through it!)
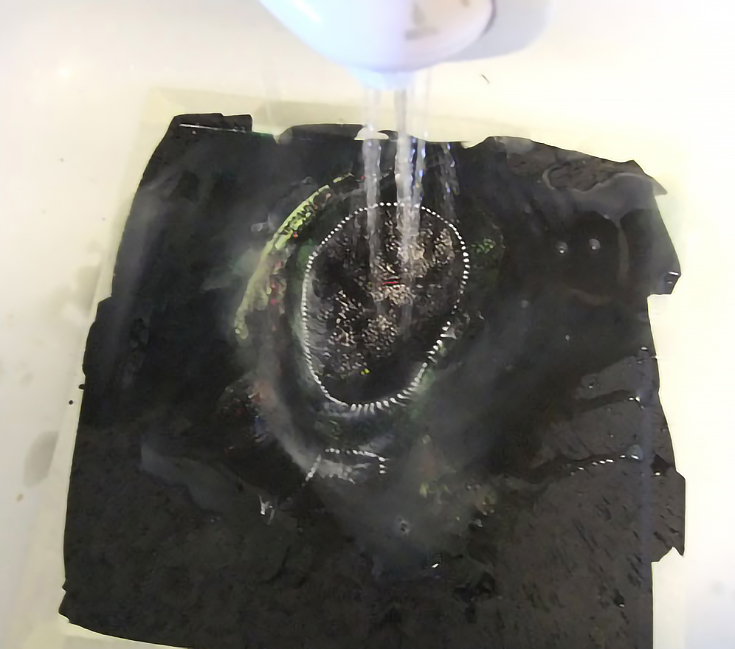
It may take 15 minutes or so, but keep at it. Slowly, the india ink will rub off.
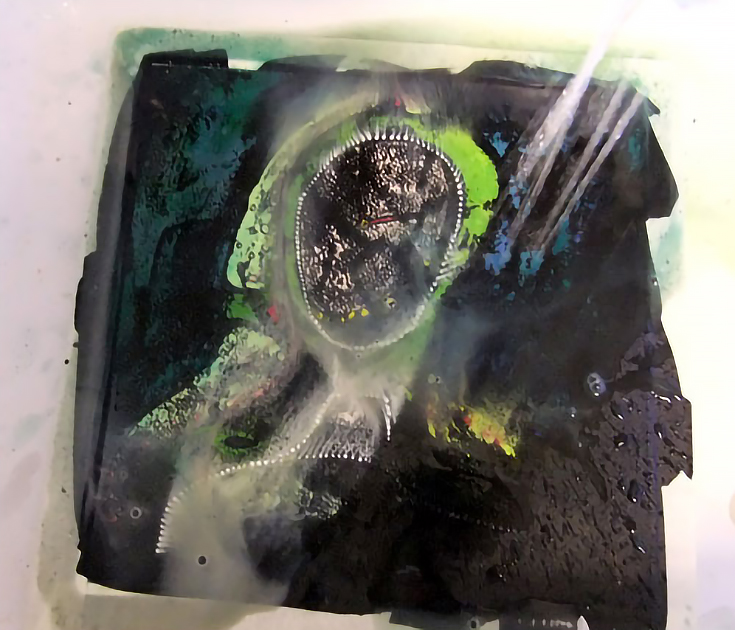
Around this point I stopped, although it’s not quite finished.
I decided to add some light touches of paint before calling it good.
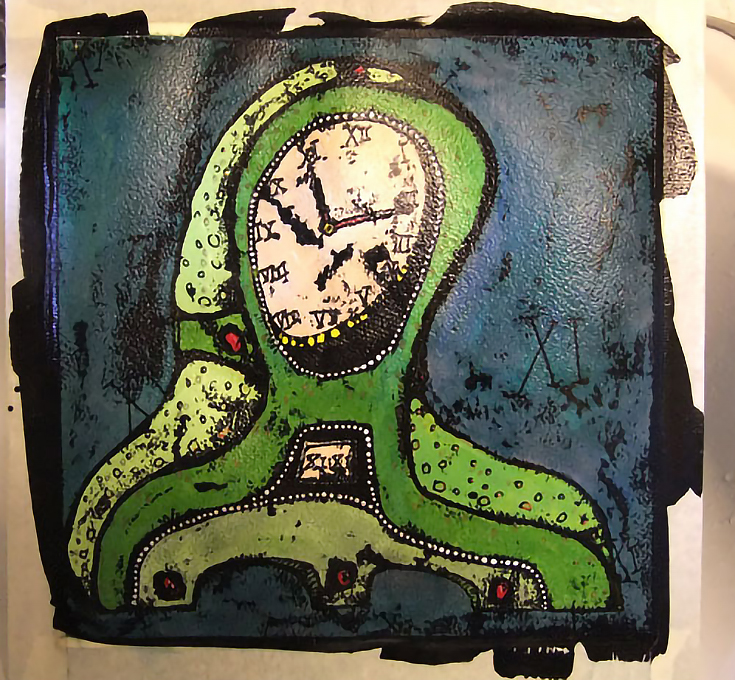
Step 4. Final Touches
I painted a bit more gouache over the clock face, not to obscure the stubborn black ink, but to mute it a bit, and still keep an antique look.
I also added the little red gems back in. . . and the yellow ones, too. (If I had kept things simpler to begin with I wouldn’t have had to paint them again.)
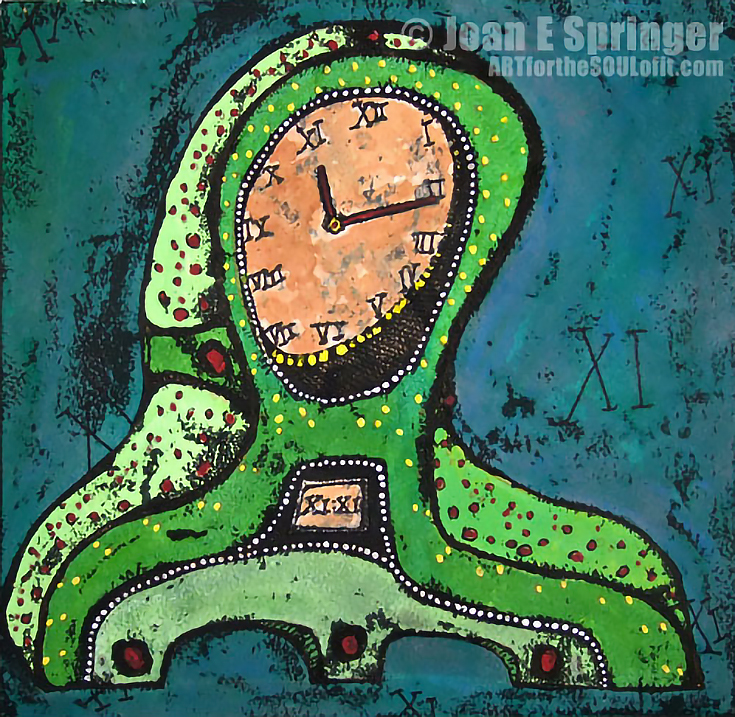
Below you’ll see my final outcome. I call it Cockamamie Clock.
NOTE: If you end up using this gouache and india ink technique, I’d love to see your paintings! Just stop by ARTfortheSOULofit.com and give me a shout.
This post may contain affiliate links.