The most important part of a drawing is the start, not the finish. This tutorial will focus on how to start a portrait drawing, using basic blocking-in techniques.
When drawing a portrait from life, you don’t want to just jump-in and draw. I always walk around the model to get a better understanding of the model and plan out my composition.
In addition, whenever I do a head study, or a portrait, I don’t start out by trying to capture a “likeness.” Instead, I try to construct a solid, three-dimensional head, focusing on the volumetric forms. By constructing the underlying forms first, you’ll be more able to achieve a credible likeness in the end.
Here is my process for drawing portraits:
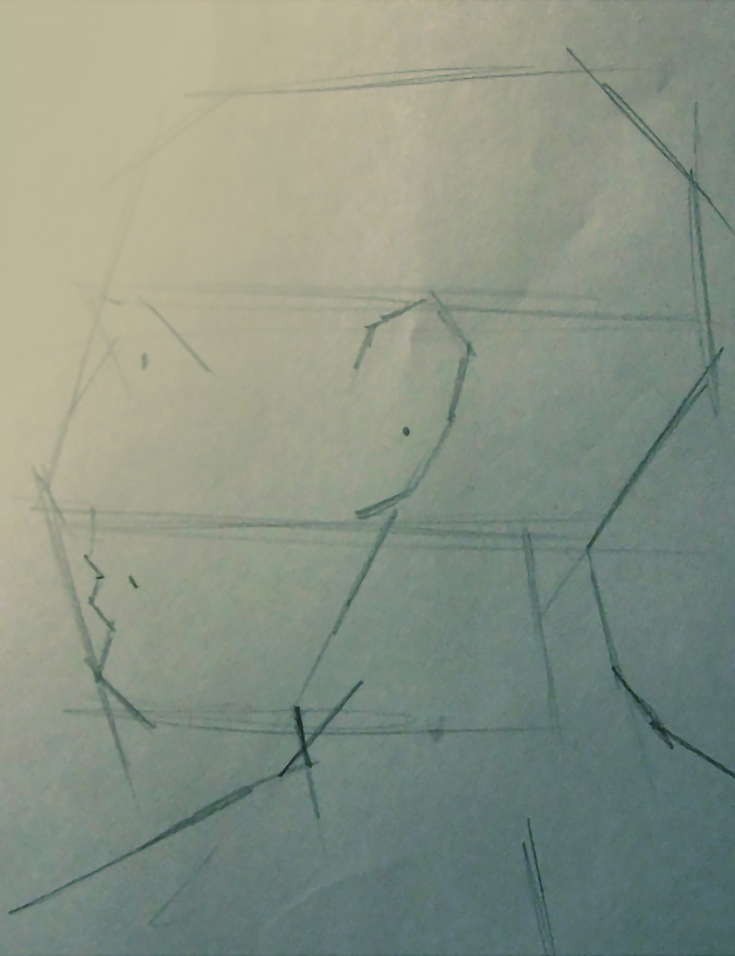
1. Establish the over-all volume of the head
Mark the top of skull (not the hair!) then locate the line of the chin, mark the back of the skull, and add two lines for the angles of the front of the skull.
Look for the bone structure of the skull not the features of the face—that will come later. Your initial lines just need to accurately depict the volume of the head.
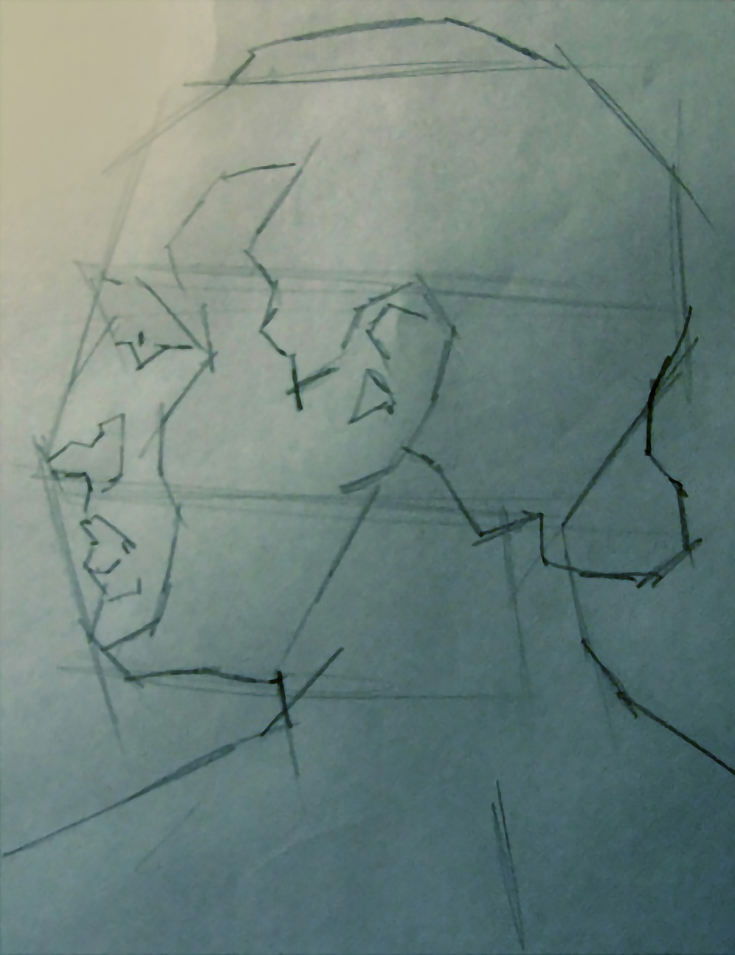
2. Position the features to resemble a realistic head
Next, divide the head into thirds by drawing some helpful guidelines: one third is from the top of the head is your first line (that’s where the top of the eye socket will be). The second third is from the top of the eye socket to the base of the nose, and the third third is from the base of the nose to the bottom of the chin.
(You can see my own three guidelines in the image above).
Next, locate the position of the eyes and the middle of the ears along those guidelines. Add the structure of the nose and lips, based loosely on your model.
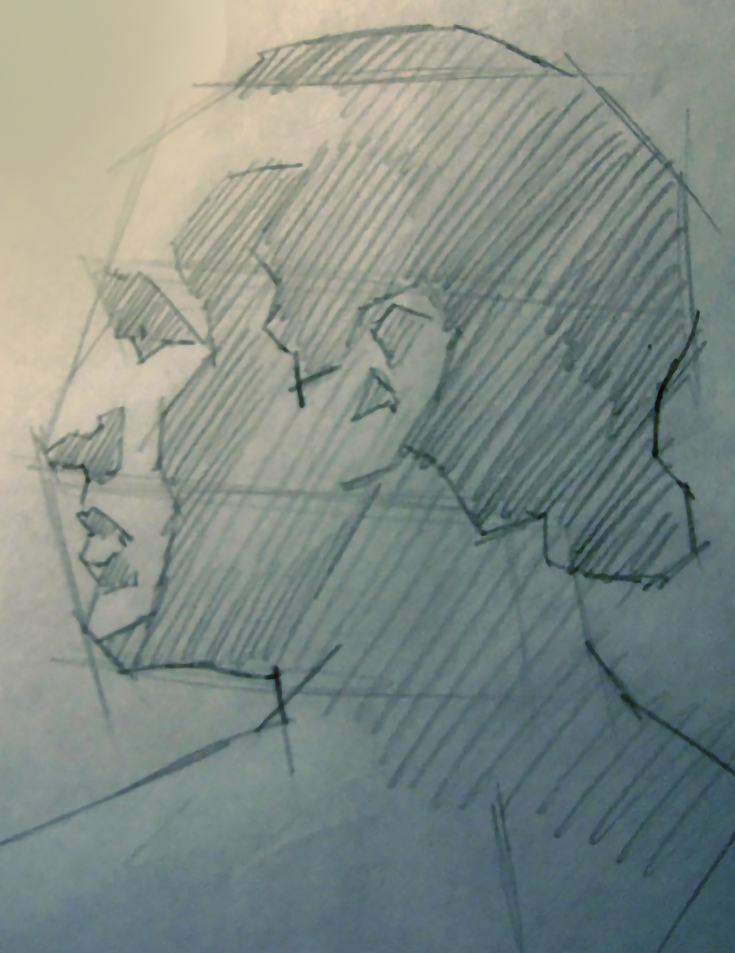
3. Outline shadow shapes to refine the structure
Notice where the shadows fall around the eye socket, and add those lines into your sketch.
IMPORTANT NOTE: Find the over-all structure—don’t worry about drawing in the eye lashes or any other little details at this point.
Locate other shadows down the side of the head, down the forehead, past the zygomatic bone, down the cheek to the jaw. Also, find the shape and structure of the hair (as though it’s solid too) and draw in those lines.
Keep the drawing simple! You are simply creating shapes within shapes at this point—like a simple “paint-by-number” drawing, where some shapes will end up being in shadow, and the other shapes will end up being in light.
4. Loosely fill in all the shadows
Now it’s time to shade in all the shadow shapes together, including the hair. Adding in this shadow will suddenly define the light structures of the head as well. Already you will have a credible solid head with simple well defined shapes that should begin to resemble the model.
5. Create different values within the shadows.
In step 4 you simply found the differences between the light and shadow. Now you can start to develop different values within the shadow shapes, separating hair from skin, and dark shadows from lighter ones.
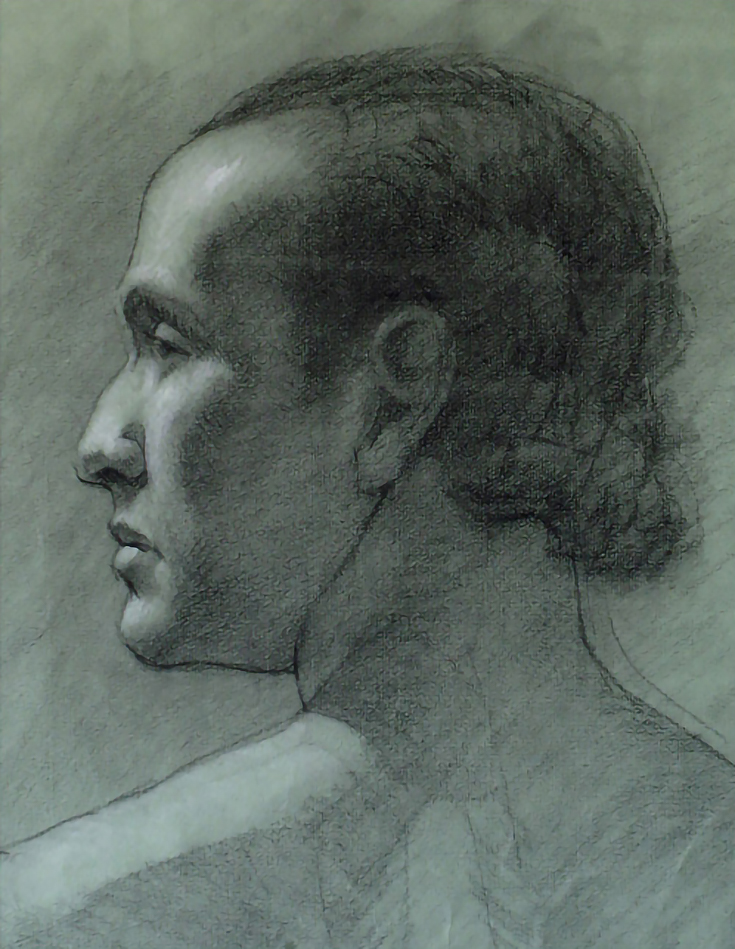
Look at your model and begin to find the darkest areas in shadow. Add in darker lines there. Also use an eraser to clean up your guidelines and earlier marks.
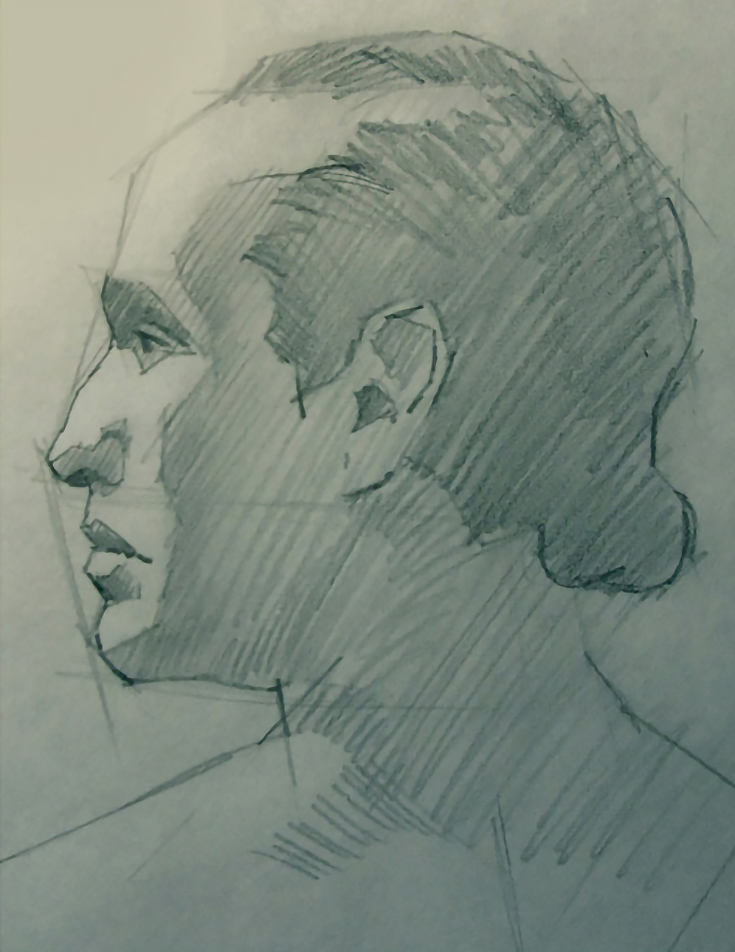
As you can see, the drawing is well on it’s way to being finished.
If you want to improve at drawing from life, you will progress more quickly by drawing basic block-ins like this over and over until they become second nature.
Practice these five steps until you can consistently draw the volume of the head—then move on to the finer details: smoothing the skin tone, adding individual hairs, perfecting the curve of the ear, shading in the background, and so on.
Your completed drawings will be much better for it.
For more drawings and tips from H. Edward Brooks, please visit his drawing blog.
This post may contain affiliate links.