We all think we know what we see. It’s only when we start to draw or paint something that a battle begins to wage between what our mind wants to see and what our eyes are actually looking at.
And then, just when we’re certain we’ve got it right, we’ll stand back and discover a wacky proportion problem due to an incorrectly foreshortened subject.
What is foreshortening?
Foreshortening happens whenever we can see at least two sides, or planes, of an object. As a flat plane recedes into the distance, it gets easier and easier to see the distortion occurring in the width and height of objects on that plane.

Subjects such as buildings, animals and people reveal faulty foreshortening more blatantly than other subjects, but in any situation the problem can be easily solved by using a rather odd little scheme involving plumbing, charting, and angling. Here’s a brief description of each.
Plumbing originated with a plumb line, which is simply a string with a weight at the end. When you hold the string so that the weight hangs loose, it creates a perfect, vertical line (great for architects and builders).
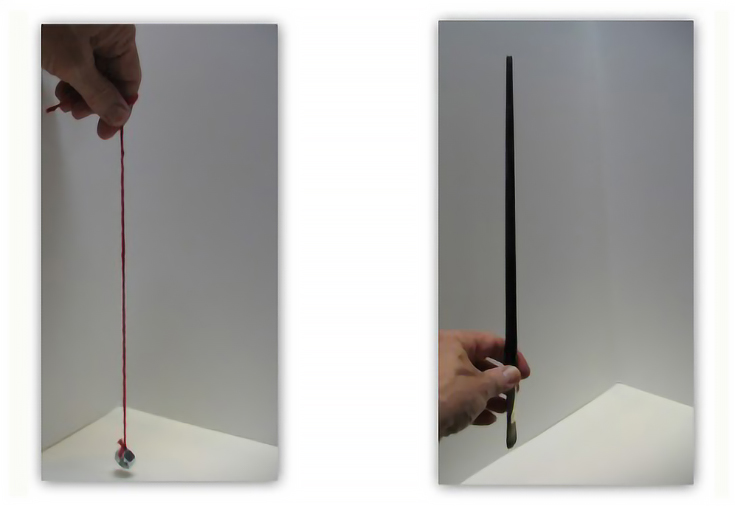
For the artist, it’s less cumbersome and just as effective to use a brush or pencil handle instead. This gives us our perfectly straight vertical line at any time.
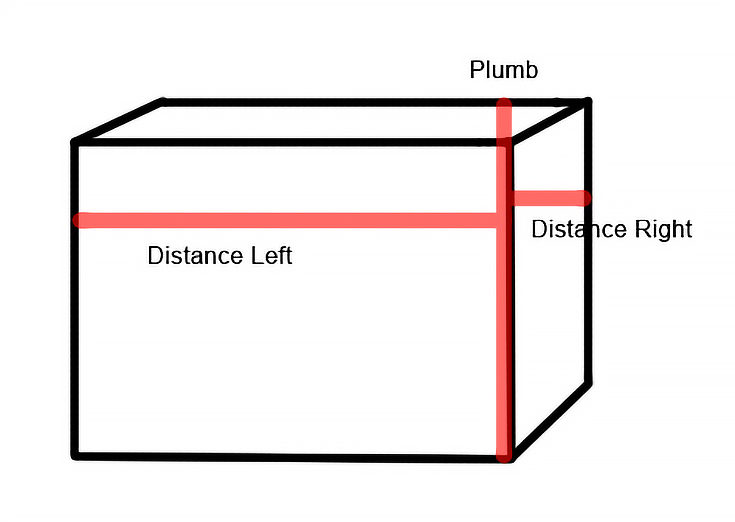
Charting is a way of visually measuring foreshortened objects. Place your plumb where two planes of a shape intersect, then gauge the apparent distance between the plumb line and the shape’s edges on either side of it
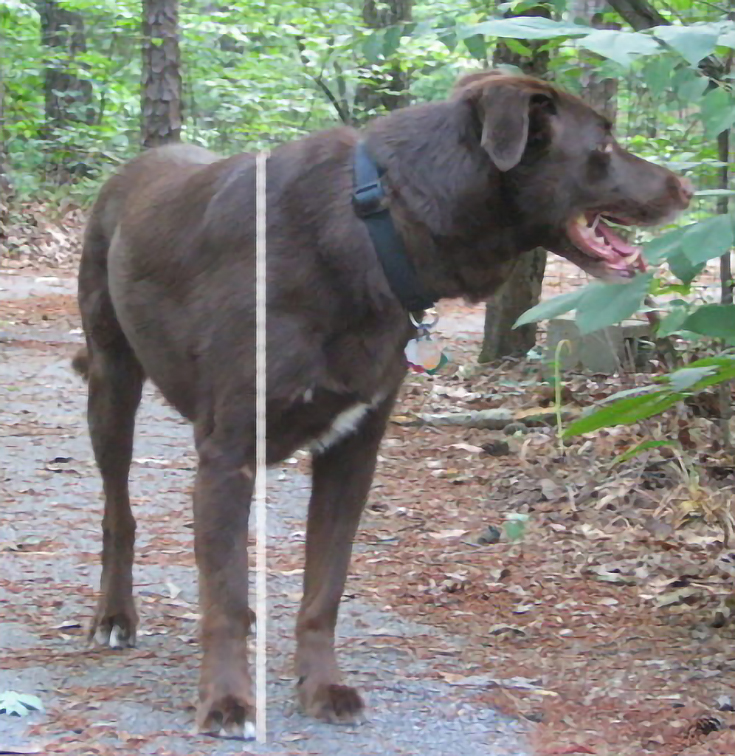
Angling is something else entirely. Rather than following contours as we normally do when drawing, angling uses straight lines to render major edges of a shape, as shown in the example below.
Now, here’s how we can combine these three techniques to accurately depict a foreshortened shape:
Step 1. Plumbing
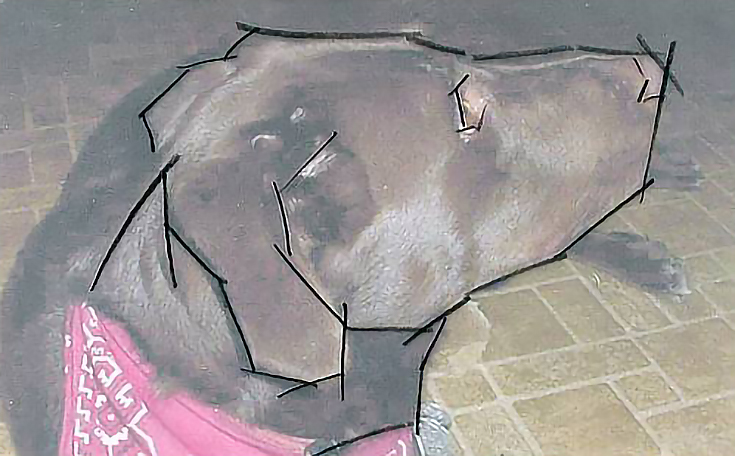
Position your plumb line at the intersection where two sides of a shape meet.
In the photo above, the dog’s body is bent so that his shoulders, neck and head form one plane with the rest of his body form another. It’s at the intersection of those two planes that we place our plumb.
Once the intersection is located, draw a corresponding line on your canvas or paper. Begin your line at the top of the shape and end it at the bottom. This will help establish the height that your drawn image will be.
Step 2. Charting
Take a look at both sides of the image, on either side of the the plumb line. Make a mark on your paper or canvas corresponding to the width of the right side of your subject. This line should start at the plumb line and extend to the farthest point on the right. Repeat for the left side.
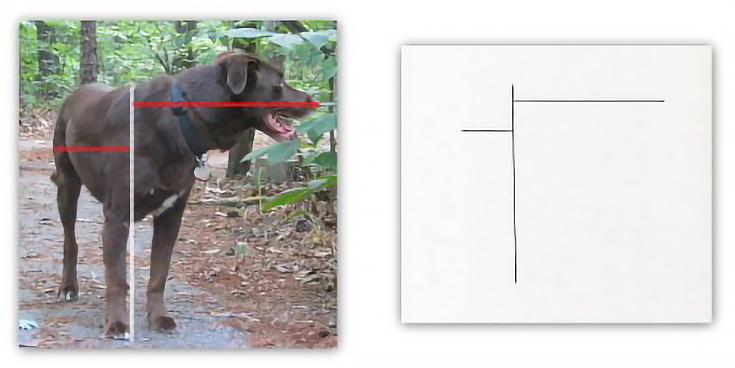
With that, you now have a chart showing the apparent width of each side. Put your two sides together and you also have the total visual length of your foreshortened subject, giving you all the reference points you need to begin your drawing.
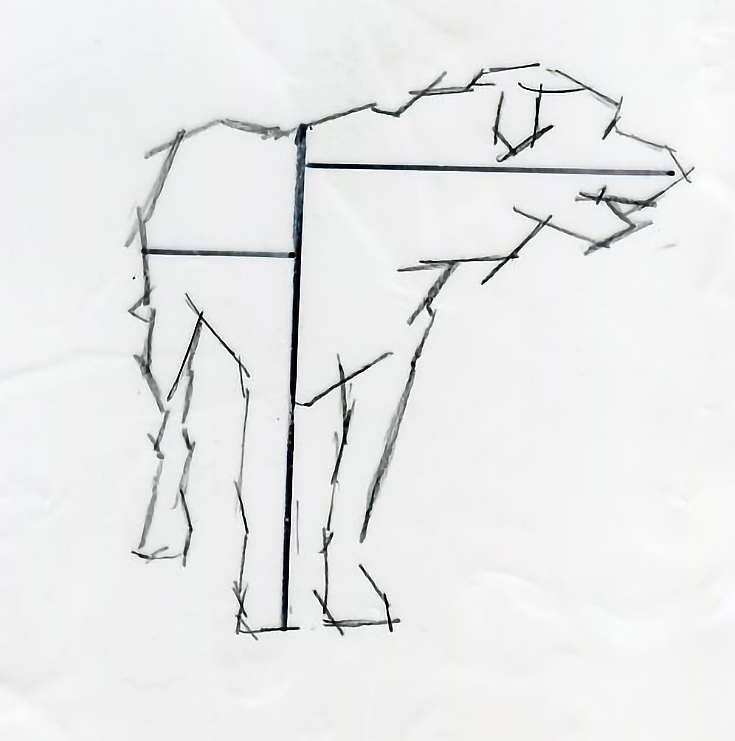
Step 3. Angling
Using the points of reference in your chart, you can start creating angled strokes to estimate the overall shape of your subject.
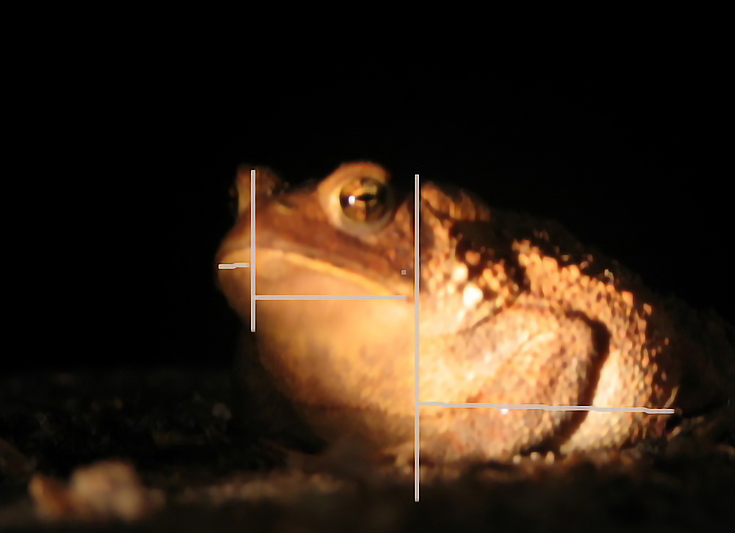
For images tilted strangely, or with multiple sides, the method still works—just create another plumb line at the second intersection as illustrated in this photo of a toad.
No matter what you’re drawing or painting, that’s all there is to it!
If foreshortened objects have challenged you in the past, just start out with this “plumb/chart/angle” technique and then move on into your painting with confidence that your foreshortening is correct.
This post may contain affiliate links.