We all want viewers to be attracted to our paintings, and to linger with them for a while. The more clever our composing strategy, the more likely we are to catch the viewers’ eye and hold their attention.
One strategy that depends upon seeing shapes of light and dark rather than following traditional compositional rules is the Japanese concept of Notan.
Notan means lightness/darkness and is pronounced just like it looks (no tan). When used in paintings, a Notan drawing is the underlying light and dark structure.
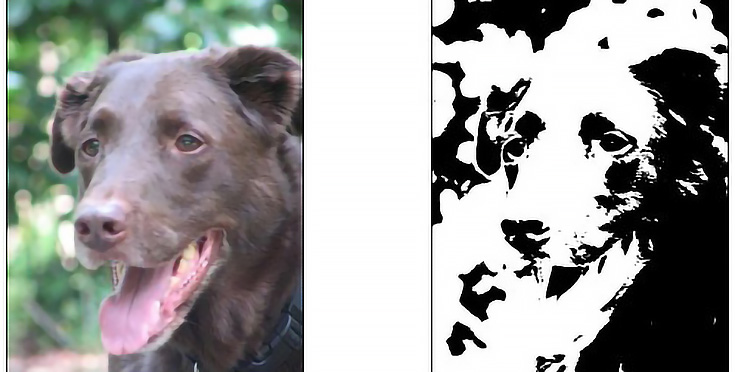
Seeing Notan is the act of identifying patterns of light and dark. A good Notan drawing will simplify the full range of a subject’s values into a black and white design—the white represents areas directly in the light, while the black depicts areas in shadow.
Color is never considered in a Notan drawing because the value of any dark-colored shape sitting in strong light will still translate to a light value. For example, a dog’s fur may be dark brown, but where sunlight hits him, the value is light.
Here are six steps to help you see Notan in a scene and create a Notan drawing.
Step 1. Round up materials.
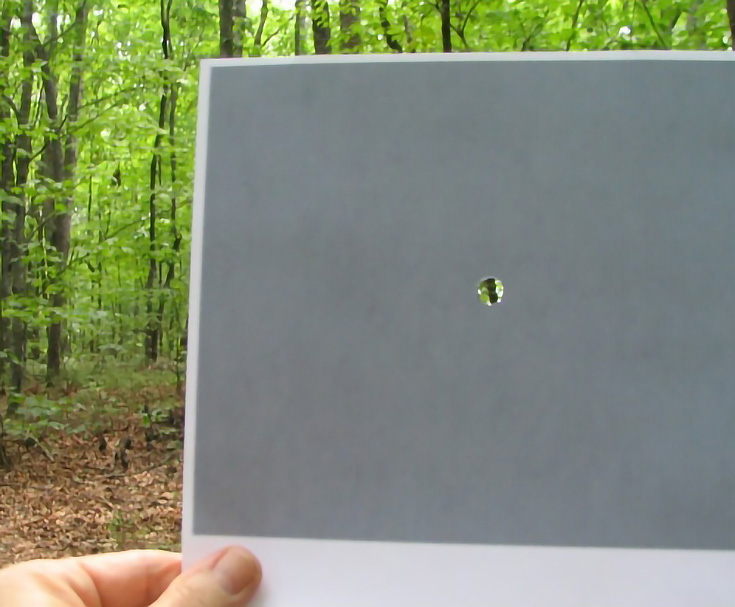
You’ll need paper, pencil, and a black drawing marker (I use Tombow N15 which has a brush tip on one end and a pen nib on the other, but any black drawing marker should work). You might also want a viewfinder and an isolator.
Step 2. Find a subject with a single light source.
This is easily done through your viewfinder. A single light source is preferable for learning to see Notan, but later on you’ll be able to discern Notan in all sorts of light.
Step 3. Choose the orientation for your image
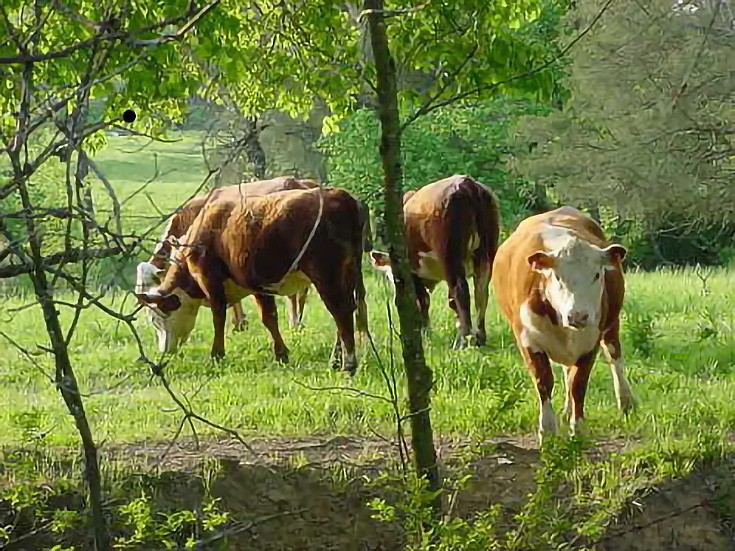
Should your subject be presented in a vertical or horizontal format? The three cows I’ll be drawing (seen below) lend themselves to a horizontal format, so that’s what I’ll use.
Step 4. Using your marker, draw a small rectangle
This rectangle will the be border of your drawing and doesn’t need to be any larger than 2” x 3”. It can actually be smaller, but larger might become cumbersome.
Step 5. Do a quick pencil drawing of basic shapes
This pencil sketch should not be detailed nor should it be labored over. The idea is to place the shapes in your format without much worry. Here’s a quick sample pencil drawing I made of those three cows.

Step 6: Fill in the Notan drawing
Squinting, look at your subject through your viewfinder. Darks and lights will become obvious. If that doesn’t work for you, close one eye and look through your isolator.
Over the top of your pencil drawing, slowly use your marker to blacken all areas where no direct light source is striking or illuminating. (These will be darker than the isolator). Allow no gaps between shapes of the same value which are side-by-side.
Continue squinting. Don’t rush. Carefully explore the entire area within your viewfinder and continue until you’ve captured the entire pattern of darks. Once the darks are captured, the light pattern is taken care of.
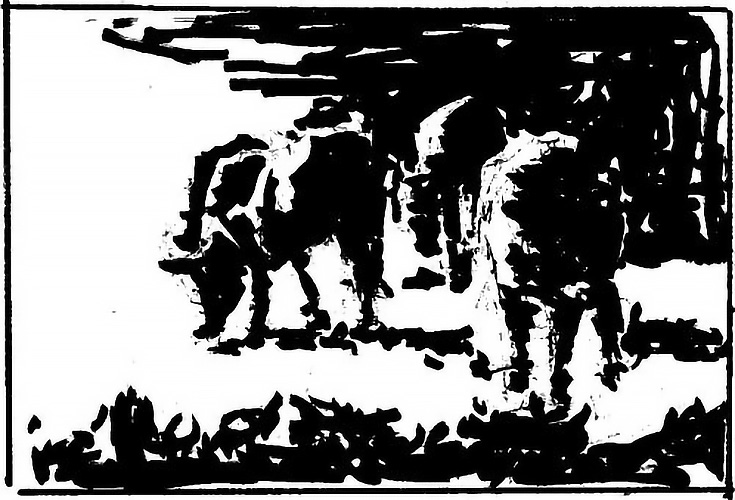
Here is my finished Notan drawing
Notan drawing will seem a bit awkward at first, but after doing it a few times you’ll begin to feel more natural with it. As an added payoff, your ability to see light and dark will greatly improve.
If you liked this tutorial, check out my follow-up article which explains how to use Notan compositions as a painting strategy.
This post may contain affiliate links.