No matter what anyone may tell you, drawing is a very learnable skill, no different than reading, writing, or riding a bike. It’s simply a question of having someone show you what to do and then practicing so you improve.
In today’s lesson we’re going to start with the most basic drawing skill that EVERY artist needs to learn. All you’ll need for this tutorial are some pieces of paper and a pencil, no other fancy supplies. Inexpensive computer printer paper and a plain old number two pencil will do just fine.
Ready? Here we go…
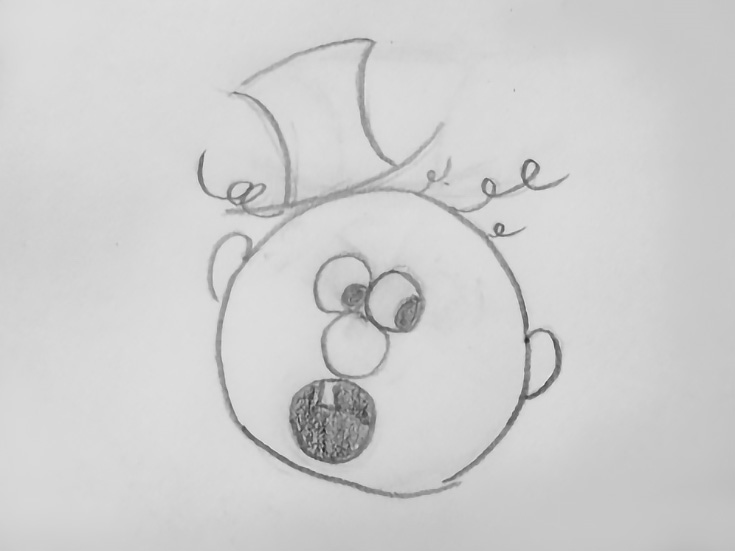
The first thing we are going to do is a little evaluation. It is NOT a test—that’s a scary word that implies success or failure. What I want you to do is draw the example illustration you see below. Don’t worry about it too much and don’t read further ahead in the lesson, just draw the picture to the best of your ability.
Finished?
Alrighty, let’s take a look. Compare your drawing to the one on your screen. How close did you get? For example, where did you place the hat? Is it straight on the top of the head? Slanted? Which direction did you slant it? Did you draw it with straight lines or did you curve them?
Why are these questions important? Because the secret to drawing—the ONLY secret—is that you must draw what you see. That’s right, that’s all there is to it!
The thing is, most people don’t do that. They draw what they THINK they see or what they think “should” be correct instead of what is actually there, because they haven’t been taught to see artistically.
Some of you may have drawn the character absolutely correctly, some partially correctly, and some not anywhere near correctly. How you drew it isn’t an indication of potential talent so much as it is simply an indication of how observant you are.
The great thing is, you can train yourself to be more observant. (In fact, that’s what the next few exercises are for.) So if you got the drawing “right,” good for you. If not, don’t be discouraged! You simply haven’t practiced observing like this before.
Let’s take another look at your drawing. Did you make the character’s eyes, nose and mouth all slanted? Are the features all touching each other? Here is a prime example of “seeing” vs. “observing.”
Everybody can “see” that this character is basically a round circle and has eyes and a nose and a mouth. I mean, it’s kind of obvious, isn’t it? But what a lot of people DON’T see is that the features are all slanted and are physically touching each other in the middle of the face.
Why don’t we see it? Because it’s necessary for your brain to record certain information while other information is not especially necessary.
For example, back in prehistoric times if you were a caveman and you were out hunting, your brain needed to record that yes indeed, that WAS a giant sabertooth tiger coming right at you!
Your brain didn’t need to record any details like where the tiger’s eyes were in his head; only that those eyes were looking at you. You didn’t need to know the specific angle of the tiger’s teeth, only that the teeth were there, and very sharp!
So your brain only recorded the barest information necessary to help you make a decision about what you were looking at and what to do; in this case you were looking at a sabertooth tiger and the correct decision was—RUN!
But as artists we’ll always need more than just the basic information, such as:
What is the shape of the object I am drawing?
How does the object I am drawing compare other objects near it?
Is it bigger than the object next to it?
Smaller?
Close to something or far away from it?
Where does this line that makes my object begin?
Where does it end?
Does it slant, curve or bend?
These are a few of the questions that artists ask themselves when they are drawing. You don’t have to memorize them, but start thinking about them now so that eventually it will become automatic to think about these things when you are drawing.
Ready to try another one? Here it is. Remember, think about relationships between objects (the sizes, shapes and angles) as you draw.
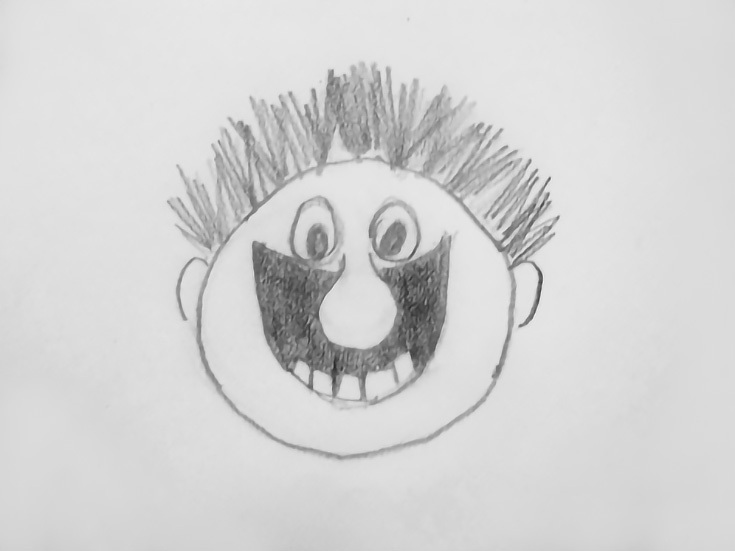
Okay, how did you do? Better this time I’ll bet! Let’s take a look.
Check out the character’s eyes. Did you get them the right distance apart? How about his nose? Is it below his eyes and inside the mouth?
Some people have a hard time with that one because in the real world, having your nose inside your mouth doesn’t make sense, and your brain wants things to make sense.
As an artist, your job is to let go of any preconceived notions and simply see WHAT IS REALLY THERE. . . even if logically it doesn’t make sense!
Here’s an example.
Did you know that your eyes are located almost exactly halfway between your chin and the top of your head? Really, they are! They might not look that way to the casual observer (most people assume the eyes are in the upper part of the head) but if you measure in a photograph or in the mirror you’ll see that they ARE right in the middle.
Very deceiving, isn’t it? But that’s what I’m talking about. Never assume anything in art! Now let’s try one more. Here it is.
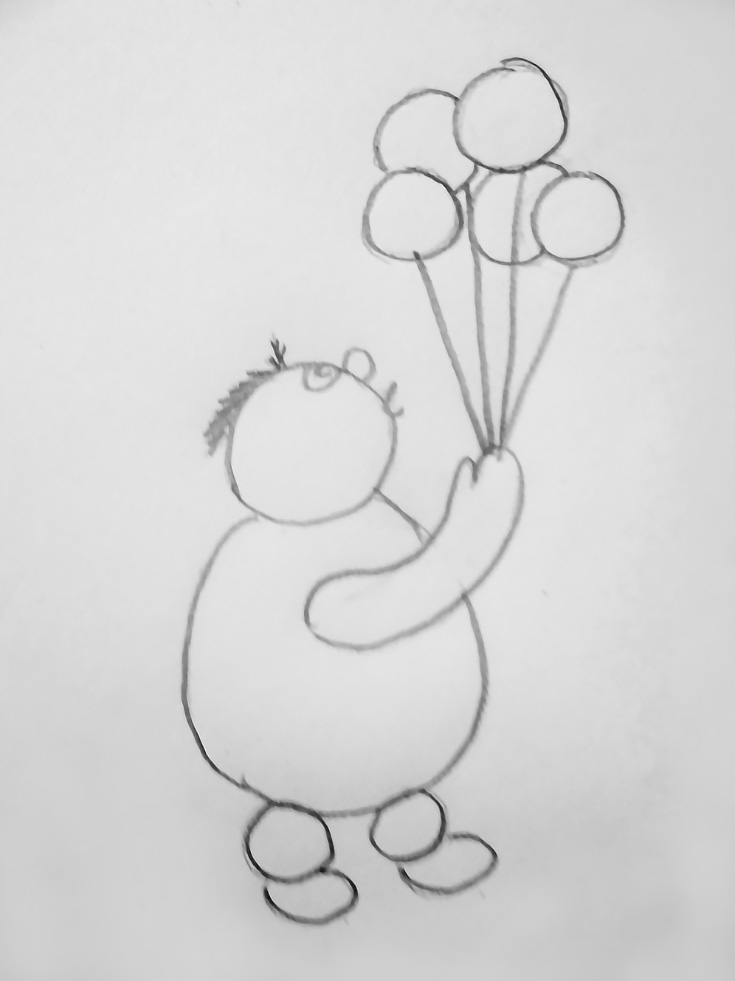
How did you do? Did you get her balloons all different sizes? Did some overlap? Sometimes new artists are afraid of over lapping objects. Be aware of overlapping objects and don’t be afraid to draw them that way!
How about her features? Did you put them up at the (supposedly) top of her head? Because that’s where they are! At least, they APPEAR to be on top of the head, because she is looking upward.
If you got all or even some of these drawings correct then you’re ready to move on to more difficult material. If you didn’t, no worries! You just need a little more practice.
You can re-draw these pictures or you can find some other very simple cartoon-like drawings to practice with. Try looking at children’s coloring books. You can even go on-line and find simple coloring sheets. The key at this point is to keep them as simple as possible, similar to what we did here.
And if you find yourself stuck somewhere without a pencil and paper, you can still work on sharpening your observation skills. Just pick any object in view and look at it—REALLY look at it.
Observe the different parts of the object and their relationship to each other. Is that an interesting tree? Are the branches close together? Far apart? Where does the first branch begin, where does it end?
How close is the door handle on your car to the front of the door? Do your dog’s ears touch his shoulder? Do they stop at the base of his neck? Does the window on your neighbor’s house take up a lot of room or just a little? Does it appear straight? Look at it again. Look at it from a different angle. Does it appear to slant or otherwise change when you look at it from another point of view?
Practice observing anything and everything around you. Once you start “observing” rather than just “seeing” you’re well on your way to becoming a much better artist.
Good luck!
This post may contain affiliate links.