I just finished teaching my ninth annual Holiday Art Cards workshop and I’m always a little surprised that students (who also receive a card from me) really want to know all the steps to design the envelope! Well, it is the first impression!
My hand-made cards and envelopes have a theme, a message, and a personal touch. The most important thing I stress is this goal: Make sure your card will arrive at its destination! A little research ensures your peace of mind—check envelope sizes, shapes and weight, and double-check zip codes with the USPS.
One of my most memorable lessons was addressing #10 envelopes vertically. OK, I got a little carried away and matched it to the card design—and it looked soo-oo coordinated! I took a few down to the post office . . . no excitement there.
“That will be TWO stamps,” the employee barked. Oh! A learning experience!!
1. Let’s look at design
A good design results in balance, rhythm, emphasis, harmony, and variety so that “everything on the page talks to each other.” That said, how do you get there? By working with line, shape, texture, space, value, and color. These words will guide you to success.
Here’s a photo of a recent card design:
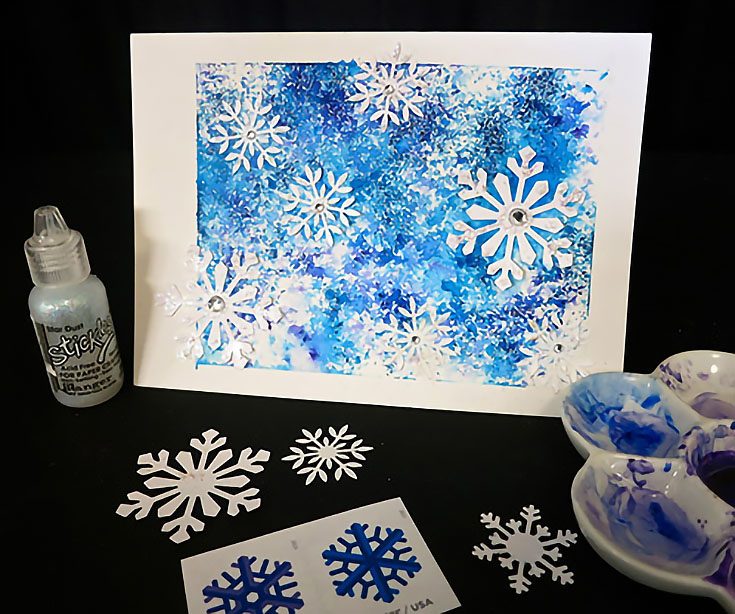
(Your card may be purchased or designed with your own artistic skills; either way these steps will work.) For the envelope, repeat the card’s line, shape, or colors. Here we have blues and violets, random snowflakes, and some sparkle.
2. Experiment with tools and paper
Test different tools and stocks to achieve a happy match of pen and paper for addressing. Usually a smooth finish works best, especially for markers. Scrap paper is perfect, be sure to write down the color and brand of your tool and paper for reference.
3. Prepare the envelopes
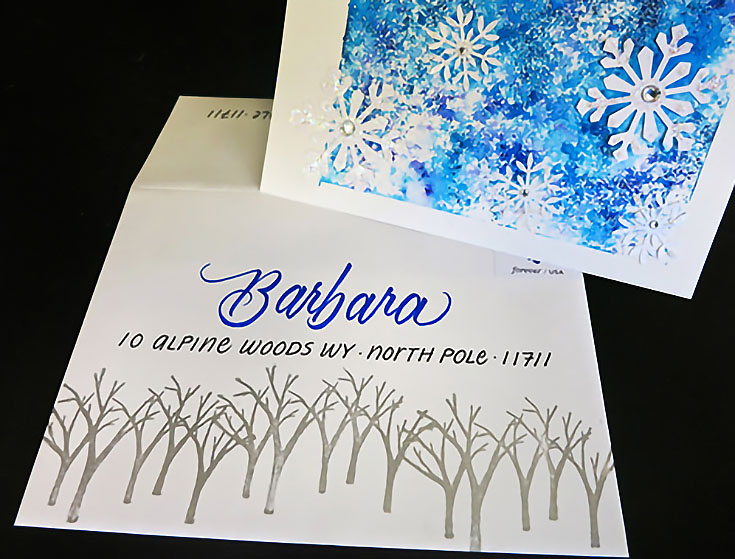
Sketch out a few design ideas. Variety adds interest (and no, they don’t have to match, just look related). For mine I integrated winter trees on the envelope, seen at the bottom of this post, to coordinate with snowflakes on the card.
Rubber stamps are fun to use when designing the background on the envelopes. If you’re using them with pigment ink, allow time to dry (30 minutes or more). Don’t rush or stack the envelopes, work in small quantities.
NOTE: For some designs you may want to address the envelopes first, and then add the holiday design. This, of course, depends on your preference.
4. Set up your address writing station
1. Clean the surface.
2. Use kitchen shelf liner (on the right in the photo below) on a slanted board to keep your pens from rolling off.
3. Have wet wipes nearby to keep your hands clean and swipe rubber stamps to remove ink pad color.
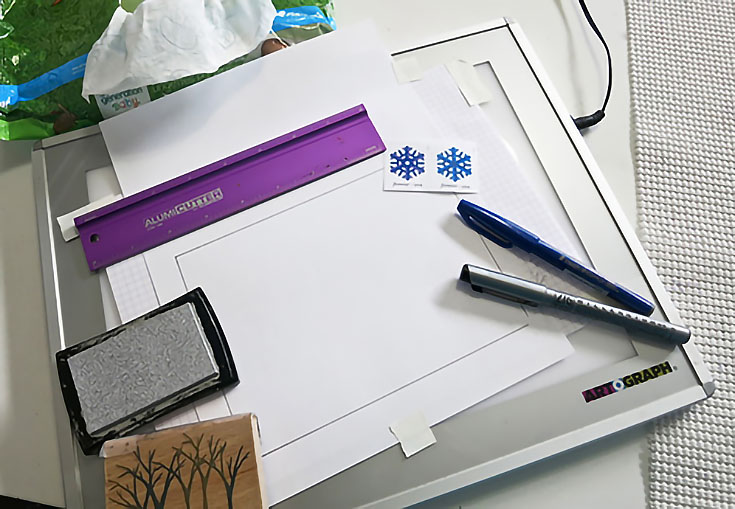
5. Make a template for the address
I begin with copy paper laid over graph paper on a light box to make a template for names and addresses. (I’ve tried liners but they usually miss the mark in one way or another.)
Use pencil first to experiment with just first name/s, or first and last, then the address. Names can be either one or two lines; addresses can be from one to four. Also test smaller brush markers for names and fine tip markers for addresses in your layout.
Aim for balance, rhythm, emphasis (usually in the name) and harmony. Keep it simple and definitely legible. . . remember the goal!
6. Personalize each envelope to the recipient
When you’re happy with the sample format you created, draw the guidelines only on the graph paper to use as a template. Put the template on your light box, then open the first envelope flap, place it over your template, and begin!
I find that listening to Christmas carols (instrumental) adds so much pleasure to the experience of remembering family, friends and students.
7. Return address
Don’t use labels for the return address; take the time to write it out, preferably on the back flap. Here’s how the finished, imaginary envelope looks:
I promise you’ll hear feedback—even years later—but so what if you don’t. . . as artists, the joy is ours in spreading beauty, peace, and love. The holidays are a good time to mend the distance, begin a friendship, show appreciation. Reach out!
Our local TV station, “Good Day Sacramento” visited my studio to take a look at my holiday cards—if you’d like to join us, just click this link.
Check back next week for this year’s card design, and blessings on your holiday season! I appreciate your support this past year!
For more tips and projects, visit my FB page: Calligraphy and Design by Phawnda.
This post may contain affiliate links.